The best way to save water with irrigation is to switch from overhead sprinklers to drip irrigation or soaker hoses, then put them on a timer. Most beginners can set up a basic system in a weekend with a few inexpensive parts, and no plumbing experience is needed.
Here’s why it works. Sprinklers spray water into the air, where wind carries it off and the sun evaporates it before it ever reaches a root. Drip lines and soaker hoses deliver water slowly, right at the soil, so nearly every drop goes where your plants can use it. Many gardeners find they use far less water this way, and their tomatoes, peppers, and flower beds look healthier for it. Wet leaves and soggy walkways, which invite fungal problems, mostly disappear too.
I remember watching my own sprinkler soak the sidewalk more than the bean row it was meant for. That was the day I started looking for a smarter setup.
If you’re still wondering is it worth it the short answer is yes for most gardens, even small ones. In this guide, we’ll help you pick the right system, gather your supplies, install it step by step, and check that it’s really saving water.
Why Water-Saving Irrigation Systems Work So Much Better Than Overhead Watering
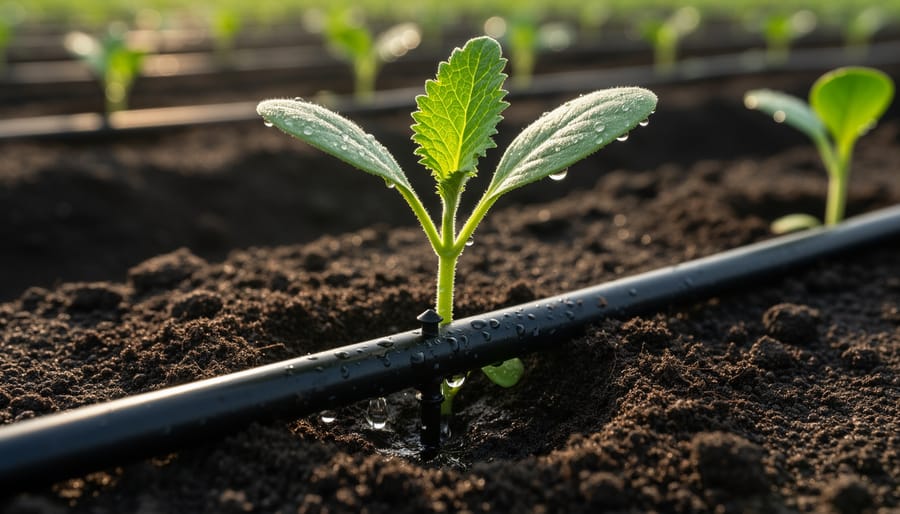
Think about the last time you watered with a sprinkler on a warm afternoon. Water arcs through the air, and a surprising amount never reaches the soil. A good share of it evaporates in the heat, and some drifts off in the breeze. Then there’s what lands on the driveway, the patio, or the path between your beds, which is water you paid for that does nothing for your plants.
Hand watering with a hose has its own quirks. It’s easy to blast a bed so quickly that the water runs off before it soaks in, especially on dry or packed soil. And soaking the leaves of tomatoes, squash, and roses can invite fungal problems like powdery mildew and blight, which means more work for you later.
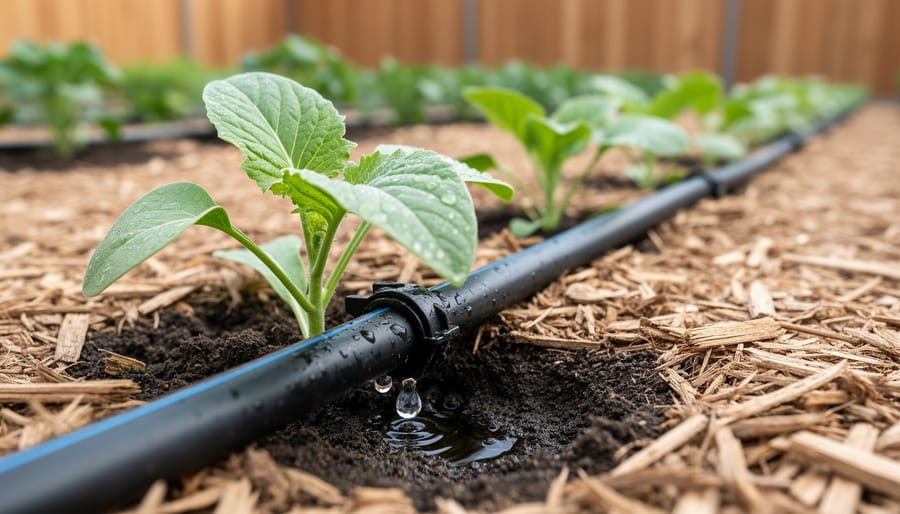
Water-saving irrigation systems solve these problems in one simple move: they put water right where plants actually drink, at the root zone. Drip lines and soaker hoses release water slowly, a drop at a time, so the soil has time to absorb it instead of letting it pool or run off. With the foliage staying dry and the paths staying dry, almost every drop goes to work.
Slow and steady also encourages deeper roots. Plants that get a good, deep drink grow sturdier and handle hot spells better than plants sipping from a shallow, soggy surface.
The best part is that you don’t need to be an expert to see the difference. Even a small setup on one bed shows how much water the old method was wasting.
Picking the Right Water-Saving Irrigation System for Your Garden
Drip Lines and Soaker Hoses: The Everyday Water Savers
Drip lines and soaker hoses both deliver water slowly at soil level, but they do it a little differently. A drip line is flexible tubing with small built-in emitters (the little outlets) spaced along it, so water drips out at set points. A soaker hose is porous, so it weeps water along its whole length. Think of drip as targeted sips and a soaker as a gentle, steady seep.
Drip lines suit vegetable rows, shrubs, and containers, where you want water right at each plant’s base. Soaker hoses shine in raised beds and closely planted rows, where a continuous damp strip does the job nicely.
A few beginner basics will save you headaches. Keep emitters spaced to match your plants and soil. Sandy soil usually needs closer spacing, while clay holds water and spreads it sideways. Both systems like low pressure, so add a pressure regulator (roughly 10 to 25 PSI is the sweet spot) or you may pop fittings or blast water everywhere.
Length matters too. Soaker hoses work best in runs of about 100 feet or less, because water output fades the farther it travels. Drip tubing manages longer runs, but check the manufacturer’s limit on the package. When in doubt, split a big garden into shorter zones.
Smart Timers and Moisture Sensors: Letting the Garden Tell You When
A timer is the easiest upgrade you can make, and it pays for itself quickly. A basic hose-end timer costs about as much as a couple of packets of seeds. You set it to water for a short time at dawn, and the garden gets a steady drink whether you’re up early or still hitting snooze. No more forgetting the hose and finding crispy leaves, or leaving it on and flooding the bed.
Many timers also have a rain delay feature. Press a button after a downpour, and the timer skips the next scheduled watering. Some models go a step further with a rain sensor that does the pausing for you. Either way, you’re not sending good water into soil that’s already soaked.
If you want to take it up a notch, try a soil moisture sensor. It’s a small probe you push into the ground near your plants. When the soil is still damp, it tells the system to hold off. When it dries out, watering goes ahead. It works like a built-in “does it need water?” finger test, minus the muddy fingernails.
You don’t need to buy everything at once. Start with a simple timer, add a rain delay, and bring in a moisture sensor later if you like the results.
Tools and Materials You’ll Need to Set Up a Drip System
Setting up a basic drip system doesn’t take a fancy toolkit, and most of it fits in one cart at a hardware store or garden center. Gather everything before you start so you’re not running back mid-project with a half-laid hose. Here’s what to pick up:
- Timer: Turns the water on and off automatically, so you never forget the hose or overwater.
- Backflow preventer: Stops garden water from flowing backward into your household supply.
- Filter: Catches grit and debris before they clog the tiny emitter holes.
- Pressure regulator: Lowers strong household pressure to a gentle level your tubing can handle.
- Mainline tubing (1/2 inch): The main pipeline that carries water out to your beds.
- Quarter-inch feeder tubing: Small branches that run from the mainline to individual plants.
- Emitters or drip line: The parts that actually release water slowly at the roots.
- Stakes: Hold tubing in place so it doesn’t wander or get tugged out by wind and pets.
- End caps or figure-eight closures: Seal the end of each line so water only comes out where you want it.
- Connectors, elbows, and tees: Let you turn corners and branch lines to fit your layout.
You’ll also want scissors or tubing cutters, a hole punch tool for adding emitters, and a tape measure. Before you shop, sketch your beds and measure the distances so you buy the right amount of tubing. A little extra is cheap insurance.
It also helps to think about what you’re watering. If you’re building a bed around low-water plants you’ll need fewer emitters than for a thirsty vegetable patch, which can save you a few dollars right at the register.
Before You Dig In: Safety Warnings and Stop Conditions
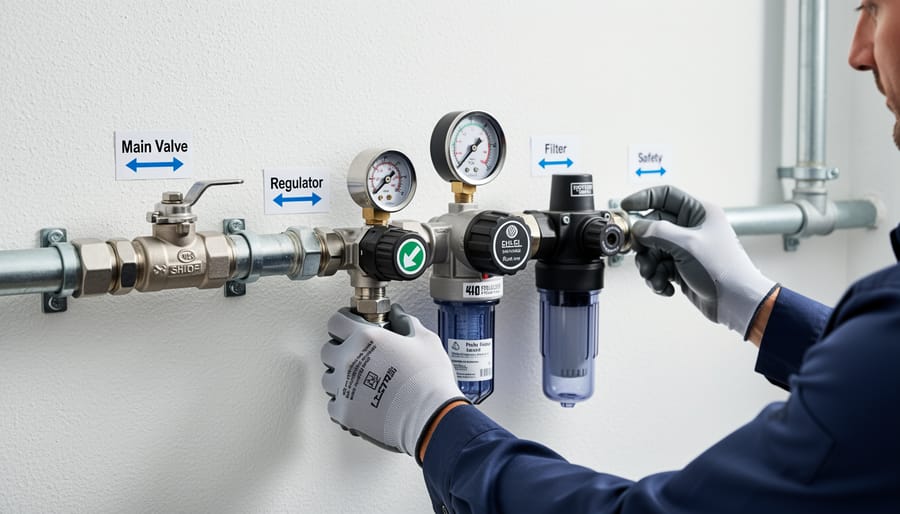
Before you start, a few safety habits will keep your project smooth and worry-free. None of them are hard, and they only take a few extra minutes.
First, call your local utility locator before you dig. In most areas it’s a free service, and it marks buried gas, electric, and water lines so your trowel stays clear of them. Next, shut off the water supply before you connect any parts to the spigot. Working on a live line is a recipe for a soggy surprise.
Pay attention to pressure, too. Most drip tubing is designed for low pressure, so a pressure regulator keeps fittings from popping loose or blowing apart. When you cut tubing, use sharp, proper cutters and keep your fingers out of the way. Wear gloves if the plastic is stiff. If your timer is electric, keep it and its plug off the ground and well away from puddles or standing water.
Know your stop conditions, too. Pause and call a licensed plumber if you aren’t sure how to tie into the main line, or if you spot leaks near your home’s foundation. Knowing when to ask for help is part of being a good gardener, and it protects both your house and your water bill.
How to Install a Water-Saving Drip Irrigation System, Step by Step
Here’s the part where it all comes together, and it’s easier than it looks. Set aside a Saturday morning, lay out your parts on the lawn, and work through these steps in order. Doing them out of sequence is the quickest way to end up redoing a section.
- Sketch your garden layout. Draw each bed, mark every plant or row, and note how far each one sits from your spigot. Measure the distances so you buy the right amount of tubing, then add about 10 percent extra for mistakes.
- Attach the filter and pressure regulator to the spigot. Screw on your backflow preventer first, then the filter, then the regulator. Hand-tighten, and use a wrap of plumber’s tape on the threads so nothing weeps.
- Run the mainline tubing. Roll out the half-inch tubing from the spigot toward your beds, and let it sit in the sun for ten minutes first so it softens and relaxes. Cold, stiff tubing fights you at every turn.
- Add branch lines and emitters at each plant. Punch holes in the mainline with a hole punch, push in your quarter-inch lines, and place an emitter at the base of every plant. Thirsty tomatoes get two emitters, while a small herb needs just one.
- Flush the lines. Before capping the ends, turn the water on for a minute and let it run free to push out dirt and plastic bits. This one habit prevents most clogged emitters down the road.
- Secure everything with stakes. Pin the tubing down every few feet so it stays put when you’re weeding. Then close off each line end with a cap or figure-eight clamp.
- Connect the timer. Attach it between the spigot and the filter assembly, set a short test schedule, and pop in fresh batteries.
- Cover with mulch. Spread two to three inches of mulch over the soil and tubing, keeping it a little back from plant stems. It shades the lines from the sun and locks in moisture.
Here’s a mistake I’ll happily own up to: the first time I did this, I skipped the flush and then spent an afternoon on my knees, poking at emitters that had clogged with a single grain of grit. Don’t be me. Flush first, and thank yourself later.
Also, take your time at the planning stage. It feels slow, but a few extra minutes with a pencil saves you from running out of tubing halfway across the garden.
When everything’s in place, turn the water on slowly, not all at once, and walk the line. Watch each emitter start to bead and drip. That quiet little trickle is the sound of water going exactly where your plants need it, and not a drop onto the path.
Easy Habits That Stretch Every Drop Even Further
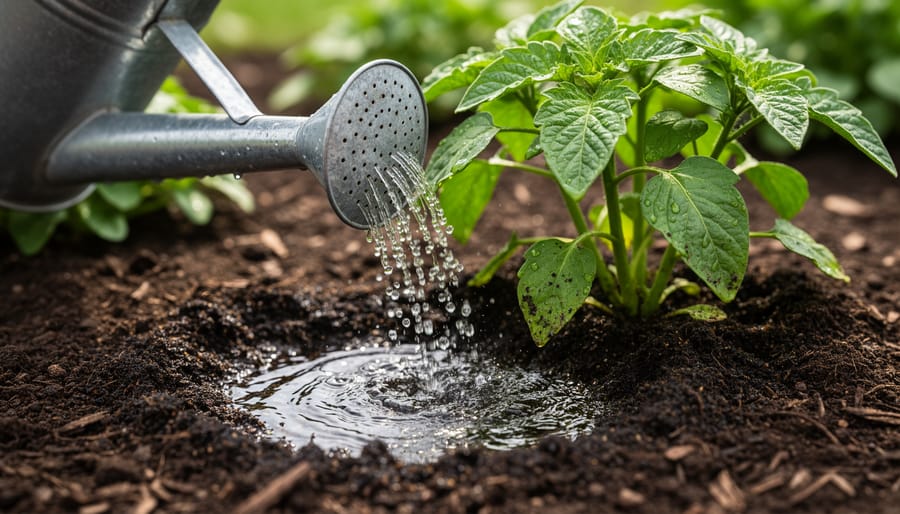
Your irrigation system does the heavy lifting, but a few easy habits help you squeeze even more out of every drop. Start by running your timer early in the morning, when the air is cool and the wind is calm. Less water evaporates, and the soil has all day to soak it in.
Next, lay down two to three inches of mulch over the soil. It keeps roots cooler, slows evaporation, and cuts down on weeds that compete for moisture. Pair that with grouping plants by water needs, so thirsty tomatoes share a zone and herbs like rosemary share another. Understanding how soil matters helps here too, since sandy beds drain fast while clay holds water longer, and your zones should reflect that.
Your timer shouldn’t stay on one setting all year. Here’s a simple seasonal rhythm:
- Spring: Water less often, since cool weather and rain do half the work.
- Midsummer: Run longer cycles, but keep them in the early morning hours.
- Fall: Dial the timer back as days shorten and plants slow their growth.
If you’re planning new beds, consider drought-tolerant plants for the sunniest, driest corners, and browse a few minimal watering blooms for color that won’t demand much from your system.
Finally, catch rain whenever you can. A simple rain barrel under a downspout can feed your drip lines, turning free water into healthier plants and a lighter water bill.
How to Check Your System Is Working and What to Do Next
Once everything is connected, run a short test cycle while you’re standing in the garden. Walk the lines and watch every emitter. Water should drip steadily from each one, with no spraying fountains or soggy puddles at the connections. Check the end caps and fittings too, since those are the usual spots for slow leaks.
Next, look beyond the surface. About an hour after watering, push a trowel or your finger three to four inches into the soil near a plant’s roots. You want it damp but not muddy. If it’s bone dry down there, run the system longer next time. If it’s soggy, shorten the cycle.
Over the first couple of weeks, keep an eye on your plants. Perky leaves and steady growth are good signs. Drooping or yellowing leaves usually mean too much or too little water, so adjust the timer a little at a time and give the soil a few days to settle.
Common hiccups and quick fixes:
– Dry spots: An emitter is probably clogged. Pop it off, rinse it, or swap in a new one.
– Weak flow at the far end: The line may be too long, or your filter needs cleaning.
– Leaky connections: Turn off the water, re-seat the fitting, and push it on firmly.
– Puddles at one plant: Emitters may be too close together, so move or remove one.
After a month or two, compare your water bill with the same period last year. Seeing that number drop is a lovely little reward.
When you’re ready for more, try extending the system to another bed, setting up a rain barrel to feed it, or upgrading to a smart controller that adjusts for the weather. Start small, and let the garden show you what to do next.
Water-Saving Irrigation Questions Gardeners Often Ask
How long should I run drip irrigation?
Most beds do well with 30 to 60 minutes, two or three times a week, but it depends on your soil and the weather. Check the soil a few inches down. If it’s damp, you can shorten the run.
Can I use drip lines in containers?
Absolutely. Use small stakes with one or two emitters per pot, and run them for a shorter time than your beds since pots hold less water.
Will a drip system work with low water pressure?
Yes, drip is made for low pressure, usually around 25 PSI. Keep your lines short and use pressure-compensating emitters so the plants at the far end get their share.
Do I need to winterize?
If your area freezes, yes. Drain the lines, disconnect the timer and bring it indoors, and open the end caps so leftover water can’t crack your tubing.
A common follow-up is how much water you can really save. It varies by garden, climate, and what you were doing before, so I won’t promise a magic number. What I can say is that moving from overhead sprinklers to roots-only watering stops a lot of the waste from evaporation and runoff, and you’ll usually notice it on your water bill over a season or two. If you’re curious about your own numbers, jot down your meter reading before you switch and compare a month later.
Here’s the thing I love most about a water-saving irrigation system: you put in a little effort once, and your garden keeps rewarding you all season long. Plants that get slow, steady water right at their roots grow sturdier and more productive. Your water bill creeps down. And those evenings you used to spend dragging a hose around the yard? They turn into time to sit on the porch and enjoy what you’ve grown.
You don’t need to tackle the whole garden in one weekend. Pick a single bed, maybe the one with your thirstiest tomatoes or that stubborn row of herbs, and lay your first drip line there. Add a timer, tuck in some mulch, and watch what happens over the next few weeks.
Once you see how well it works, expanding feels easy. And if you do give it a try, I’d love to hear how it goes. Share your results, your little victories, even your oops moments. Every garden is a learning adventure, and yours is off to a great start.