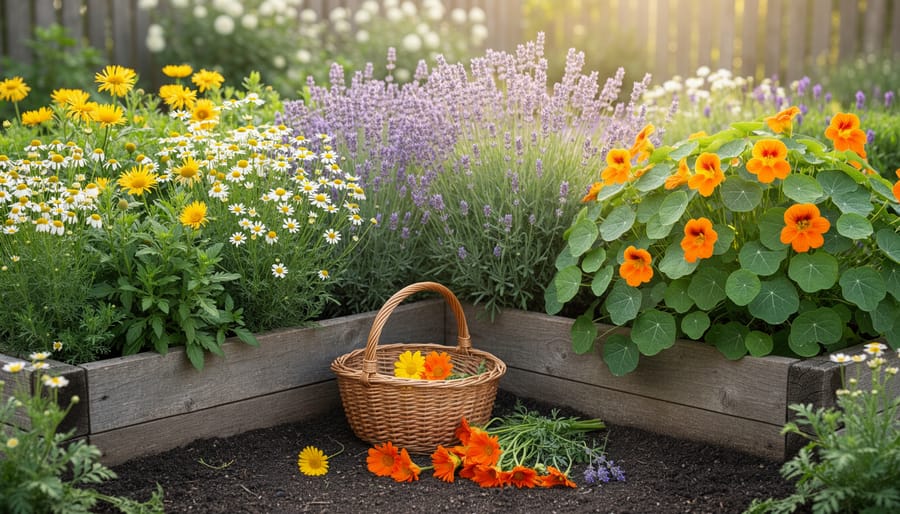
Growing herbal flowers transforms your garden into a working pharmacy, kitchen, and tea cabinet, all while adding beauty that rivals any purely ornamental bed. These dual-purpose plants deliver fragrant blooms that attract pollinators and produce leaves, petals, or seeds you can harvest for cooking, natural remedies, or homemade cosmetics. The best part? Most herbal flowers are easier to grow than traditional herbs, thriving in average soil with minimal care once established.
I started my herbal flower garden three years ago with a simple goal: fresh chamomile for evening tea. What began as six plants in a sunny corner quickly expanded when I realized how many gorgeous flowers could work double duty. That lavender border now fills sachets and flavors summer desserts. The calendula that self-seeded along my fence produces petals for salve-making. Even my nasturtiums, which I originally planted just because they’re cheerful, now add peppery punch to salads.
The timing couldn’t be better to start your own collection. Growing herbal flowers fits perfectly into edible landscaping ideas letting you blend function with beauty throughout your yard. Whether you have a sprawling backyard or just a few containers on a balcony, you can cultivate these multipurpose plants that serve you long after they’ve finished blooming. This guide walks you through the best varieties to grow, their specific uses, and the straightforward steps to get them thriving in your space.
Best Herbal Flowers to Grow for Different Uses
Culinary Herbal Flowers
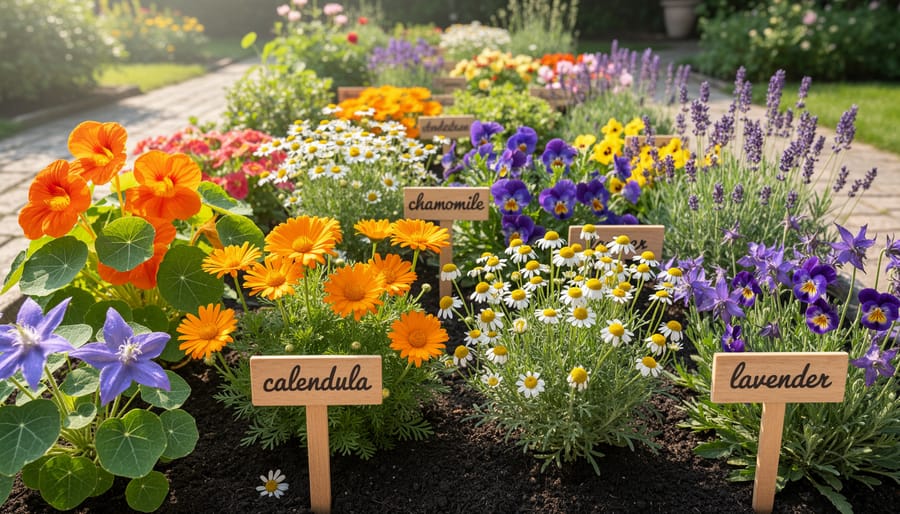
Calendula petals bring a mild, slightly peppery flavor to salads and rice dishes, and they add natural golden color to soups and broths. You can toss fresh petals into green salads or dry them to steep in tea. The flavor is subtle, so calendula works best as a garnish or light seasoning rather than a dominant ingredient.
Chamomile flowers taste sweet and apple-like, making them perfect for calming herbal teas. Harvest the small white-and-yellow blooms when fully open and dry them for later use. Fresh chamomile also works in baked goods and infused syrups.
Nasturtiums deliver a bold, peppery kick similar to watercress. Both the flowers and leaves are edible, and they’re fantastic in salads, on top of cream cheese, or as a colorful garnish for savory dishes. The bright orange, yellow, and red blooms make any plate more vibrant.
Borage flowers have a delicate cucumber flavor that pairs well with summer drinks and fruit salads. The star-shaped blue flowers look stunning frozen in ice cubes for cocktails or lemonade. You can also candy them for cake decorations or scatter fresh blooms over cold soups.
Medicinal and Wellness Herbal Flowers
Echinacea stands out for immune support, with purple coneflower varieties valued for their potential to shorten colds and upper respiratory infections. Research continues to evaluate echinacea usefulness and safety making it a popular choice for home herbal tea gardens. Harvest the flowers just as they fully open, then dry them for infusions throughout cold season.
Lavender offers calming properties that help with sleep and anxiety when used in teas, sachets, or essential oil form. The fragrant purple spikes contain compounds that promote relaxation, making lavender one of the most versatile herbs and flowers for wellness gardens. English lavender varieties tolerate colder climates, while French lavender thrives in warmer zones.
St. John’s wort produces cheerful yellow blooms that have been used for centuries in mood support. Studies suggest it may be effective for mild to moderate depression though it interacts with many medications and requires careful consideration before use. The bright flowers bloom prolifically in midsummer and spread readily in well-drained soil.
Aromatic and Craft Herbal Flowers
Lavender tops the list for crafters, producing intensely fragrant spikes that hold their scent for years when dried. Harvest stems just as the flowers open, bundle them loosely, and hang upside down in a dark, airy spot. The dried buds work beautifully in sachets for drawers and closets.
Roses offer timeless fragrance and color. Choose old garden varieties or rugosa types for the strongest scent. Pick blooms in early morning, then dry petals flat on screens. They’re perfect for potpourri blends and decorative jars.
Yarrow dries with its shape intact, making it ideal for wreaths and arrangements. The flat flower heads come in white, yellow, pink, and red. Cut stems when blooms are fully open but still firm.
German chamomile’s tiny daisy-like flowers add delicate beauty to dried bouquets while releasing a sweet, apple-like fragrance that intensifies as the flowers dry.
What You’ll Need to Grow Herbal Flowers
You don’t need fancy equipment to start growing herbal flowers, just a few essential tools and quality materials will set you up for success. Whether you’re planting in containers on a balcony or creating a dedicated garden bed, having the right supplies on hand makes the process smoother and more enjoyable.
Here’s what you’ll need to get started:
- Seeds or nursery transplants of your chosen herbal flowers
- Quality potting mix for containers or loose, well-draining garden soil
- Compost or aged manure to enrich the soil
- Containers with drainage holes if growing in pots (at least 8-12 inches deep)
- Watering can with a gentle rose attachment or garden hose with spray nozzle
- Garden trowel or hand spade for digging and transplanting
- Plant labels or markers to identify varieties
- Organic mulch like straw, shredded leaves, or wood chips
- Seed-starting trays and dome if starting indoors
- Garden gloves to protect your hands
Beyond these basics, consider adding a few helpful extras. A soil thermometer helps you know when the ground is warm enough for direct sowing, and pruning shears make harvesting flowers cleaner and easier. If you’re starting seeds indoors, a grow light ensures seedlings get enough brightness even in darker homes.
Most herbal flowers aren’t picky about soil pH, but a simple test kit can help you understand what you’re working with. You’ll also want access to water, either from an outdoor spigot or by hauling watering cans. Containers should always have drainage holes to prevent root rot, which is one of the quickest ways to lose plants.
Start with what you have and build your toolkit over time. Many gardeners discover their favorite tools through trial and error, so don’t feel pressured to buy everything at once.
Important Safety and Growing Considerations
Before you plant your first herbal flower, understand these critical safety points. Many flowers that look beautiful can cause allergic reactions, skin irritation, or worse if misidentified or improperly used.
Always verify the botanical name of any plant before consuming or applying it topically. Common names vary widely, and one name can refer to multiple species, some safe, others toxic. Cross-reference multiple trusted sources and compare physical characteristics carefully to confirm you have the correct plant.
If you’re growing flowers for food or remedies, avoid all synthetic pesticides, herbicides, and fungicides. These chemicals can persist on petals and leaves, creating a serious risk from pesticide spraying even after washing. Use only organic growing methods for anything you’ll ingest or use on skin.
Consider how your growing conditions affect safety too. Poor drainage, contaminated soil, or proximity to treated lawns can introduce harmful substances into your plants. Understanding how soil affects growth includes recognizing potential contaminants that might compromise safety.
Some herbal flowers interact with medications or medical conditions. Pregnant or nursing women, children, and anyone with health concerns should consult a healthcare provider before using herbal flowers medicinally. Even safe plants can cause problems for sensitive individuals, lavender might trigger headaches in some people, while chamomile can affect those allergic to ragweed.
Step-by-Step Guide to Growing Herbal Flowers
Step 1: Choose Your Location and Prepare the Soil
Most herbal flowers thrive in spots that get six to eight hours of direct sunlight daily. Walk your yard at different times and note where the sun hits longest, south-facing areas typically work best. If you’re stuck with partial shade, chamomile and lemon balm tolerate it reasonably well, but calendula and lavender will stretch and bloom poorly without full sun.
Check drainage by digging a hole about a foot deep and filling it with water. If it drains within an hour or two, you’re good. Standing water after four hours means you’ll need raised beds or a different spot entirely.
Grab a handful of your soil and squeeze it. Does it clump into a hard ball? That’s clay, you’ll need to work in compost and perlite. Does it fall apart immediately? Sandy soil drains too fast and needs compost to hold moisture. The ideal texture crumbles loosely but holds its shape briefly.
Spread two to three inches of finished compost over your planting area and work it into the top eight inches of soil. For heavy clay, mix in coarse sand or perlite at the same time. Most herbal flowers prefer slightly alkaline to neutral pH around 6.5 to 7.0, so test with an inexpensive kit if your plants have struggled before.
Step 2: Start Seeds Indoors or Direct Sow
Starting herbal flowers from seed gives you more variety and costs less than buying transplants. The method you choose depends on your climate and the specific flower.
For indoor starting, begin six to eight weeks before your last spring frost date. Fill seed trays with moistening seed-starting mix, plant seeds at twice their depth (tiny seeds like chamomile barely need covering), and keep them at 65-70°F. Calendula, echinacea, and lavender all benefit from this head start. Place trays in bright light or under grow lights for 12-14 hours daily, keeping the soil consistently moist but not soggy.
Direct sowing works well for quick-growing flowers like borage, nasturtium, and calendula. Wait until soil temperatures reach 60°F and all frost danger passes. Rake the planting area smooth, scatter seeds at the spacing recommended on the packet (usually 6-12 inches apart), and press them gently into contact with soil. Water with a fine spray to avoid washing seeds away. Thin seedlings once they develop true leaves, giving each plant enough room to mature fully.
Step 3: Transplant Seedlings or Plant Transplants
Wait until your seedlings have developed their second set of true leaves and all danger of frost has passed before transplanting outdoors. Check your local frost dates, most herbal flowers transplant safely when nighttime temperatures stay consistently above 50°F.
Start hardening off seedlings one to two weeks before planting. Place them outside in a sheltered spot for an hour the first day, then gradually increase exposure by an hour or two daily. Bring them inside at night initially, then leave them out overnight once they’ve adjusted. This prevents shock from sudden temperature and light changes.
When you’re ready to plant, dig holes slightly larger than the root ball and water them thoroughly. Gently loosen the roots if they’re circling the pot, then set each plant at the same depth it grew in its container. Firm the soil around the base and water again. Transplant on a cloudy day or in late afternoon to reduce stress from direct sun.
Step 4: Water and Mulch Your Plants
Proper watering keeps your herbal flowers healthy without drowning their roots. Most herbal flowers prefer soil that stays evenly moist but never waterlogged. Water deeply once or twice per week rather than sprinkling lightly every day, this encourages roots to grow deeper and makes plants more drought-tolerant. Check soil moisture by sticking your finger two inches down; if it feels dry, water thoroughly until moisture reaches six to eight inches deep. Water at the base of plants in early morning so foliage dries quickly and fungal diseases stay away.
After watering, spread a two to three inch layer of organic mulch around your plants, keeping it an inch away from stems to prevent rot. Shredded bark, straw, or compost all work well. Mulch locks in moisture so you water less often, keeps soil temperatures steady, and stops weeds from stealing nutrients. Refresh the mulch layer mid-season if it breaks down or thins out.
Step 5: Maintain Your Herbal Flowers Throughout the Season
Water established plants deeply once or twice weekly rather than daily shallow sprinkles, adjusting for rainfall and heat. Most herbal flowers thrive with consistent moisture but hate soggy roots, so let the top inch of soil dry between waterings.
Deadhead spent blooms every few days by pinching or snipping just below the flower head. This simple task redirects energy into new buds instead of seed production, keeping calendula, chamomile, and echinacea flowering for weeks longer. For bushier plants with more blooms, pinch back growing tips when plants reach six inches tall, removing the top inch of new growth.
Feed monthly with diluted fish emulsion or compost tea during active growth. Skip heavy fertilizers, too much nitrogen creates lush leaves but fewer flowers.
Check weekly for aphids, spider mites, or powdery mildew. Catch problems early by inspecting leaf undersides and new growth. Spray stubborn pests off with water or use insecticidal soap, avoiding chemical pesticides on anything you’ll harvest.
Stake tall varieties like echinacea and yarrow before they flop, using bamboo stakes and soft ties. Install supports when plants are young to avoid damaging established roots later.
Step 6: Harvest at Peak Time
Timing your harvest correctly preserves the maximum flavor, aroma, and potency of herbal flowers. Most flowers should be picked in mid-morning, after dew has evaporated but before the day’s heat intensifies. This is when essential oils are most concentrated.
For culinary flowers like calendula and nasturtium, harvest when blooms are fully open and colors are vibrant. Pick them just as they reach peak beauty, before petals begin to fade or drop.
Medicinal flowers like echinacea and chamomile need different timing. Chamomile flowers are best when the petals just start to reflex backward, indicating full maturity. Echinacea should be harvested when the cone is fully developed and petals are bright.
Use clean, sharp scissors or pruners to cut stems at a 45-degree angle just above a set of leaves or node. This angled cut encourages the plant to branch and produce more flowers. Never tear or rip stems, which can damage the plant and invite disease.
Harvest regularly throughout the season rather than waiting for one big cutting. Frequent picking signals the plant to keep blooming, extending your harvest window by weeks.
How to Tell Your Herbal Flowers Are Thriving
Healthy herbal flowers display unmistakable signs of vitality. Look for strong, upright stems that support blooms without flopping or bending excessively. Flower color should be rich and vibrant, whether you’re growing purple echinacea or golden calendula. New buds should form continuously throughout the growing season, with spent blooms giving way to fresh flowers within days. Foliage should be deep green (unless the variety naturally has silver or gray leaves), firm to the touch, and free from spots or discoloration.
Check the undersides of leaves regularly for pests. Thriving plants show minimal insect damage and no visible colonies of aphids or spider mites. The soil around your plants should feel slightly moist an inch below the surface, not bone-dry or waterlogged. Consistent watering makes a huge difference, which is why many gardeners wonder if an irrigation system worth it for maintaining steady moisture levels.
If you notice yellowing leaves, check your watering schedule first. Too much or too little water causes this issue. Poor flowering usually signals insufficient sunlight or overfertilizing with nitrogen-heavy products. Wilting despite moist soil often points to root problems or disease. Adjust care based on what you observe, and most herbal flowers will bounce back quickly with the right corrections.
What to Do After Your First Harvest
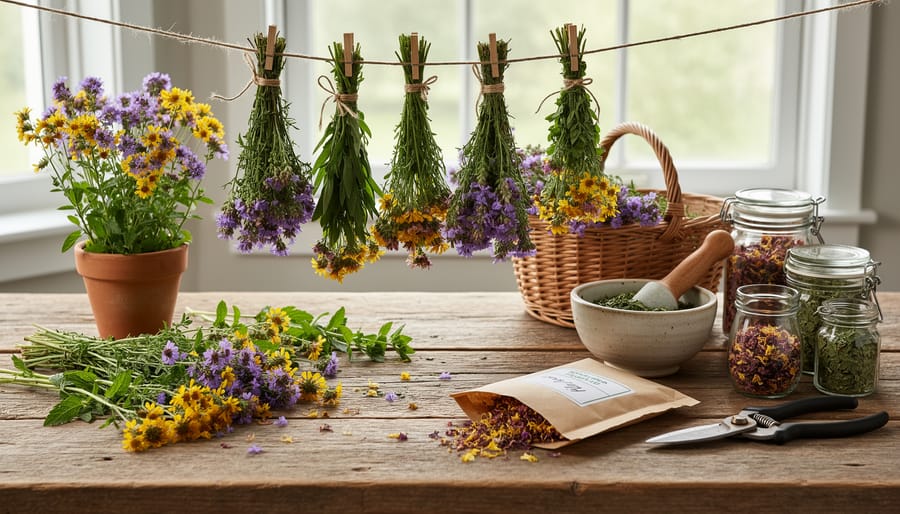
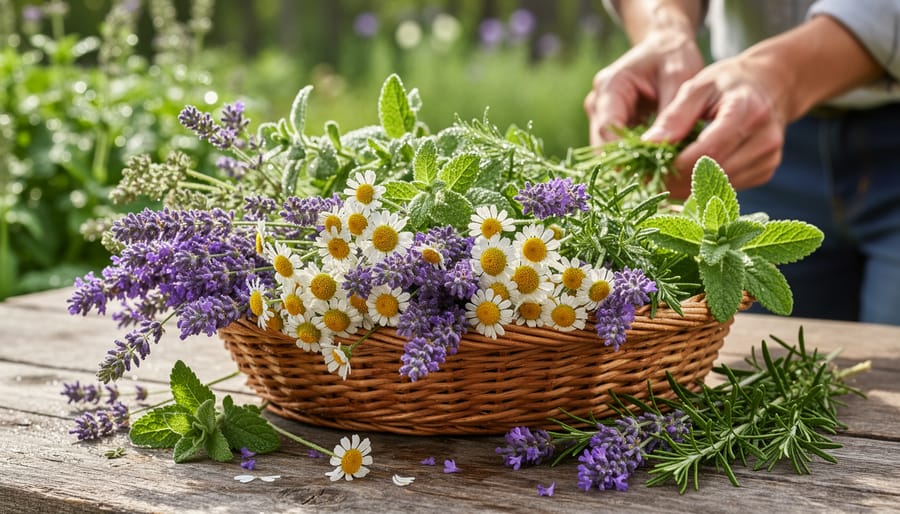
Your first harvest opens up a world of possibilities. Fresh herbal flowers are at their peak potency right after picking, so use what you can immediately, toss calendula petals into salads, steep chamomile for a calming tea, or float borage blooms in summer drinks. For the rest, preserving your harvest lets you enjoy these flowers long after the growing season ends.
The simplest preservation method is air-drying. Bundle small bunches of flowers with stems attached, secure them with twine, and hang them upside down in a dark, well-ventilated space like a pantry or closet. They’ll dry completely in one to three weeks, depending on humidity. Once crisp, store whole flowers or petals in airtight glass jars away from light to maintain color and fragrance. This works beautifully for lavender, rose, and yarrow.
Here are effective ways to preserve and use your herbal flowers right away:
- Dry flowers for tea by hanging bundles in a dark, airy spot until crisp
- Freeze edible petals in ice cubes for drinks and cocktails
- Make tinctures by steeping flowers in alcohol or glycerin for four to six weeks
- Infuse fresh flowers in honey or vinegar within a day of harvest
- Press flowers between heavy books for craft projects and homemade cards
- Use fresh blooms immediately in recipes, garnishes, or herbal baths
If you’re planning for continuous harvest, deadhead spent blooms regularly to encourage more flowering, and mark a few of your healthiest plants for seed saving. Let those flowers go to seed naturally, then collect the dried seed heads in late summer or fall. Store seeds in labeled envelopes in a cool, dry place. With proper care, most herbal flower seeds remain viable for two to three years, giving you a head start on next season’s garden.
Common Questions About Growing Herbal Flowers
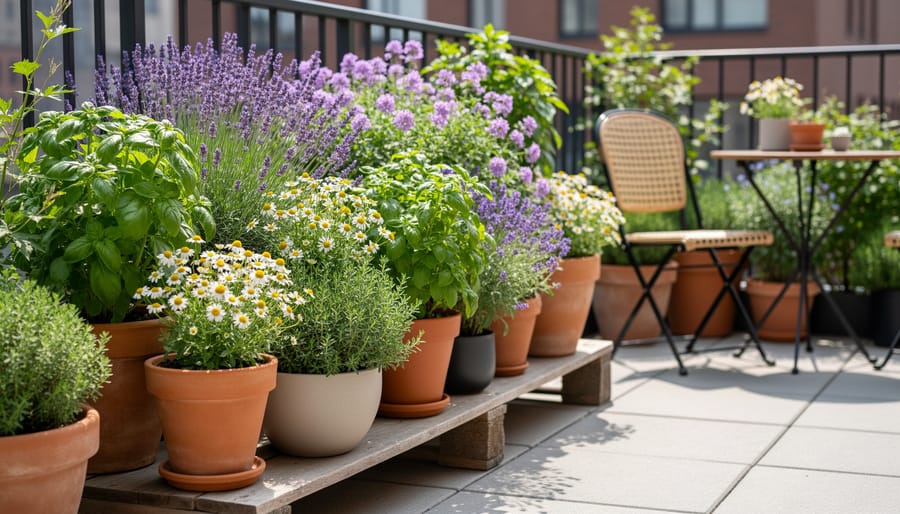
Growing herbal flowers raises practical questions, especially for gardeners new to these dual-purpose plants. Here are answers to the most common concerns.
Can I grow herbal flowers in containers?
Absolutely. Most herbal flowers thrive in pots, calendula, chamomile, nasturtium, and lavender all adapt well to container life. Use pots at least 12 inches deep with drainage holes and quality potting mix, and you’ll enjoy harvests even on a balcony or patio.
Which herbal flowers are easiest for beginners?
Calendula, chamomile, and nasturtium top the list for new growers. They germinate quickly, tolerate varying conditions, and forgive minor mistakes while still producing abundant blooms you can actually use.
How do I extend the blooming period?
Deadhead spent flowers regularly to trigger more buds, and plant varieties with staggered bloom times. Succession planting, sowing new seeds every two to three weeks, keeps fresh flowers coming throughout the season.
When is the best time to plant herbal flowers?
Most herbal flowers go in after your last spring frost, typically when soil temperatures reach 60°F. Cool-season types like chamomile can handle earlier planting, while heat-lovers like echinacea prefer late spring warmth.
Many gardeners wonder about indoor growing. While possible with supplemental grow lights, most herbal flowers perform better outdoors where they get full sun and natural airflow. If you’re limited to indoor space, focus on compact varieties and south-facing windows.
Companion planting works beautifully with herbal flowers, nasturtiums deter aphids from vegetables, while borage attracts pollinators that help nearby crops. Mixing herbs and flowers creates a healthier garden ecosystem where plants support each other naturally.
Saving seeds from your herbal flowers makes sense once you’ve identified varieties that perform well in your conditions. The seed saving benefits multiply when you’re working with plants that serve multiple purposes, giving you both free seeds and a renewable source of useful blooms year after year.
Starting your herbal flower garden means joining centuries of gardeners who’ve discovered that the most rewarding plants are ones you can actually use. Whether you’re brewing calendula tea, tossing nasturtium petals into salads, or crafting lavender sachets for your linen closet, you’re creating something beautiful that also improves your daily life.
You don’t need acres of land or advanced skills to succeed. A few pots on a sunny balcony, a corner of your existing garden bed, or even a repurposed planter box will support chamomile, borage, or echinacea that blooms reliably and gives you harvests for months. These aren’t fussy ornamentals that demand constant attention, they’re forgiving plants that thrive with basic care and reward you with flowers you’ll reach for again and again.
Growing your own herbal flowers connects you to a healthier, more sustainable way of living. You know exactly what went into the soil, you control what touches the petals, and you reduce your reliance on store-bought dried herbs and flowers that have traveled thousands of miles. Each bloom you harvest brings you closer to food security, natural wellness, and the simple satisfaction of using something you grew yourself.
Start small, pick two or three varieties that excite you, and plant them this season. The flowers will show up, the bees will thank you, and you’ll wonder why you waited so long to grow plants that give back so much.