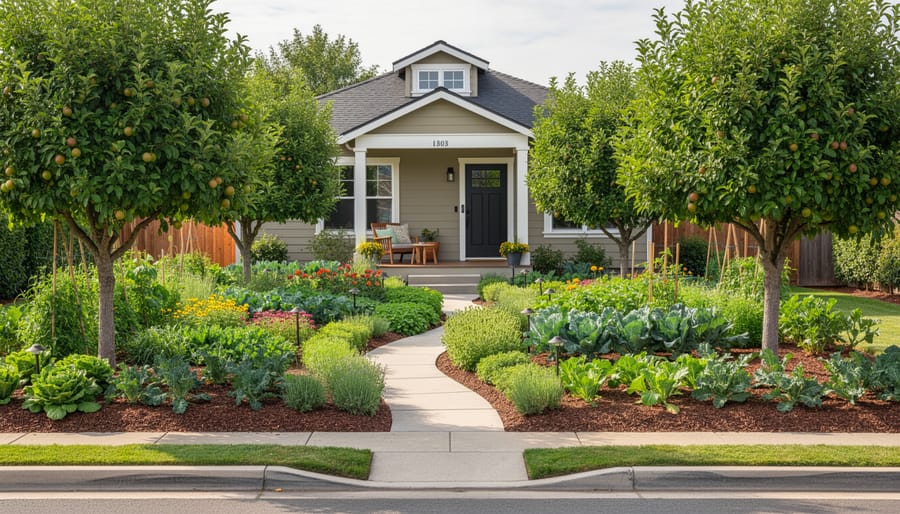
Transforming your front yard into an edible landscape combines the beauty of ornamental gardening with the practical reward of growing your own food, and the process takes about 4-6 weeks from planning to planting. What is edible landscaping? It’s the art of designing attractive outdoor spaces using productive plants like herbs, vegetables, fruit trees, and berries instead of purely decorative ones. Your front yard is the perfect canvas for this approach because it typically receives ample sunlight, welcomes visitors with visual appeal, and can demonstrate to your entire neighborhood that growing food doesn’t mean sacrificing curb appeal.
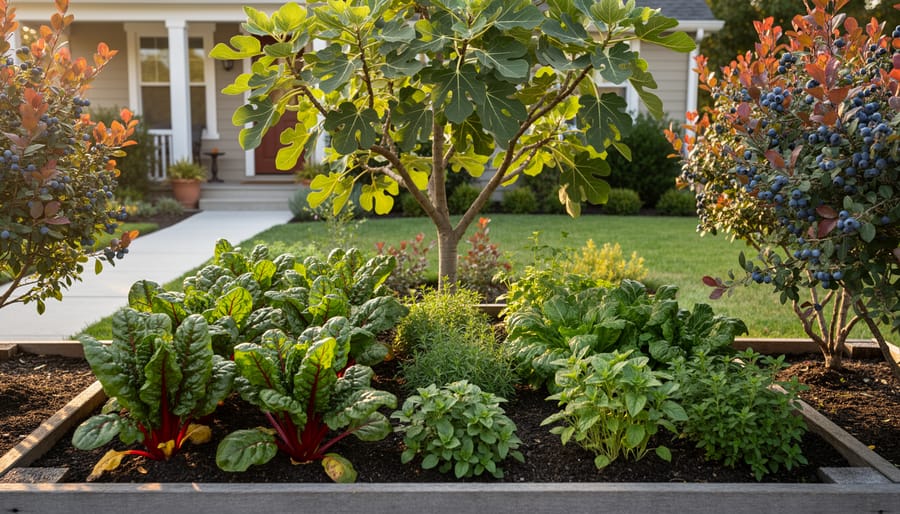
The key to success lies in selecting plants that look beautiful throughout the season while producing a harvest. Think ruby-red Swiss chard instead of boring hostas, blueberry bushes with stunning fall color replacing barberry, or a fig tree as your focal point rather than a generic ornamental. Most homeowners worry that vegetables will make their yard look messy or that neighbors and HOAs will complain, but thoughtful design using neat, attractive edibles actually increases property value and sparks conversations.
Whether you’re working with a tiny urban strip or a sprawling suburban lawn, this guide will walk you through every step of creating a front yard that feeds both your family and your aesthetic sense. You’ll learn which plants work best in public-facing spaces, how to arrange them for maximum beauty and productivity, and exactly what materials and techniques will ensure your edible landscape thrives for years to come.
Planning Your Edible Front Yard
Assessing Your Site Conditions
Your front yard’s unique conditions will shape every planting decision you make. Start by tracking sunlight patterns for at least three days, noting which areas receive full sun (6+ hours), partial sun (3-6 hours), or shade. Morning sun is gentler than intense afternoon rays, so mark those differences on your sketch.
Next, observe drainage after a heavy rain. Does water pool anywhere? Low spots need plants that tolerate wet feet, or you’ll need to add drainage solutions. Walk your yard after a storm to identify problem zones.
Test your soil using an inexpensive kit from any garden center. You’re checking pH levels and nutrient content, both of which determine what will thrive. Most edibles prefer slightly acidic to neutral soil (pH 6.0-7.0). Clay soil drains slowly but holds nutrients well, while sandy soil drains fast but needs frequent feeding.
Finally, inventory existing features. Mature trees provide shade but compete for nutrients and water. Slopes create microclimates and affect irrigation. Note where your water source is located, too. These realities guide your plant choices more than any Pinterest board ever will.
Defining Your Design Goals
Before you sketch a single bed or buy your first seed packet, get clear on what you actually want from this space. Are you aiming for maximum harvests, or is a beautiful streetscape your top priority? Most successful edible front yards strike a balance, but knowing where you lean helps every decision that follows.
Start by honestly assessing your available time. A low-maintenance design might feature perennial herbs, berry bushes, and a few seasonal container vegetables. If you love daily garden time, you can incorporate intensive vegetable beds that need regular planting, harvesting, and succession sowing.
Next, list the edibles your household actually eats. There’s no point growing Brussels sprouts if nobody touches them. Focus on favorites that either cost a fortune at the market or taste dramatically better fresh, heirloom tomatoes, fresh herbs, or specialty salad greens often top that list.
Finally, consider your comfort level with public-facing experimentation. Some gardeners embrace the changing, slightly wild look of a productive space. Others prefer tidy, structured designs with evergreen edibles that look polished year-round. Neither approach is wrong; pick what matches your personality and your street.
Essential Tools and Materials for Edible Landscaping
Getting your edible front yard right starts with having the proper tools and materials on hand. While you don’t need to purchase everything at once, gathering these essentials before you begin will save multiple trips to the garden center and keep your project moving smoothly.
Planning Phase Essentials
Start with the basics for mapping your space: graph paper and pencil (or a free garden design app), a measuring tape, a soil test kit, and stakes with string for marking bed edges. A camera or smartphone helps document existing conditions and sun patterns throughout the day.
Installation and Planting Supplies
For the physical work ahead, you’ll need:
- Digging tools: sharp spade, garden fork, and hand trowel for planting
- Wheelbarrow or garden cart for moving materials
- Rake for leveling and spreading amendments
- Garden hose with spray nozzle for watering
- Compost and organic matter for soil preparation
- Mulch (wood chips, straw, or shredded leaves) for weed suppression
- Landscape fabric or cardboard for sheet mulching existing lawn
- Edging material (metal, stone, or wood) to define beds
- Your chosen edible plants, seeds, and transplants
Ongoing Maintenance Kit
Once your landscape is installed, keep pruning shears, hand pruners, a weeding tool, and organic fertilizer readily accessible. A rain barrel or soaker hoses make watering more efficient, though these can be added after your initial installation if budget is tight.
Most gardeners already own several of these items. Focus first on quality digging tools and soil amendments, these make the biggest difference in establishment success.
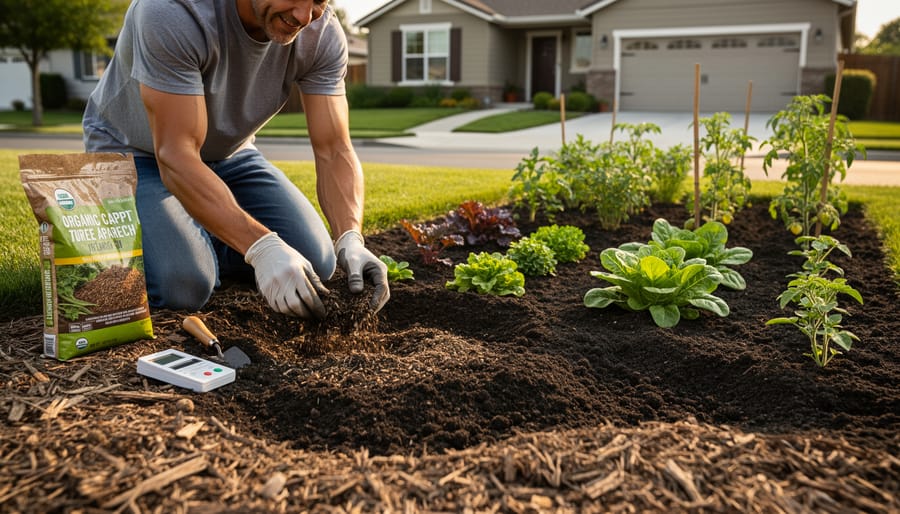
Safety and Important Considerations
Before you break ground, understand the potential hazards unique to front yard edible gardening. Unlike backyard spaces, front yards face public exposure, which brings specific safety concerns you need to address upfront.
Start with tool safety basics: keep pruners and shovels sharp, which actually makes them safer by requiring less force. Wear gloves when handling soil amendments and tools, and eye protection when cutting branches overhead. Store all tools out of children’s reach.
Plant selection matters for safety. Avoid toxic ornamentals like foxglove, castor bean, and oleander anywhere near your edible plants. If you have young children or pets, skip plants with small, berry-like fruits that could be confused with edibles, even if they’re just ornamental.
Commit to pesticide-free growing in your front yard. Because this space is visible and accessible, you have a responsibility to neighbors, mail carriers, and anyone walking past. Use organic pest control methods like hand-picking, row covers, and beneficial insects instead.
Check your soil for contamination, especially if your home was built before 1978 when lead paint was common, or if you’re near a busy street. A soil test costs twenty to forty dollars and gives you peace of mind. If lead or other contaminants are present, use raised beds with fresh soil and a barrier fabric underneath to prevent root penetration into contaminated ground.
Step-by-Step Process: Creating Your Edible Front Yard
Step 1: Sketch Your Design Layout
Start by drawing your front yard to scale on graph paper or using free design software, a bird’s-eye view helps you see the whole picture. Mark existing features like walkways, driveways, and utility access points that you can’t move. Next, sketch in your planned paths; they should be wide enough for maintenance (at least 24 inches) and create natural flow from the street to your front door.
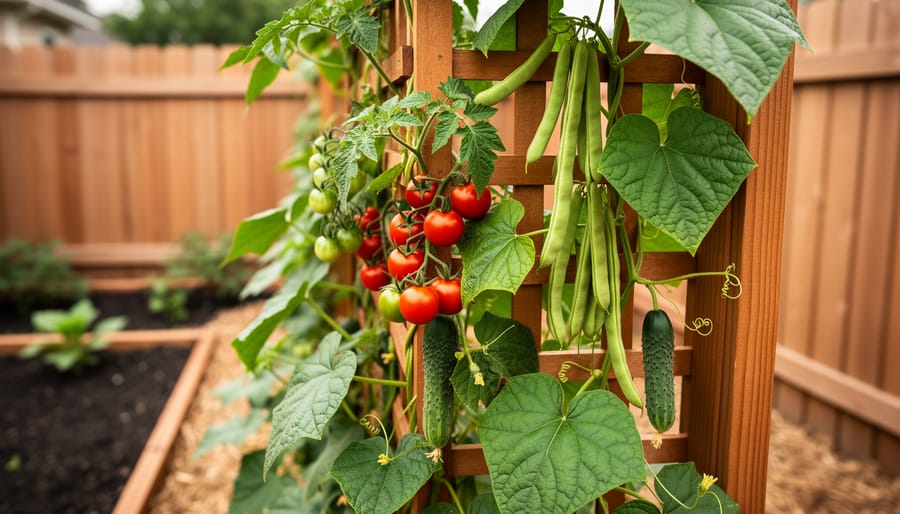
Now layer your plantings from tall to short: place fruit trees or tall climbing crops on trellises toward the back or sides, medium-height plants like blueberry bushes in the middle layer, and low-growers like herbs and lettuces along the front edges. This creates visual depth and ensures nothing blocks sunlight from shorter plants.
Add focal points where you want the eye to land, a beautiful espalier fruit tree, a grouping of colorful chard, or a stone birdbath surrounded by strawberries. Mix edibles with flowering ornamentals throughout to soften the “vegetable garden” look and create year-round interest. Your sketch doesn’t need to be perfect; it’s a working document you’ll adjust as you go.
Step 2: Remove Existing Lawn or Vegetation
The fastest way to remove your front lawn is cutting and lifting the sod with a flat spade or rented sod cutter, which works in hours but creates disposal work. For a gentler approach that feeds your soil, try sheet mulching: mow the grass short, water thoroughly, then layer cardboard or thick newspaper (overlapping edges by six inches) directly over the lawn. Top with four to six inches of compost and mulch. The grass dies beneath and becomes organic matter over eight to twelve weeks.
If you’re not in a rush, clear small sections at a time so you can plant progressively. Cover paths and future bed edges first, then work inward. Avoid tilling existing lawn unless you want to fight regrowth for months, chopping roots into pieces multiplies your weeds instead of eliminating them.
Whatever method you choose, remove any obvious rocks, roots, or debris as you work. This prevents future planting headaches and gives you clean soil to amend in the next step.
Step 3: Prepare and Amend Your Soil
Start by testing your soil to understand what you’re working with. Pick up an inexpensive soil test kit from your local garden center, or send a sample to your county extension office for detailed results. You’ll learn your pH level and nutrient content, which tells you exactly what amendments your plants need.
Once you have results, spread 2-3 inches of finished compost across your planting areas and work it into the top 6-8 inches of soil. This improves drainage in clay soils and boosts water retention in sandy ones. If your test shows low pH for most edibles (below 6.0), add garden lime. For high pH soils, sulfur brings it down.
Consider building raised beds if you have poor drainage, contaminated soil, or want cleaner visual lines. Frame them with untreated cedar or stone, fill with a quality soil mix, and you’ll gain better control over growing conditions while adding attractive structure to your design.
Step 4: Install Hardscaping Elements
Start hardscaping before plants go in, it’s far easier to maneuver materials and tools in an empty bed than around delicate seedlings. Begin with pathways using gravel, flagstone, or mulched corridors at least two feet wide for comfortable access and wheelbarrow passage. Install edging next to define beds and keep mulch contained; materials like metal landscape edging, stone borders, or reclaimed brick work well and add visual polish. If your design includes structural supports for vining edibles like grapes or beans, set those posts or trellises now while you can dig freely. Compact any loose soil along paths to prevent settling later, and double-check that all elements align with your design sketch before moving to planting.
Step 5: Plant Your Edible Landscape
Now comes the exciting part: putting plants in the ground. Start with your largest, longest-lived plants first, perennial edibles and fruit trees, since moving these later becomes a hassle. Position dwarf fruit trees or berry bushes at focal points where you’ve planned them, checking that they’ll receive adequate sunlight as they mature. Space them according to their mature width, not their current nursery size (dwarf apples typically need 8-10 feet, blueberries 4-6 feet).
Next, add your perennial herbs and vegetables like asparagus, artichokes, or rhubarb in their designated spots. These will anchor your design year after year.
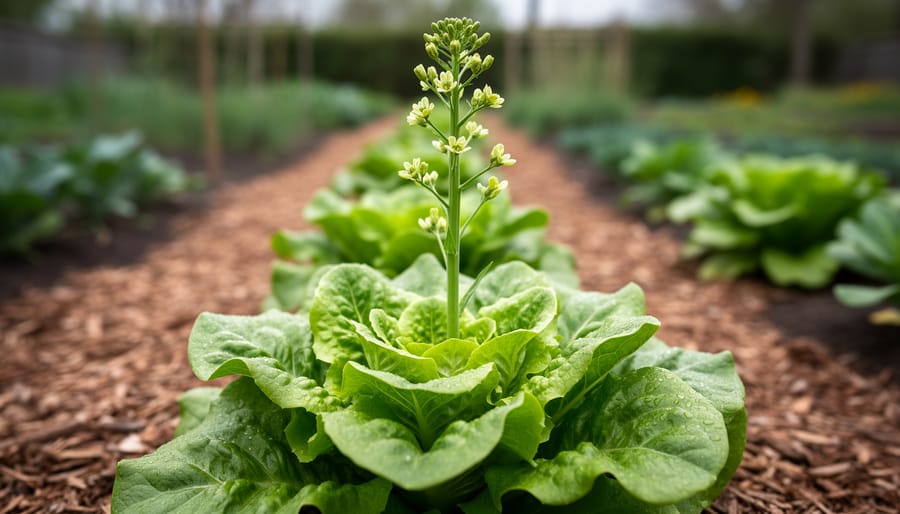
Fill remaining spaces with annual vegetables and herbs, grouping them by similar water needs. Tuck lettuce and spinach into shadier spots near taller plants, while tomatoes and peppers claim the sunniest real estate. Practice companion planting for both pest control and visual interest: basil alongside tomatoes, nasturtiums near squash, marigolds throughout for color and aphid deterrence.
For curb appeal, alternate textures and colors. Place bold-leafed Swiss chard next to feathery carrot tops, purple basil beside chartreuse lettuce. Edge beds with compact herbs like parsley or low-growing strawberries for a finished look.
Water everything thoroughly after planting, and resist the urge to overcrowd. Plants need room to breathe and grow, you can always add more annuals next season.
Step 6: Add Mulch and Finishing Touches
With plants in the ground, a three-inch layer of organic mulch around each one locks in moisture and chokes out weeds before they start. Pull mulch back an inch from stems and trunks to prevent rot. Wood chips, shredded bark, or straw all work, but skip dyed mulches in edible spaces. If you planned an irrigation system now’s the time to lay drip lines under the mulch where they’ll stay hidden. Finish by tucking in a few decorative elements that reflect your style: a birdbath, stepping stones, or small garden signs labeling herbs. These touches transform the space from “just planted” to intentionally designed.
Best Edible Plants for Front Yard Landscapes
Ornamental Edibles That Shine
Blueberry bushes top the list for edible front yards because they deliver year-round interest: delicate white spring blooms, lush summer foliage, sweet berries in July, and fiery red fall color. Choose compact varieties like ‘Northblue’ or ‘Top Hat’ for smaller spaces. Plant them in acidic soil and you’ll harvest for decades while enjoying a stunning ornamental shrub.
Swiss chard transforms vegetable gardening into art. ‘Bright Lights’ offers neon-pink, orange, and yellow stems that rival any flower border, while ‘Rhubarb’ chard delivers deep crimson stalks against dark green leaves. Plant it as a border edging or mixed into perennial beds, it looks intentional, not agricultural.
Kale varieties like ‘Redbor’ and ‘Lacinato’ bring dramatic texture with frilly purple or dark blue-green leaves. They anchor winter gardens when most plants fade and tolerate frost beautifully.
Dwarf fruit trees offer maximum impact in tight quarters. A ‘Honeycrisp’ apple espalier against your house creates living architecture, while a ‘Stella’ cherry in a prominent corner provides spring blossoms and summer fruit without overwhelming the space.
Flowering herbal flowers like lavender, chive blooms, and rosemary combine fragrance, pollinator appeal, and kitchen utility in plants that look perfectly at home in ornamental beds.
Edible Groundcovers and Border Plants
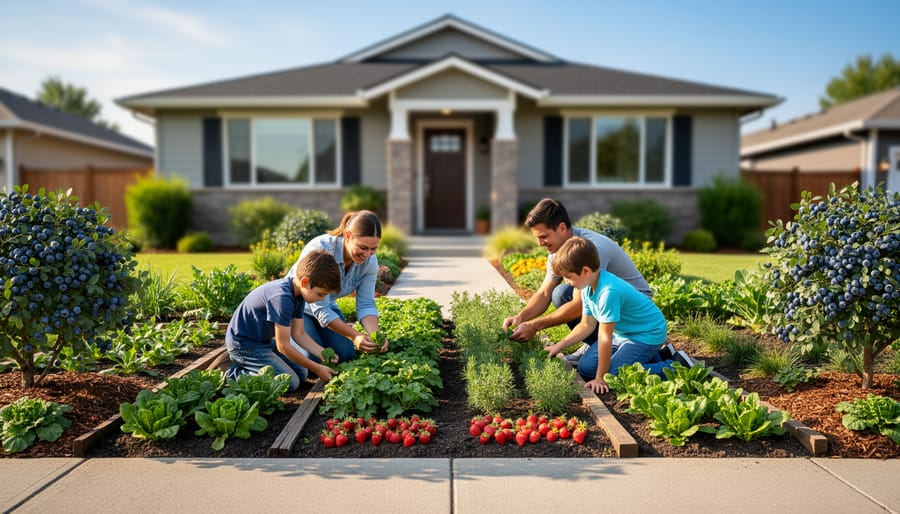
Edible groundcovers transform the spaces where grass traditionally struggles, under trees, along pathways, at bed edges, into productive zones that suppress weeds and look intentional year-round.
Strawberries are the workhorses of edible groundcover, spreading runners that fill in bare soil while producing berries from late spring through fall. Alpine varieties stay compact and fruit continuously, perfect for tight border spaces, while June-bearing types create lush, low mats ideal for larger areas. Plant them 12 inches apart and they’ll knit together within one season.
Creeping thyme handles foot traffic better than most edibles, releasing fragrance when brushed and offering tiny edible flowers that bees love. Woolly thyme stays under two inches tall for pathway edges, while culinary thyme reaches four to six inches and delivers stronger flavor for cooking. Both varieties thrive in lean soil and full sun, asking almost nothing once established.
Creeping oregano spills over edges beautifully, its trailing stems dotted with pink summer flowers you can toss in salads. It spreads more aggressively than thyme, making it excellent for filling problem spots where nothing else grows.
Sweet woodruff works in shady front yard corners where edibles rarely succeed, its delicate white flowers and whorled leaves creating elegant texture. The leaves flavor beverages and desserts once dried, giving you harvests from otherwise unproductive shade.
Verification and Maintaining Your Edible Front Yard
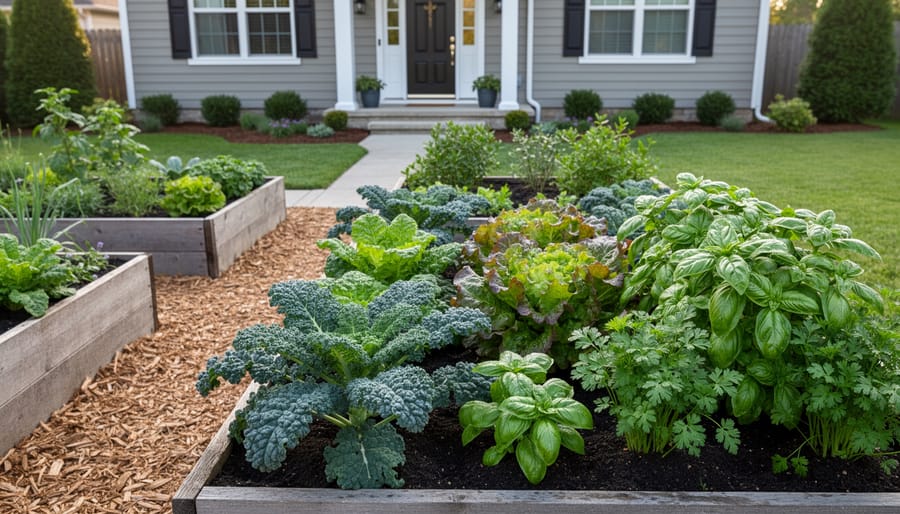
Your edible front yard is succeeding when you see steady new growth, vibrant leaf color, and plants filling in their designated spaces without overcrowding. Harvest-ready signs vary by crop, pick lettuce and herbs when leaves are plump and full, gather berries when they release easily from the stem, and pluck tomatoes or peppers when they show their mature color. If plants look stunted or yellowing, check for watering issues first (stick your finger two inches into the soil; it should feel evenly moist but not soggy), then consider whether they need feeding or better drainage.
Weekly walk-throughs keep your landscape thriving. Spend fifteen minutes checking for pests, pulling emerging weeds before they seed, and deadheading flowers to encourage more blooms. Water deeply twice a week during dry spells rather than shallowly every day, which builds stronger root systems. Feed heavy feeders like tomatoes and squash every three to four weeks with compost tea or a balanced organic fertilizer; perennials and herbs typically need feeding just once in spring.
Seasonal tasks anchor your maintenance rhythm. Spring calls for pruning fruit trees, dividing overgrown perennials, and refreshing mulch as it breaks down. Summer focuses on consistent watering and harvesting before crops bolt in the heat. Fall is prime time for planting garlic, adding a layer of compost, and cutting back spent annuals. Winter in most climates means minimal intervention, just occasional checks after storms and planning next year’s improvements.
Track what works and what doesn’t. Note which varieties produce well, where bare spots appear, and what neighbors compliment most. Adjust your design each season, adding more of what thrives and replacing underperformers. This continuous refinement turns a good edible front yard into a great one.
Common Questions About Edible Front Yard Landscaping
Do I need permission to turn my front yard into an edible landscape?
Check your local HOA covenants first if you live in a managed community. Many HOAs have specific rules about front yard appearance, plant heights, and acceptable garden styles. If you’re in a city or county without an HOA, you typically have more freedom, but some municipalities restrict front yard vegetable gardens or require certain setback distances from sidewalks. Review your local ordinances online or call your city planning department to confirm what’s allowed before you invest time and money.
Will my neighbors complain about an edible front yard?
Most neighbor concerns stem from worries about untidy appearance or declining property values, not the concept itself. Prevent complaints by keeping your design neat and attractive from day one. Defined edges, mulched pathways, strategic placement of showy edibles like blueberries and colorful chard, and regular maintenance all signal that your space is intentional landscaping, not a neglected vegetable patch. In practice, well-designed edible landscapes often become neighborhood talking points and inspire copycats rather than complaints.
How much will this project cost?
Budget anywhere from $500 for a modest makeover with perennial herbs and a few berry bushes to $3,000 or more for extensive soil amendment, hardscaping, and mature fruit trees. Your biggest expenses will be quality compost and soil amendments, permanent plants like fruit trees and berry bushes, hardscaping materials for paths and edging, and an irrigation system if you install one. Save money by starting with a small area, propagating plants from cuttings, choosing smaller starter plants that establish quickly, and tackling the work yourself rather than hiring landscapers.
How much time does an edible front yard require?
Plan for 3-5 hours per week during peak growing season for watering, harvesting, and basic maintenance. Perennial-focused designs with good mulch coverage require less ongoing work than annual vegetable beds.
What if wildlife eats everything I plant?
Choose plants that local wildlife ignore (herbs like rosemary and thyme, strongly scented alliums), use netting or cages for vulnerable crops, and accept that sharing some harvest is part of the trade-off. Deer and rabbits cause the most damage in most regions.
Won’t my front yard look bare and ugly in winter?
Select a mix of evergreen edibles like rosemary, thyme, and certain kale varieties, plus ornamental perennials with winter structure. Hardscaping elements and defined beds maintain visual interest year-round even when plants are dormant.
Spring installation timing works best because plants establish roots before summer heat stress. You’ll see your first meaningful harvests within three to four months for fast crops like lettuce and herbs, while fruit trees and berry bushes take one to three years to produce substantial yields.
You’ve now got everything you need to transform your front yard into a thriving edible landscape. Whether you’re starting with a blank slate or reworking an existing garden, the steps we’ve covered will guide you from initial sketch to first harvest.
Don’t feel pressured to tackle everything at once. Start with a single bed of herbs and greens, or plant one dwarf fruit tree this season. Many successful edible front yards evolved gradually over several years, with gardeners learning and adjusting as they went. Your first attempt doesn’t need to be perfect, it just needs to be planted.
The beauty of edible landscaping is that it rewards you twice: once when you step outside and admire how gorgeous your yard looks, and again when you harvest fresh produce for dinner. That combination of visual appeal and practical abundance makes every bit of effort worthwhile.
We’d love to hear how your edible front yard takes shape. Share your progress photos, ask questions when you hit a snag, or tell us about your favorite plant combinations in the comments below. The Gardenoholic community is here to support your journey from lawn to harvest.