Test your ash’s pH before adding it to garden beds—wood ash from untreated logs typically raises soil alkalinity, making it perfect for acid-loving plants like blueberries to avoid. Let ash cool completely for at least 72 hours in a metal container with a lid, stored away from combustible materials, before handling it for garden use. According to chimney and masonry experts at masonchimneyrepair.com, only use ash from clean-burning wood fires, never from treated lumber, colored paper, or anything with chemical coatings that can leach toxins into your soil.
Store cooled ash in waterproof containers until you’re ready to apply it—spring is ideal when you can work it into garden beds before planting. Sprinkle a light dusting around vegetable gardens, particularly where you grow tomatoes, carrots, and brassicas that thrive in slightly alkaline conditions. Apply no more than 20 pounds per 1,000 square feet annually to avoid over-alkalizing your soil. Mix ash into compost piles to balance acidic materials and provide calcium and potassium that boost plant growth. Skip application near acid-loving plants like rhododendrons and azaleas, where ash will create hostile growing conditions rather than help them flourish.
Why Chimney Ash Disposal Matters for Your Garden
If you’re cozy by a wood-burning fireplace this winter, you might be wondering what to do with all that leftover ash. Here’s the exciting part: that gray powder could actually be garden gold, but only if you know what you’re dealing with.
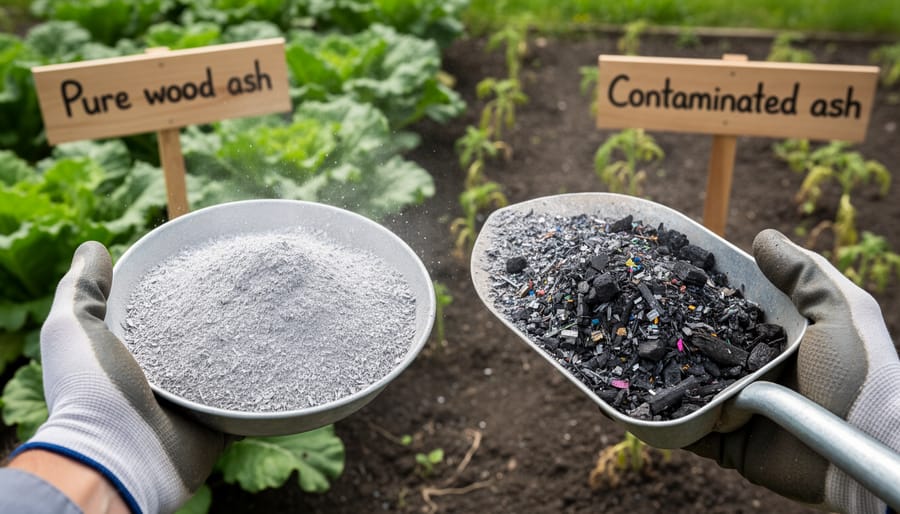
Not all chimney ash is created equal, and understanding the difference can make or break your garden’s health. Pure wood ash from untreated hardwoods contains valuable nutrients like potassium, calcium, and trace minerals that plants love. I remember the first time I added wood ash to my vegetable patch and watched my tomatoes thrive. It felt like discovering a secret ingredient that had been hiding in plain sight all along.
However, ash from treated lumber, painted wood, or coal creates a completely different story. These materials release heavy metals and toxic chemicals that can poison your soil and harm the very plants you’re trying to nurture. The same goes for ash from burning trash, cardboard with glossy finishes, or pressure-treated wood. These contaminants don’t just disappear; they accumulate in your soil and can even make their way into your homegrown vegetables.
This is where responsible homeownership meets garden stewardship. By understanding what you’re burning and how to handle the resulting ash safely, you’re practicing sustainable gardening practices that protect both your family and the environment. The key is knowing your fuel source and testing your soil regularly to avoid overloading it with alkalinity.
The Good Ash vs. The Bad: What You’re Really Dealing With
Wood Ash: Your Garden’s Friend (When Used Right)
Here’s a little secret I learned from my neighbor Margaret, who’s been gardening for thirty years: that pile of ash from your wood-burning fireplace is essentially a mineral-rich treasure waiting to happen. When you burn pure hardwood (think oak, maple, or hickory), you’re left with ash that’s packed with potassium, calcium, magnesium, and trace amounts of phosphorus. These are the same nutrients your plants crave for strong growth and robust fruiting.
The real magic of wood ash lies in its pH-raising properties. If you’ve ever tested your soil and found it too acidic (below 6.5), wood ash can help balance things out. Just a light dusting contains enough alkalinity to gradually neutralize acidic soil conditions. This is particularly helpful for vegetables like asparagus, brassicas, and onions that prefer slightly alkaline environments.
Think of wood ash as nature’s slow-release fertilizer. Unlike synthetic options that can overwhelm plants, ash breaks down gradually, releasing its nutrients over time. However, remember that we’re only talking about pure hardwood ash here. Any ash containing treated lumber, colored paper, or coal is a definite no-go for your garden beds. Keep it simple, keep it pure, and your plants will thank you.
Toxic Ash: What to Never Put in Your Garden
Not all ash is created equal, and some types can seriously harm your garden rather than help it. I learned this the hard way when a neighbor once asked if I wanted ash from their backyard fire pit—turns out they’d been burning old deck boards, and that’s a definite no-go!
Treated wood ash is your garden’s enemy. Pressure-treated lumber contains arsenic, chromium, and other heavy metals that will contaminate your soil for years. Similarly, painted or stained wood releases toxic chemicals when burned, leaving harmful residues in the ash that plants can absorb.
Coal ash is another troublemaker. Unlike wood ash, it contains sulfur and heavy metals that acidify soil and poison beneficial organisms. If you heat with coal, dispose of that ash separately—never in your garden beds.
Burning household trash, glossy magazines, or cardboard with colored inks creates ash loaded with dioxins, plastics residue, and chemical compounds. Even seemingly innocent items like pizza boxes can have wax coatings that leave unwanted chemicals behind.
The golden rule? Only use ash from untreated, natural hardwood logs burned in your fireplace or wood stove. When in doubt, throw it out. Your vegetable garden and family’s health are worth being cautious about what you’re adding to the soil that grows your food.
The Mixed Ash Problem
Let’s be honest—most of us aren’t keeping detailed logs of every fire we’ve had this season. Maybe your family tossed in a pizza box during a cozy evening, or perhaps some painted wood from that old fence found its way into the fireplace. It happens! If you’re unsure about what’s been burned in your chimney, the safest approach is simple: don’t use it in your garden.
Think of it this way: using questionable ash is like eating mystery leftovers from the back of your fridge—it’s just not worth the risk. Treated wood, colored paper, plastics, and other materials can leave behind heavy metals and toxic chemicals that persist in soil for years, potentially contaminating your vegetables and harming beneficial soil organisms.
When in doubt, bag it up and dispose of it with your regular household waste. If you want to use wood ash in your garden moving forward, start fresh by committing to burning only untreated, natural hardwood. You might even designate a small container near your fireplace for clean wood only, making it easy to keep your ash pure and garden-safe.
Safe Collection and Storage: Your First Line of Defense
Cooling Period: The 72-Hour Rule
I learned this lesson the hard way when I once rushed to empty my fireplace, thinking the ash looked completely cool. Two hours later, I discovered scorch marks on my metal trash can! Here’s the truth: ash is incredibly deceptive. Those fluffy gray flakes can hide glowing embers deep inside for days, and one tiny spark can ignite dry leaves, paper, or even your wooden garden shed.
The 72-hour rule exists for good reason. Even when your fireplace appears stone cold, buried coals can retain heat much longer than you’d expect. If you transfer “cool” ash too soon, you risk starting fires in containers, compost bins, or wherever you’ve spread it in the garden.
To test if ash is truly ready, try the hand test: carefully hover your palm a few inches above the ash pile. Feel warmth? Wait longer. For extra safety, gently stir the ash with a metal poker, checking for any red glow or heat rising from deeper layers. Only when the entire pile feels room temperature throughout should you proceed with disposal. Remember, patience here prevents potential disasters and keeps your garden project safe and enjoyable.
Container Selection and Storage Tips
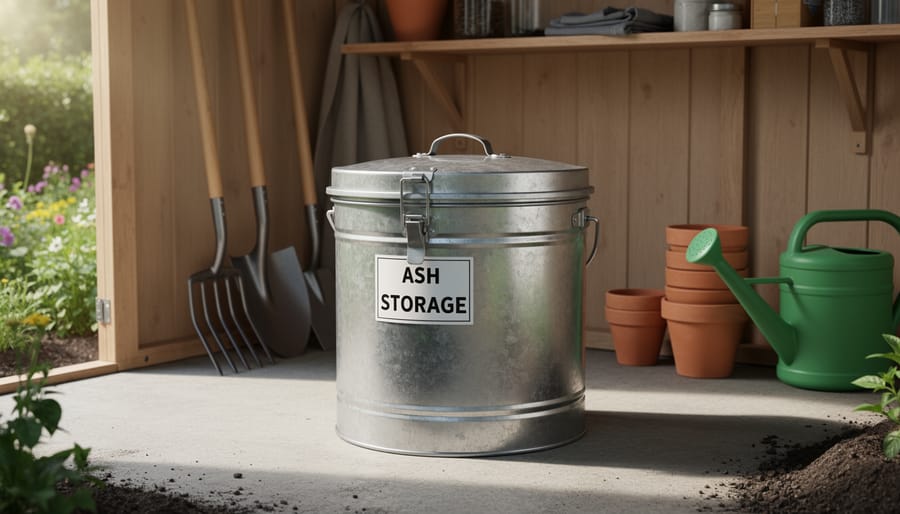
Storing ash safely is as important as the wood you burn! I learned this lesson the hard way when I carelessly left warm ash in a plastic bucket, which warped overnight. Always collect ash in metal containers with tight-fitting lids—a galvanized steel bucket or metal trash can works perfectly. These fireproof vessels prevent any lingering embers from causing problems, and the lid keeps moisture and rain out while containing fine dust particles.
Store your ash container on a non-combustible surface like concrete or stone, well away from your house, deck, or anything flammable. I keep mine near my garden shed on a paving stone. Even ash that feels completely cold can harbor hot spots for several days, so give it at least a week to cool before use.
Keep your ash dry during storage. Wet ash becomes caustic and messy, making it harder to spread evenly in the garden. A covered, well-ventilated outdoor spot is ideal. Once you’re confident it’s completely cool and you’ve confirmed it’s wood-only ash, you’re ready to put it to work enriching your garden soil!
Sifting and Debris Removal
Before adding ash to your garden, you’ll need to remove any unwanted debris that often hides in what looks like pure ash. I learned this the hard way after discovering a rusty nail in my tomato bed—not fun!
Here’s a simple sifting method that takes just minutes. Grab an old kitchen colander or a piece of window screen stretched over a bucket. Working outdoors on a calm day (trust me, wind and ash don’t mix), scoop cooled ash onto your sifter and gently shake it back and forth. The fine ash will fall through while nails, staples, bits of unburned wood, metal fragments, and even small stones stay behind.
Check the debris carefully—sometimes chunks of partially burned wood can slip through. These pieces aren’t fully composted and can alter soil composition unpredictably. Toss any questionable materials into your regular trash.
For larger quantities, consider using a hardware cloth frame. It speeds up the process considerably and your back will thank you. Once sifted, your ash is ready for garden application, giving you that clean, debris-free amendment your plants deserve.
How to Actually Use Wood Ash in Your Garden (Without Overdoing It)
Test Your Soil First (This Step Saves Gardens)
Before you spread a single handful of ash, grab a soil testing kit—it’s honestly the most important step! I learned this the hard way when I enthusiastically added ash to my already alkaline soil and watched my blueberries struggle. Wood ash raises pH levels, which is fantastic if your soil is acidic, but potentially harmful if it’s already neutral or alkaline.
Testing your soil takes just minutes with an inexpensive home kit from any garden center. You’re looking for a pH number between 0-14. Most vegetables prefer 6.0-7.0. If your soil tests above 7.0, skip the ash entirely—your garden doesn’t need it. Between 5.5-6.5? You’ve got the green light for moderate ash application. Below 5.5? Ash can be particularly beneficial for improving soil health and pH.
This simple test prevents nutrient lockout, protects acid-loving plants, and ensures your ash actually helps rather than hinders your garden’s success.
Application Rates That Actually Work
Getting the application rate right is crucial for success. Think of ash like seasoning in cooking—a little goes a long way! For most garden areas, apply no more than half a cup of ash per square yard, which is about the same amount as a small coffee mug spread over a space roughly the size of a bathroom floor tile.
I learned this the hard way when I enthusiastically dumped a whole bucket on my tomato bed one spring. The plants looked stunted for weeks until I realized I’d overdone it. Now I measure carefully, and my vegetables thank me for it.
For lawns, sprinkle ash so lightly that you can still see grass blades through it—imagine dusting powdered sugar on a cake. Around acid-loving plants like blueberries and azaleas, skip the ash entirely or use just a pinch every few years.
A practical approach is to start with one 5-gallon bucket of ash per 1,000 square feet of garden space annually. That’s about ten standard garden beds. Always test your soil pH first, and if it’s already above 6.5, hold off on adding any ash. Remember, you can always add more next season, but removing excess ash is nearly impossible.
Best Times and Methods for Spreading Ash
Timing your ash application makes all the difference in keeping your garden happy and healthy. The best time to spread wood ash is during fall or early winter, giving it several months to break down before spring planting. I learned this the hard way my first year when I enthusiastically scattered fresh ash in March, only to watch my tender seedlings struggle with the pH shock.
Always spread ash on a calm, dry day to prevent it from blowing away or clumping. Avoid applying it during rainy periods, as wet ash becomes difficult to distribute evenly and can form a cement-like crust on your soil surface.
For incorporation method, you have two good options. Lightly digging ash into the top few inches of soil works wonderfully for vegetable beds, allowing it to mix thoroughly and start neutralizing acidity right away. This approach gives you more control over distribution. Alternatively, surface spreading works beautifully around established plants and in ornamental beds, where the ash will gradually work its way down with rainfall and watering. Just remember to water it in gently afterward to prevent wind drift and help it start breaking down. Whichever method you choose, always apply sparingly – a light dusting goes much further than you’d think.
Plants That Love Ash (And Those That Don’t)
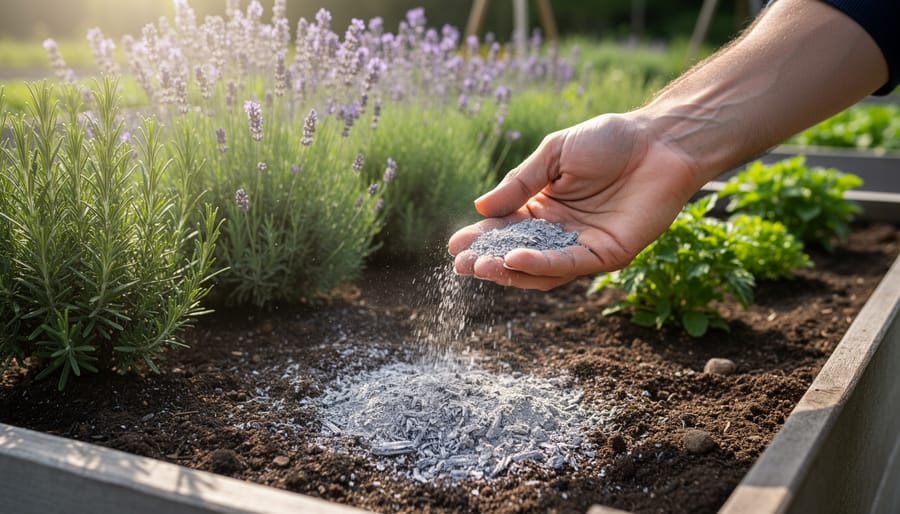
Wood ash works wonders for alkaline-loving plants like tomatoes, carrots, garlic, and brassicas (broccoli, cabbage, kale). Root vegetables especially appreciate the extra potassium boost ash provides. Many herbs thrive with ash, including lavender, rosemary, and thyme. For flowers, try roses, clematis, and lilacs—they’ll reward you with vibrant blooms.
However, skip the ash on acid-loving plants like blueberries, azaleas, rhododendrons, and potatoes. These prefer lower pH levels and won’t appreciate the alkaline kick. Before applying ash anywhere, test your soil’s pH first. If you’re planning your beds strategically, check out our companion planting guide to maximize ash benefits alongside compatible plant pairings.
Alternative Uses When Your Garden Doesn’t Need More Ash
Not every garden needs ash, and that’s perfectly okay! If you’ve already applied enough this season or your soil is naturally alkaline, you’ll need other responsible ways to handle your fireplace leftovers.
First, check with your local waste management department. Many communities accept cold wood ash in regular trash bins when properly stored in a metal container with a tight-fitting lid. Just make sure it’s completely cooled for at least a week before disposal.
Here’s a creative alternative I discovered last winter: ash makes an excellent ice-melt for walkways and driveways. It provides traction without the harsh chemicals that damage plants and paws. Simply sprinkle a thin layer on icy patches, and you’ll have safer footing without contributing to spring runoff problems.
You can also offer ash to fellow gardeners who might benefit from it. Community gardens often welcome donations, especially if members are growing acid-loving plants and need pH adjustments. Before sharing, always mention whether your ash comes purely from untreated wood so recipients can make informed decisions.
For those maintaining compost piles, small amounts of ash can help balance acidic materials, though moderation is key. Think of it as seasoning, not a main ingredient. A light dusting every few weeks is plenty to support the decomposition process without throwing off your compost’s delicate chemistry.
Making Ash Disposal Part of Your Chimney Maintenance Routine
Making ash disposal a regular part of your chimney care routine doesn’t have to be complicated. Think of it as another seasonal rhythm, just like starting seeds in spring or mulching in fall. Here’s a simple approach that works beautifully for most homeowners.
During heating season, store your cooled wood ash in a covered metal container between uses. Every few weeks when the container fills up, that’s your reminder to add a light layer to your garden beds or compost pile. I keep a small notebook near my ash bucket to track how much I’ve applied and where, preventing me from overdoing it in any one spot.
When spring arrives and you schedule your annual chimney inspection, use that same week to do a final ash application before planting season begins. Test your soil pH at this time too, so you’ll know if you need to adjust your ash usage for the coming year.
Before firing up your chimney again in fall, clean out any remaining ash and give it one last garden application. This creates a natural yearly cycle where chimney maintenance and garden enrichment work hand in hand, making both tasks easier and more rewarding.
Turning chimney ash into a garden resource isn’t just about being resourceful—it’s about being thoughtful and safe. Remember, the three golden rules are always at the heart of responsible ash disposal: test your soil first, use only hardwood ash in moderation, and ensure ash is completely cool before handling. I’ve learned over the years that the best gardeners are those who pay attention to the small details, whether they’re tending their tomatoes or maintaining their fireplaces.
Think of chimney maintenance and gardening as two sides of the same coin. Both require regular attention, a bit of knowledge, and respect for safety practices. When you clean your chimney properly and handle ash with care, you’re not just protecting your home—you’re potentially enriching your garden beds and reducing waste headed to the landfill.
Start small if you’re new to this practice. Test a corner of your garden, observe the results, and adjust accordingly. Your garden will tell you what it needs, and with these safety principles in mind, you’ll be making choices that benefit both your household and the environment. Happy gardening, and here’s to warm fires and thriving gardens!