Growing healing flowers and herbs at home takes about 8-12 weeks from seed to first harvest, requires only basic gardening tools, and gives you direct access to natural remedies right outside your door. You’ll start seeds indoors or directly in the garden (depending on your climate), nurture plants with consistent watering and sunlight, then harvest leaves, flowers, or roots to prepare simple teas, salves, and tinctures. The process works because most medicinal plants are surprisingly low-maintenance once established, often thriving in conditions where fussy ornamentals struggle.
I started my medicinal garden three years ago with just six varieties, and I was amazed at how quickly chamomile and calendula took over a sunny corner of my backyard. What began as curiosity about natural wellness transformed into a year-round supply of remedies I actually use. The best part? You don’t need a sprawling plot or advanced horticultural knowledge. A few containers on a balcony or a small raised bed will support a solid collection of healing plants.
This guide walks you through selecting the right plants for your space and climate, preparing soil that encourages strong root systems, timing your planting for optimal growth, and safely harvesting and preparing your botanicals. You’ll learn how to grow herbal flowers like echinacea and lavender alongside classic medicinal herbs such as mint and sage. We’ll also cover critical safety guidelines, because not every plant is appropriate for every person, and proper identification prevents serious mistakes.
Understanding Healing Flowers and Herbs: What Makes Them Work
Plants earn their “healing” reputation through chemistry, not magic. The flowers and leaves you grow contain specific compounds that interact with human biology in measurable ways. Understanding what makes these plants work helps you choose the right varieties and use them effectively.
The therapeutic power comes from bioactive compounds in medicinal plants such as essential oils, flavonoids, tannins, and alkaloids. Essential oils give lavender its calming effect and peppermint its digestive benefits. Flavonoids in chamomile provide anti-inflammatory properties. These compounds develop as the plant grows, concentrating in different parts depending on the species, sometimes in flowers, sometimes in leaves or roots.
Not all healing plants serve the same purpose. Culinary herbs like basil and thyme contain medicinal compounds but in gentler concentrations suitable for daily cooking. Medicinal varieties, echinacea, calendula, St. John’s wort, produce stronger concentrations of active ingredients specifically for therapeutic use. Ornamental varieties bred for appearance often sacrifice potency for prettier blooms or longer flowering periods.
Here’s what matters for home gardeners: your fresh or properly dried herbs will have therapeutic value, but they won’t match pharmaceutical strength. A cup of homegrown chamomile tea soothes mild anxiety and aids sleep, but it won’t replace prescription medication for clinical conditions. Growing conditions affect potency too, plants stressed by poor soil or wrong sunlight levels produce fewer active compounds.
Set realistic expectations. Your healing garden excels at supporting everyday wellness, managing minor complaints, and preventing problems rather than curing disease. That’s not a limitation; it’s exactly what makes these plants valuable for daily life.
Essential Supplies and Materials You’ll Need
Getting started with healing flowers and herbs doesn’t require expensive equipment or specialized tools. Most items you’ll need are standard gardening supplies, and you probably own some already. I’ve organized everything by phase so you can gather what you need as your garden develops.
For Growing Your Healing Garden:
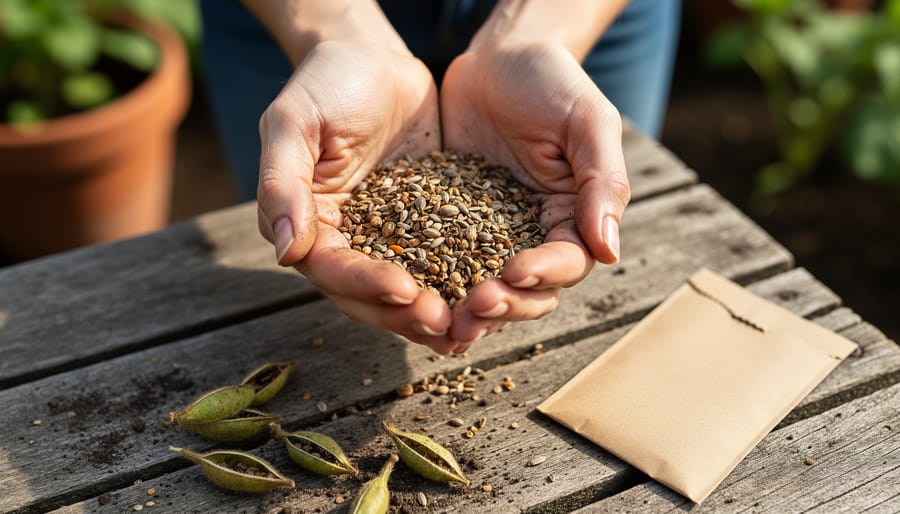
Seeds or starter plants are your foundation. Starter plants give you a head start and ensure correct plant identification, while seeds offer more variety at lower cost. Choose organic when possible, especially for plants you’ll ingest.
Quality potting mix matters more than you’d expect. Look for well-draining blends designed for herbs, or create your own with equal parts compost, peat moss or coconut coir, and perlite. Garden soil needs amendments too, compost and aged manure improve both drainage and fertility.
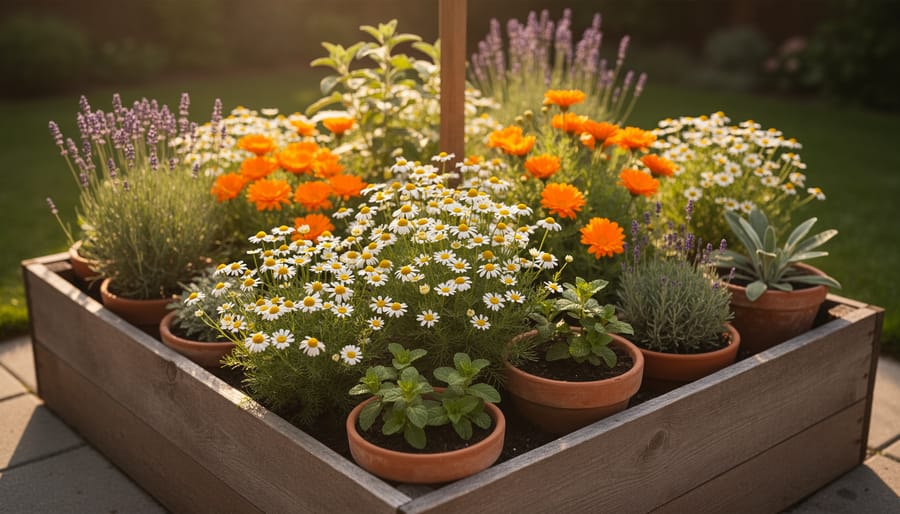
Containers should have drainage holes and hold at least two gallons for most herbs. Terra cotta breathes well but dries quickly, while plastic retains moisture longer. In-ground gardeners can skip these.
Basic hand tools, a trowel, hand cultivator, and pruning shears, handle planting and maintenance. A watering can with a gentle rose attachment prevents washing away seeds.
For Harvesting and Preserving:
- Sharp scissors or herb snips for clean cuts that won’t crush stems
- Breathable harvest baskets or paper bags (never plastic, which traps moisture)
- Drying racks, screens, or bundles of twine for air-drying
- Food dehydrator if you’re processing large quantities
- Clean glass jars with tight-fitting lids in various sizes
- Labels and permanent markers for tracking harvest dates and plant names
- Kitchen scale for measuring dried herbs accurately
For Basic Preparation:
A mortar and pestle crushes dried flowers and leaves for teas. You’ll also want a fine-mesh strainer, cheesecloth for infusions, and small amber glass bottles for storing tinctures away from light. A notebook dedicated to your healing garden helps you track what works, harvest dates, and preparation notes, invaluable as your garden grows.
Start with the growing essentials, then add harvesting and preparation supplies as your first plants mature. There’s no need to buy everything at once.
Important Safety Precautions Before You Begin
Before you plant your first healing herb or harvest a single flower petal, understand that natural doesn’t automatically mean safe. Even plants with genuine medicinal properties can cause serious harm when misidentified, improperly used, or combined with medications you’re already taking.
Plant identification errors cause real injuries every year. Poisonous hemlock looks similar to yarrow and Queen Anne’s lace, while foxglove can be mistaken for comfrey. If you’re working from seeds or transplants from reputable nurseries, you’re starting with correct identification, but wild harvesting requires expert-level knowledge. When in doubt, don’t use it.
Allergies present another critical concern. If you’re allergic to ragweed, you’ll likely react to chamomile and calendula, which belong to the same plant family. Always perform a patch test before applying any herbal preparation to large areas of skin, and start with tiny amounts when trying a new tea or tincture.
Medication interactions are surprisingly common with healing herbs. St. John’s wort interferes with birth control pills, antidepressants, and blood thinners. Echinacea may worsen autoimmune conditions. If you take any prescription medications, check for interactions before adding herbal remedies to your routine.
Pregnant and breastfeeding women should avoid most medicinal herbs unless specifically approved by their healthcare provider. Many compounds that are safe for adults cross the placental barrier or enter breast milk, potentially affecting developing babies.
Finally, remember that home remedies complement professional medical care, they don’t replace it. Growing healing plants offers wonderful wellness support for minor concerns like occasional sleeplessness or mild skin irritation, but serious symptoms require a doctor’s evaluation.
Top Healing Flowers and Herbs to Grow in Your Garden
Starting your medicinal garden with reliable, easy-to-grow plants sets you up for success. These eight varieties thrive in most climates, forgive beginner mistakes, and deliver genuine wellness benefits.
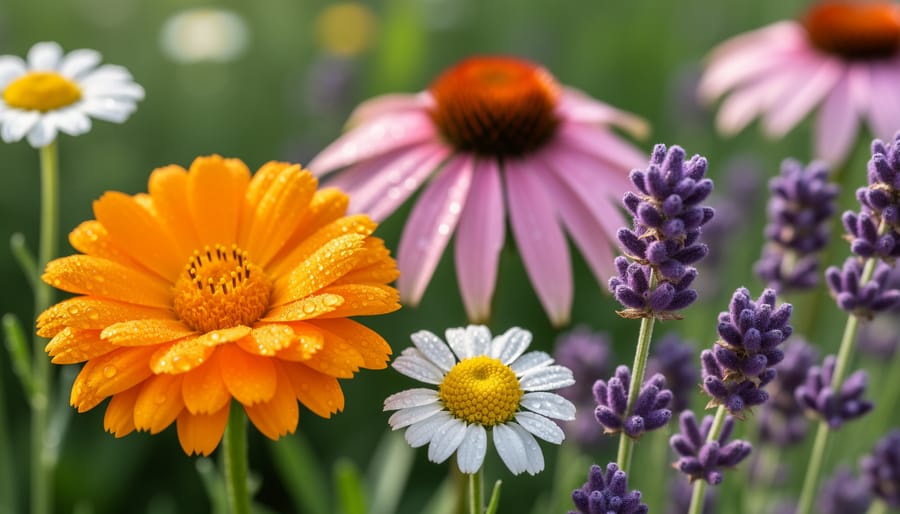
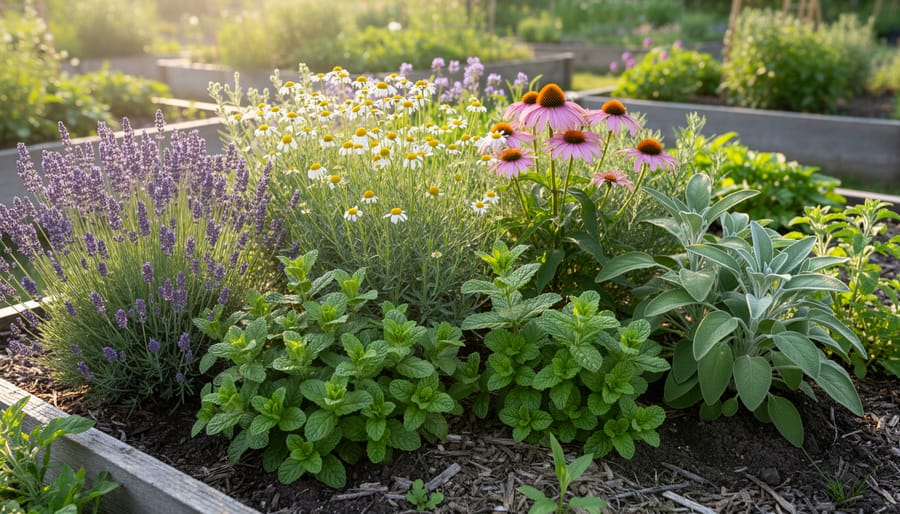
Calendula tops the list for good reason. These cheerful orange and yellow blooms heal minor cuts, burns, and skin irritations when made into salves or oils. They’re nearly foolproof in full sun with average soil, blooming continuously if you deadhead regularly. Difficulty: Very easy.
Chamomile produces delicate daisy-like flowers that make the classic calming tea. German chamomile grows as an annual reaching 24 inches, while Roman chamomile forms a low perennial groundcover. Both prefer full sun and well-drained soil, and they actually produce more essential oils in slightly dry conditions. Difficulty: Easy.
Lavender offers stress relief through its fragrant flowers, which you can use fresh or dried for sachets, teas, and bath products. English lavender handles cold better than French varieties. Give it full sun, lean soil, and excellent drainage, it’s one of those low-water herbs that actually suffers from kindness. Difficulty: Easy to moderate.
Echinacea (purple coneflower) supports immune function, with roots, leaves, and flowers all usable in teas and tinctures. These North American natives handle heat, drought, and poor soil once established. Full sun brings the best flowering. Difficulty: Easy.
Lemon balm grows with such enthusiasm you might need to contain it, but that vigor means plenty of leaves for calming, antiviral teas. It tolerates partial shade and average soil. Harvest before flowering for the strongest lemon scent. Difficulty: Very easy.
Holy basil (tulsi) adapts your body to stress and supports respiratory health. Unlike culinary basil, you grow it specifically for tea. It needs warm soil to germinate, full sun, and consistent moisture. Pinch growing tips to encourage bushiness. Difficulty: Easy.
Yarrow produces flat-topped flower clusters in white, pink, or yellow, useful for wound healing and fever reduction. This tough perennial spreads readily, tolerates drought, and actually prefers poor soil. Too much fertilizer creates floppy growth. Difficulty: Very easy.
St. John’s wort flowers support mood balance when prepared as teas or oils. The bright yellow blooms appear in midsummer on plants that prefer full sun and good drainage. Note that this herb interacts with many medications, so research safety thoroughly. Difficulty: Easy.
These healing herbs form the foundation of a practical wellness garden that grows more abundant each season.
Step-by-Step: Growing Your Healing Garden
Step 1: Choose the Right Location and Prepare Your Soil
Most healing herbs thrive in full sun, at least six hours of direct sunlight daily, though a few like lemon balm and mint tolerate partial shade. Scout your yard for the sunniest spot, ideally with southern or western exposure. Before you plant, check drainage by digging a hole about a foot deep, filling it with water, and watching how quickly it drains. If water sits for more than a few hours, you’ve got poor drainage that can rot roots. Fix this by building raised beds or mounding soil to lift plants above waterlogged ground.
Test your soil pH with a simple kit from any garden center; most medicinal herbs prefer slightly acidic to neutral soil (pH 6.0-7.0). If your soil for herbs is heavy clay, work in compost and coarse sand to improve structure. Sandy soil benefits from compost alone to boost nutrients and water retention. Many herbs actually prefer lean soil over heavily fertilized beds, too much nitrogen produces lush leaves with weak flavor and reduced medicinal potency.
Containers offer flexibility if your yard lacks ideal conditions. Use pots at least 12 inches deep with drainage holes, and you can move them to chase sunlight or escape harsh weather.
Step 2: Start Your Plants from Seeds or Transplants
Starting your healing garden begins with understanding your last frost date, this determines when tender herbs like basil can go outdoors safely. Hardy perennials such as echinacea and yarrow tolerate direct sowing two weeks before the last frost, while annuals like calendula prefer waiting until danger has passed.
Most healing herbs transplant well and give you a head start. Purchase seedlings from reputable nurseries or start seeds indoors 6-8 weeks before your planting date. Chamomile and lavender have tiny seeds that need light to germinate, so press them gently onto the soil surface without covering.
Space plants according to their mature size: lavender needs 18-24 inches, while compact herbs like thyme work fine at 12 inches apart. Crowding invites fungal issues and reduces air circulation.
If you started plants indoors, harden them off gradually over 7-10 days. Set them outside for a few hours daily, increasing exposure time. This prevents transplant shock when they face full sun and wind.
Water transplants thoroughly at planting, then maintain consistent moisture for two weeks while roots establish. After that, most healing herbs prefer drier conditions between waterings.
Step 3: Maintain Your Healing Plants Through the Season
Most healing herbs are wonderfully low-maintenance once established. Water deeply but infrequently, once or twice weekly for most varieties, allowing soil to dry between sessions. Lavender, calendula, and yarrow actually prefer minimal watering once their roots are established, as they’re adapted to Mediterranean conditions. Overwatering causes root rot and dilutes essential oils.
Skip the fertilizer for most medicinal herbs. They develop stronger, more potent compounds in lean soil. Rich conditions produce lush, pretty growth but weaker healing properties. If plants look pale, a light compost tea mid-season is plenty.
Prune regularly to encourage bushy, productive growth. Pinch stem tips when plants reach six inches tall, then harvest frequently. This prevents flowering in basil and lemon balm, keeping leaves tender and flavorful.
For pests, start with the simplest solution: a strong spray of water dislodges aphids. Companion planting works brilliantly, yarrow attracts beneficial insects, while strong-scented herbs like lavender confuse pests. Hand-pick larger insects at dawn when they’re sluggish. Reserve neem oil or insecticidal soap for persistent problems, applying in early morning to avoid harming pollinators.
Step 4: Harvest at Peak Potency
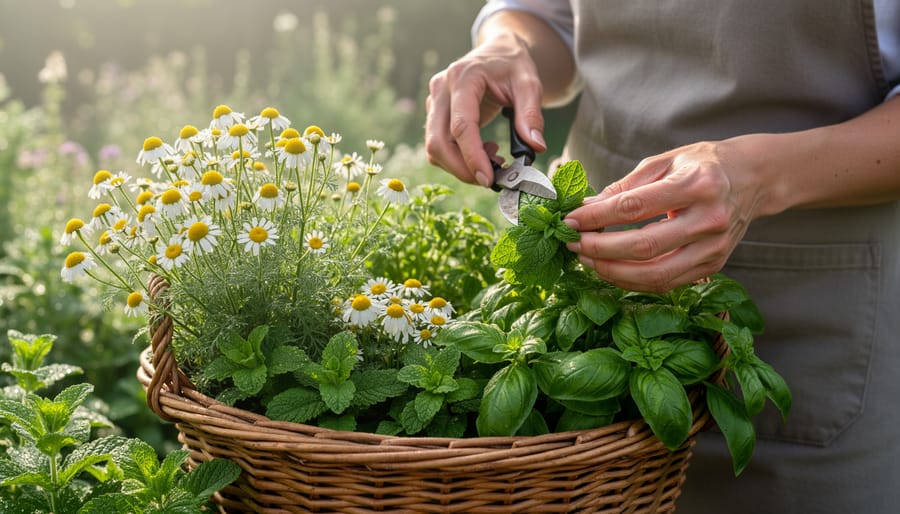
Timing makes all the difference when harvesting healing flowers and herbs. The essential oils that give these plants their medicinal punch are at their peak mid-morning, typically between 10 a.m. and noon, after the dew has dried but before the afternoon heat causes oils to evaporate. You’ll literally smell the difference, plants harvested at the right time release stronger fragrance when you brush against them.
Different plants offer different parts for healing. Harvest lavender and chamomile flowers just as they fully open, calendula petals when blooms are at their brightest, and leafy herbs like lemon balm and holy basil before they flower (flowering redirects energy away from leaf production). For echinacea, you can use both the flowers and roots, though roots require digging up the entire plant after at least three years of growth.
Follow these practices for a successful harvest that keeps your plants producing:
- Use clean, sharp scissors or pruning shears to make angled cuts that shed water and prevent disease
- Cut stems about one-third down from the top, just above a leaf node where new growth will emerge
- Never take more than one-third of the plant at once, this leaves enough foliage for continued photosynthesis and regrowth
- Harvest from multiple plants rather than stripping one bare
- Stop harvesting six weeks before your first expected frost to let plants harden off for winter
Your plants will respond to thoughtful harvesting by becoming bushier and more productive, giving you multiple cuts throughout the growing season rather than just one.
How to Preserve and Prepare Your Healing Harvest
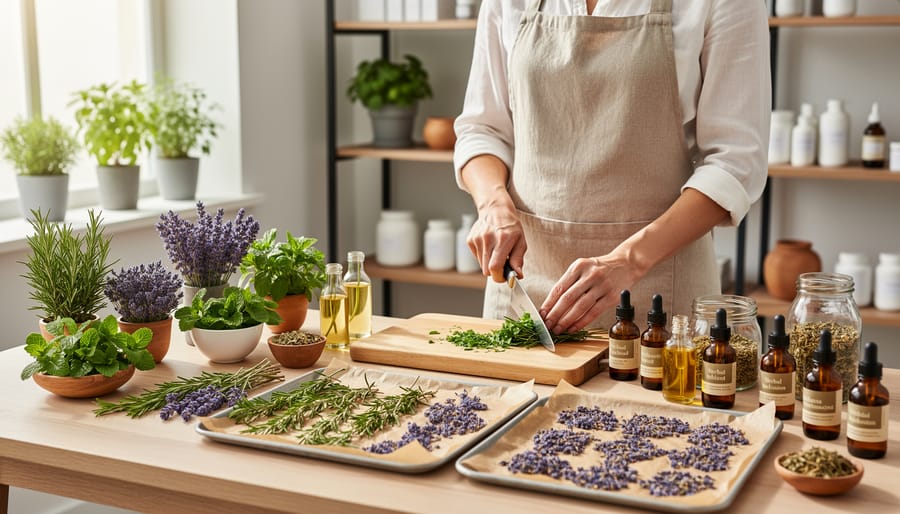
After you’ve carefully timed your harvest for peak potency, preserving those healing flowers and herbs correctly determines whether you maintain their therapeutic properties or end up with flavorless, ineffective plant material. The method you choose depends on your available equipment, climate, and which plant parts you’re preserving.
- Air drying works best for low-humidity climates and sturdy herbs like lavender, yarrow, and sage, bundle stems and hang upside down in a dark, well-ventilated space for 1-2 weeks
- Dehydrator drying gives you the most control and works in any climate, set between 95-115°F to preserve essential oils while removing moisture in 2-4 hours
- Oven drying serves as a quick backup method when you need results fast, use the lowest setting (ideally under 180°F) with the door cracked, checking every 20 minutes to prevent scorching
Regardless of method, your herbs are properly dried when stems snap cleanly rather than bend, and leaves crumble when rubbed between your fingers. Delicate flowers like chamomile and calendula need gentler handling than woody herbs.
Store dried material immediately in airtight glass jars away from direct light and heat. Label each jar with the plant name and harvest date, this matters because potency fades over time. Dried leaves and flowers typically maintain their strength for one year, while roots can last two years if stored whole and ground only when needed.
For basic preparations, start with simple teas by steeping 1-2 teaspoons of dried herb per cup of hot water for 5-10 minutes. Infusions use the same ratio but steep for 4-8 hours to extract more compounds, making them stronger than regular tea. Tinctures require covering herbs with 80-proof alcohol in a glass jar, shaking daily for 4-6 weeks, then straining, the alcohol preserves active compounds for 3-5 years. For topical salves, gently heat dried herbs in a carrier oil (like olive or coconut) for several hours, strain, then add beeswax to create a semi-solid consistency.
Dried sachets are the simplest preparation, just fill small fabric bags with aromatic flowers like lavender for drawers or pillows, replacing them when the scent fades after 2-3 months.
Checking Your Results: Signs of Success and Troubleshooting
Healthy healing plants show several clear signs: vibrant leaf color (deep green for most herbs, silvery-green for lavender), steady new growth throughout the season, and strong fragrance when you gently rub the leaves. That last indicator matters most, essential oils are what give medicinal plants their therapeutic properties, so if your chamomile barely smells or your lavender lacks its characteristic scent, the plants aren’t producing enough active compounds to be truly useful.
Growth rate tells you a lot too. Most healing herbs should produce enough foliage for a small harvest within 6-8 weeks of transplanting, with perennials like echinacea ready for root harvest after their second year. Annuals like calendula bloom within 60 days from seed. If your plants seem stunted or grow very slowly, check whether they’re getting at least six hours of direct sun and haven’t been over-fertilized, too much nitrogen creates lush leaves with diluted essential oils.
Yellowing leaves usually signal overwatering, especially in Mediterranean herbs like rosemary and thyme that prefer drier conditions. Let the soil dry between waterings and improve drainage if needed. Pale, washed-out foliage often means insufficient light; move containers or trim back competing plants. Leggy growth with sparse leaves indicates the same issue, most medicinal plants concentrate their oils best in full sun.
If flower production disappoints you, resist the urge to add fertilizer. Many healing plants bloom more profusely under slight stress. For herbs grown primarily for leaves, like lemon balm or holy basil, pinch off flower buds to redirect energy into foliage production, which is where the medicinal compounds concentrate anyway.
Frequently Asked Questions About Healing Flowers and Herbs
Which healing herbs are easiest for complete beginners?
Calendula, chamomile, and lemon balm are practically foolproof choices that tolerate occasional neglect, grow quickly, and produce reliable harvests. All three thrive in average soil with minimal fussing and forgive beginners’ common mistakes like inconsistent watering.
Can I grow medicinal herbs indoors successfully?
Yes, though your options narrow to shade-tolerant plants like lemon balm, holy basil, and peppermint if you lack strong natural light. A south-facing window or supplemental grow lights will expand your choices to include lavender and calendula, but don’t expect the same potency as outdoor-grown plants.
Do I need organic certification to grow herbs for my own use?
No. Certification matters only if you plan to sell products labeled “organic.” For personal use, simply avoid synthetic pesticides and fertilizers, and you’ll have chemical-free remedies without the paperwork or inspection fees.
Are fresh herbs more potent than dried ones?
Fresh herbs contain more moisture but not necessarily more active compounds, drying actually concentrates essential oils by weight. Use three times more fresh herb than dried in recipes to account for water content, but both forms work effectively when harvested and stored properly.
How long do homemade herbal remedies stay effective?
Dried herbs maintain potency for six months to one year when stored in airtight containers away from light and heat. Tinctures last two to three years, while infused oils and salves remain effective for roughly six months in cool, dark conditions.
Should I harvest in the morning or evening for best results?
Mid-morning after dew has dried but before afternoon heat hits gives you peak essential oil content. Evening harvests work in a pinch, but avoid picking when plants are wet or during the hottest part of the day when oils have volatilized.
These questions reflect what most new medicinal gardeners wonder about as they start their first healing garden. You’ll find your own rhythm as you work with your plants, some growers swear by moon phases for harvesting, while others simply pick when they have time. The beauty of growing your own remedies is that you control every step, from seed selection to final preparation, which means you know exactly what goes into the teas and salves you create. Start with the questions that matter most to your situation, experiment with one or two plants, and let your confidence build naturally as you watch your garden flourish.
Starting your journey with healing flowers and herbs doesn’t require a massive garden or extensive botanical knowledge. Pick two or three plants that genuinely excite you, maybe lavender for its calming scent, chamomile for evening tea, or calendula for skin care, and give them your full attention this first season.
As you watch these plants flourish under your care, you’ll discover something special: growing your own remedies connects you to an ancient tradition while giving you practical tools for everyday wellness. There’s real satisfaction in picking fresh lemon balm for tea or harvesting calendula petals you nurtured from seed.
Remember those safety guidelines we covered earlier. Always identify plants correctly, start with small amounts when trying new remedies, and consult your healthcare provider if you’re taking medications or managing health conditions. Your healing garden should enhance your wellbeing, not create risks.
Once you’ve successfully grown and used your first few plants, you’ll naturally want to expand. That’s when the real adventure begins, experimenting with new varieties, refining your preservation techniques, and discovering which remedies work best for you and your family.
Enjoy the entire process, from turning soil to sipping your homegrown tea. Your healing garden offers rewards at every stage.