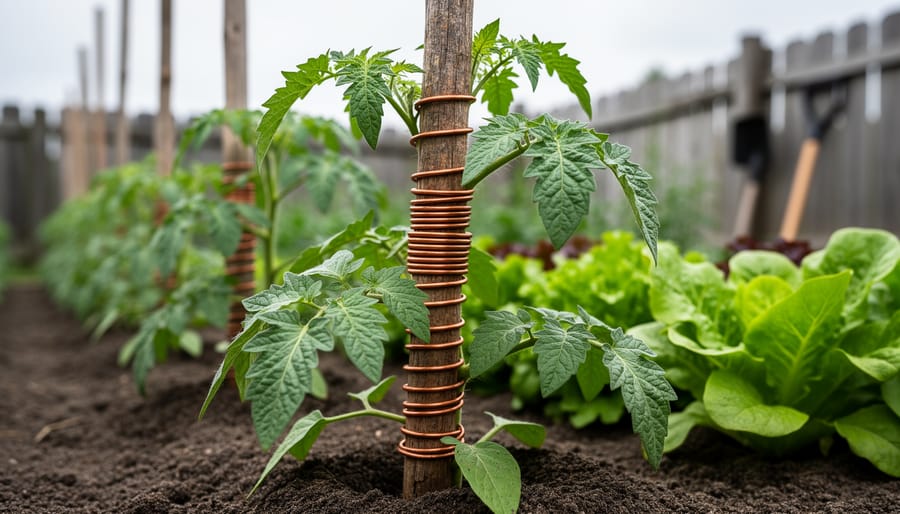
Electro culture gardening uses low-level electrical currents or atmospheric energy to boost plant growth, typically by placing copper wires, antennas, or magnetic coils near your plants. You’ll wrap copper wire around wooden stakes or create simple antenna structures in your garden beds, then observe your plants over a three-month growing cycle to see if they grow faster, healthier, or produce more than control plants. The method has roots in early 20th-century agricultural experiments, though modern scientific evidence remains limited and mixed.
If you’ve stumbled across those viral videos of towering tomatoes next to copper coils or read about farmers in the 1920s boosting crop yields with antenna arrays, you’re probably equal parts intrigued and skeptical. That’s exactly the right mindset. This technique sits somewhere between traditional gardening wisdom and fringe experiment, which makes it perfect for curious gardeners who love testing unconventional methods in a corner of their plot.
The beauty of electro culture is its simplicity. You won’t need expensive equipment or a degree in electrical engineering. Most setups require only copper wire, wooden stakes, and basic hand tools you probably already own. The real investment is patience and a willingness to document what happens, because you’ll be conducting your own science experiment. Some gardeners report remarkable improvements in plant vigor and yield, while others see no difference at all. Your soil type, climate, and even your specific plant varieties might influence results in ways we don’t fully understand yet.
This guide walks you through the complete process, from gathering materials to evaluating your harvest, with safety precautions and realistic expectations built in at every step.
What You’ll Need to Get Started
Setting up your first electroculture garden experiment doesn’t require a trip to a specialty shop or a hefty budget. You can gather everything you need from your local hardware store, garden center, or online retailers for under $30 in most cases. The beauty of this project is its simplicity, you’re working with basic materials that let you test this emerging technique without major investment.
Here’s what you’ll need for a basic electroculture setup:
- Copper wire (14 to 18 gauge works best), about 10-15 feet per antenna
- Wooden or bamboo stakes (4 to 6 feet tall, untreated), one per antenna structure
- Wire cutters or heavy-duty scissors for cutting copper
- Measuring tape to track plant growth and spacing
- Optional: copper grounding rods (8-12 inches) if you want to experiment with grounding
- Optional: pliers to help shape and secure wire coils
- Notebook or smartphone app for recording observations
When selecting your materials, pay close attention to chemical treatments. Avoid pressure-treated lumber, painted stakes, or coated wires that could leach unwanted substances into your soil. Pure copper wire and natural wood or bamboo keep your experiment clean and won’t compromise your garden’s health. If you’re growing organically, this matters even more.
Most hardware stores stock copper wire in their electrical department, while garden centers carry untreated bamboo stakes year-round. You’ll find the wire costs around $10-15 for enough to build two or three antennas, and stakes run about $2-5 each depending on height and material. That means you can set up multiple test structures for the price of a couple of tomato transplants, making this an accessible experiment for any gardener curious about trying something new.
Safety and Important Considerations
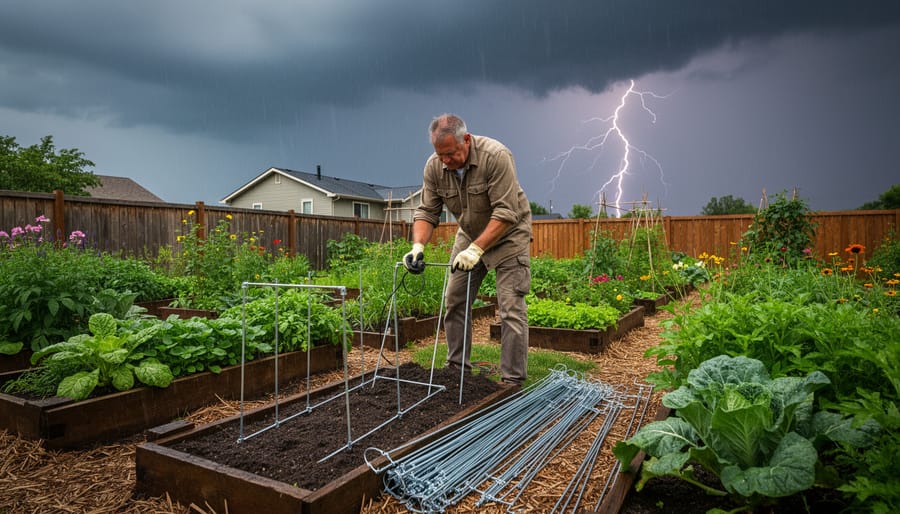
Before you install anything in your garden, understand that electroculture setups involve metal structures that interact with atmospheric conditions. While these are low-voltage, passive systems that don’t connect to household electricity, they still require thoughtful placement and seasonal awareness to stay safe.
Keep your antennas at least 25 feet away from power lines, underground utility lines, and existing electrical systems. If you live in an area with frequent severe weather or your property has buried cables, gas lines, or irrigation systems, electroculture might not be the right fit for your garden. Call 811 before digging or installing anything to mark underground utilities.
This technique is experimental, and scientific evidence supporting its effectiveness remains limited and largely anecdotal. Approach electroculture as a garden experiment rather than a proven method. You might see interesting results, or you might not notice any difference at all. That’s okay. The point is testing it yourself with realistic expectations and solid safety practices in place.
Never position electroculture structures where they could fall onto pathways, power equipment, or areas where children and pets play. Secure them well so wind won’t topple them, and inspect them regularly throughout the growing season for damage or instability.
How to Set Up Your Electroculture Garden
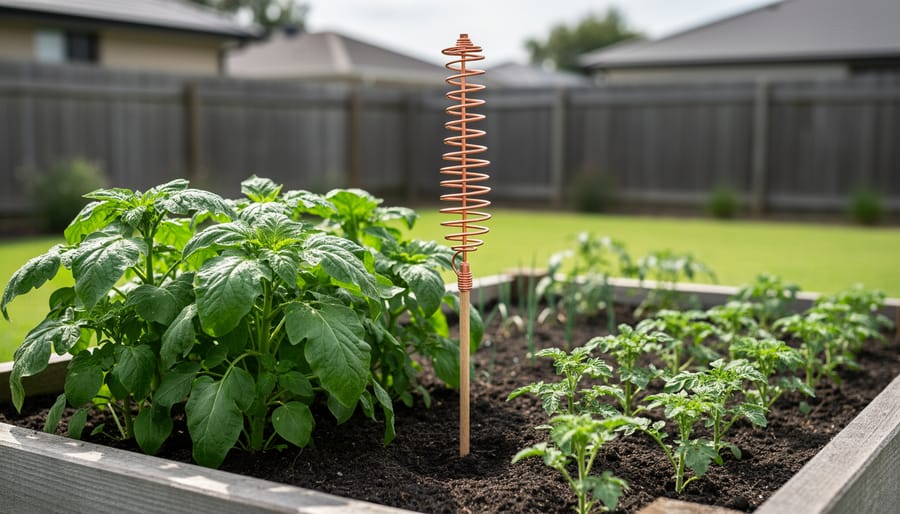
Step 1: Choose Your Test Garden Area
Start with a manageable space so you can track changes without getting overwhelmed. A 4×4 foot raised bed or a section of an in-ground garden works perfectly for your first electroculture trial. If you have room, a 4×8 foot bed gives you space for more plant varieties while still keeping everything observable.
Here’s the critical part: set up a control area right next to your test bed. Plant the exact same varieties in identical conditions (same soil mix, same sun exposure, same planting date) but without any electroculture setup. This side-by-side comparison is the only way you’ll know if electroculture uses electrical currents to make any real difference in your garden.
Choose plants that are easy to measure and observe throughout the season. Tomatoes let you count fruits and track height weekly. Lettuce shows visible leaf growth you can measure every few days. Bush beans produce countable pods and grow quickly enough to see results within your experiment window. Avoid slow-growing crops like carrots or complex vine plants that are harder to measure consistently.
Pick a spot with consistent sunlight, away from overhanging trees or structures that might interfere with your antenna setup later.
Step 2: Prepare Your Copper Wire Antenna
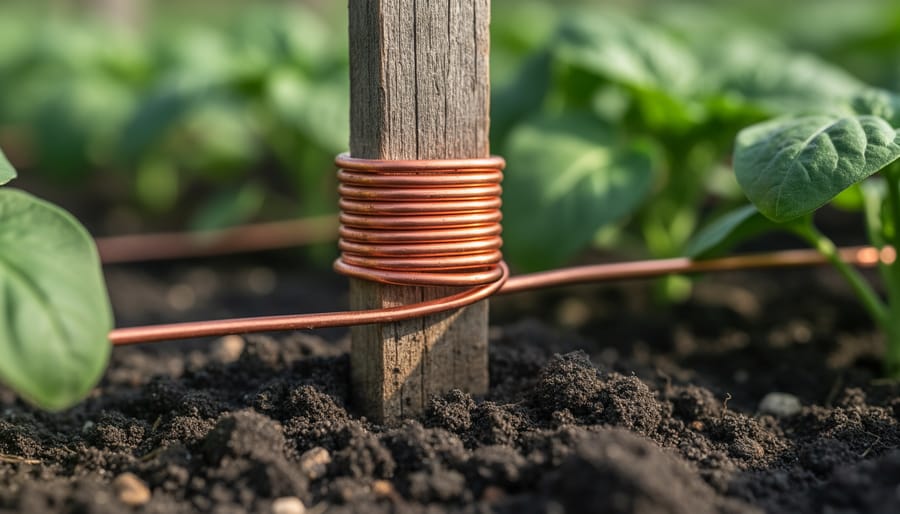
Grab a wooden or bamboo stake that’s between 3 and 6 feet tall, taller antennas capture more atmospheric energy, but they need extra stability. A 4-foot stake works well for most garden beds and won’t topple in moderate winds. Make sure the wood is untreated since you don’t want chemicals leaching into your soil.
Take your copper wire (14 to 18 gauge is easiest to work with) and leave about 6 inches loose at the bottom. Start wrapping the wire around the stake in a spiral pattern, moving upward. Keep your wraps evenly spaced, about an inch apart, and maintain consistent tension so the coils don’t slide down later. You can wrap clockwise or counterclockwise, gardeners report trying both directions with similar results.
When you reach the top, leave another 6 inches of wire extending upward to act as your antenna tip. This is where you’ll need to be careful: use wire cutters to trim any excess, then bend that sharp end into a small loop or curl. A pointed wire can scratch you during installation or poke you when you’re working around it later.
Secure the wire at three or four points along the stake using small staples, twist ties, or waterproof tape. This keeps everything in place when wind hits the antenna. Give the whole structure a gentle shake test, if the wire shifts or loosens, add more securing points before taking it outside.
Step 3: Install the Electroculture Setup
Now it’s time to position your antenna in the garden. Start by deciding where to place it within your test area. A single antenna typically covers 16 to 50 square feet, so a 4×4 foot bed needs just one centrally located structure, while a larger 4×8 foot space might benefit from two antennas spaced evenly apart.
Push the wooden stake into the soil to a depth of at least 8 to 12 inches. This depth keeps the antenna stable in wind and prevents it from toppling during watering or maintenance. If your soil is hard or rocky, consider pre-drilling a pilot hole with a metal rod, then inserting the stake. The antenna should stand upright and firm when you give it a gentle shake.
Position your antennas near the center of planting rows rather than at the edges, where they’re more likely to get knocked during garden work. Face the spiral toward the sky, and ensure the top of the stake sits above the mature height of your plants so it can remain in place all season.
If you want to try grounding your setup, run a length of copper wire from the base of the antenna to a grounding rod (a 2-foot copper or galvanized steel rod) driven into the soil about a foot away. This is entirely optional; many gardeners skip grounding with good results.
You can install antennas before planting seeds or after seedlings are established. Just be careful not to disturb roots if you’re working around existing plants.
Step 4: Plant and Monitor Your Garden
With your electroculture antenna in place, it’s time to plant both your test area and control area identically so you can make fair comparisons later. Choose the same number of seedlings or seeds for each space, prepare the beds with identical soil amendments (following soil health basics), and commit to the same watering consistency in both sections. Right after planting, measure and record baseline data for each plant: height from soil line to growing tip, number of true leaves, and any notes about color or vigor. Take photos from the same angle every time.
Set up a simple notebook or spreadsheet to track weekly observations over the next three months. Each week, measure and note these details for both your electroculture and control plants:
- Plant height from soil to tallest growing point
- Leaf color and overall size
- When flowering or fruiting begins
- General vigor and growth rate
- Pest resistance (whether you need to manage aphids or other insects differently)
Keep everything else the same between the two areas: if you fertilize one, fertilize the other on the same schedule with the same product. Consistency in every variable except the electroculture setup gives you the clearest picture of whether the antenna makes a difference in your garden.
Step 5: Maintain Your Setup Throughout the Season
Once your electroculture setup is installed, it needs minimal but consistent attention through the growing season. Check your copper antennas weekly to ensure they haven’t shifted or loosened in the soil, especially after heavy rain or wind. Secure any loose wire wraps and straighten stakes that have tilted.
Remove metal structures immediately when severe thunderstorms are forecast, then reinstall them once the weather clears. This simple precaution eliminates any lightning attraction risk.
As you water, weed, and harvest, work carefully around the antennas to avoid knocking them over. They should never interfere with your regular garden tasks. If you’re adding compost, amendments, or applying a mulch comparison around your plants, apply identical amounts and types to both your test beds and control areas.
This consistency is critical. Any difference in results needs to reflect the electroculture treatment alone, not variations in water, fertilizer, or care. Treat both areas as if they’re the same garden, with one subtle difference hovering above.
How to Compare Results and Decide What’s Next
After three months of growing, it’s time to see whether your electroculture experiment made a difference. Start by gathering the measurements you recorded at the beginning, plant height, leaf count, and overall health scores, and take final measurements of the same data points in both your test and control areas. Compare yields directly: weigh harvested produce from each section, count the number of fruits or vegetables, and note any differences in size or quality. Don’t just rely on memory or impressions; side-by-side numbers tell the real story.
What counts as meaningful results? Look for consistent patterns across multiple plants rather than one or two standouts. If your electroculture tomatoes produced 20% more fruit on average and showed notably thicker stems throughout the season, that’s worth paying attention to. But if half the plants did better and half did worse, or if differences are small enough to explain by slight soil variations or sun exposure, you’re probably seeing normal garden variation rather than an electroculture effect. Be honest with yourself about factors you couldn’t control perfectly, a patch that got more afternoon shade or an area where the soil drains faster can easily account for small differences in growth.
Based on what you observed, you have a few paths forward. If results were clearly positive across most of your test plants, consider expanding the setup to a larger bed next season or trying different antenna heights and coil configurations to see if you can improve outcomes further. If results were mixed or unclear, you might repeat the experiment with better controls, trying plants that are easier to measure reliably or addressing variables you didn’t account for this time. Even if you saw no difference at all, that’s valuable information, it tells you that for your specific conditions, soil, and plants, electroculture didn’t provide an advantage worth the effort. Some gardeners report that certain crops respond while others don’t, so you might experiment with different plant varieties. Maybe your beans showed no change, but it’s worth testing whether why lettuce bolts might be influenced by the technique or whether root vegetables behave differently.
Document everything you learned, including what didn’t work. Share your findings with other gardeners trying electroculture, online forums and gardening groups are full of people comparing notes on this experimental technique, and your data adds to the collective understanding. Remember, inconclusive results don’t mean you failed; they mean you approached gardening like a scientist, testing ideas rather than accepting claims at face value. That mindset will serve you well in all your future garden projects.
Common Questions About Electroculture Gardening
Does electroculture really work? Honest answer: we don’t know for certain yet. Scientific studies on electroculture remain limited, and most evidence comes from anecdotal reports from home gardeners who’ve tried it. Some report noticeably healthier plants and better yields, while others see no difference at all. That’s exactly why setting up your own side-by-side test with a control area matters, so you can see what happens in your specific conditions rather than relying on someone else’s claims.
How much does it cost to set up? Very little. A basic setup typically costs between $15 and $30, depending on what you already have on hand. You’ll need 20-50 feet of copper wire (around $10-15), a few wooden or bamboo stakes ($5-10), and basic tools you probably already own like wire cutters and a measuring tape. It’s one of the most budget-friendly garden experiments you can try, which makes it perfect for testing without major investment.
Can I use materials other than copper? Copper is the most commonly recommended material because of its excellent conductivity and resistance to corrosion, but some gardeners have experimented with galvanized steel wire or aluminum with mixed results. The theory centers on how well the material conducts atmospheric electricity, and copper performs best in that regard. If you decide to try alternatives, make sure whatever you use won’t leach harmful substances into your soil as it weathers.
Do I need to ground my antenna?
Not necessarily. Many electroculture setups work as simple antennas without grounding rods, relying on the surrounding soil moisture for a natural ground connection. Some gardeners add a grounding rod to potentially enhance the effect, but start with the basic ungrounded version first to keep things simple.
How long before I see results?
If electroculture is going to make a difference in your garden, you’ll likely notice it within 4-8 weeks as plants grow. Look for changes in leaf color, growth rate, or overall vigor compared to your control area. A full growing season (3-4 months) gives you the clearest picture.
Is electroculture safe for organic gardens?
Yes, electroculture uses passive collection of atmospheric energy without chemicals, synthetic fertilizers, or electrical power sources. The copper wire and stakes are inert materials that don’t introduce anything prohibited by organic standards.
Will it attract lightning?
Your electroculture antenna is much shorter and less conductive than typical lightning targets like trees, rooflines, or metal poles. That said, remove your setups or stay out of the garden during electrical storms as a sensible precaution, just as you would avoid being near any metal objects outdoors in a lightning storm.
Keep in mind that electroculture remains an emerging practice without widespread scientific validation. Approach it as a learning experience, document what you observe carefully, and adjust your setup based on your own results rather than treating it as a proven technique. The gardening community continues to experiment and share findings, so your observations add to the collective understanding of whether this method holds real promise.
Electroculture gardening is one of those wonderfully quirky experiments that reminds us why we love gardening in the first place. You’re not chasing guaranteed results here, you’re exploring a technique that might surprise you or might teach you something entirely different than you expected. Either way, you’ll learn more about your garden and sharpen your observation skills along the way.
The beauty of this setup is that it costs almost nothing and fits into any garden space. Whether your copper antennas boost your tomatoes or simply become conversation starters, you’ve added something interesting to your growing season. Gardening has always been about trying new things, keeping what works, and laughing off what doesn’t.
We’d love to hear how your electroculture experiment turns out. Share your results, photos, and discoveries with the Gardenoholic community, and browse our other DIY projects for more ways to put your own creative stamp on your garden. The best gardens are built one experiment at a time, so grab that copper wire and see what happens. Happy growing!