Outdoor vertical gardens transform overlooked walls, fences, and bare patio surfaces into thriving plant displays that produce fresh herbs, vegetables, and flowers without eating up precious ground space. Whether you’re working with a tiny balcony in the city or want to dress up a dull garage wall, vertical gardening lets you grow more in less space while creating a living focal point that draws the eye upward.
The beauty of vertical gardens lies in their flexibility. You can start simple with a few hanging planters or go all-in with a sophisticated living wall system. I’ve watched friends turn their narrow side yards from wasted space into productive gardens that supply salad greens and herbs all season long, and the transformation never fails to inspire.
Space constraints aren’t the only reason gardeners are embracing vertical growing. These gardens make maintenance easier on your back and knees, improve air circulation around plants (which means fewer disease problems), and can even provide privacy screening or hide unsightly areas. Plus, there’s something deeply satisfying about harvesting tomatoes at eye level instead of crawling around on the ground.
The ideas ahead range from weekend projects using recycled materials to more ambitious installations that become permanent garden features. You’ll find options for every budget and skill level, along with practical guidance on choosing the right approach for your specific space, climate, and what you want to grow. No matter where you’re starting, you can create a vertical garden that works hard and looks beautiful doing it.
How We Selected These Vertical Garden Ideas
We chose these fifteen vertical garden ideas based on criteria that matter most to real gardeners facing real constraints. Our goal wasn’t to showcase only the most Pinterest-worthy or expensive solutions, but to offer options that actually work for different situations.
Each idea in this collection was evaluated against several practical factors:
- Ease of installation, from simple hang-and-plant projects to weekend builds requiring basic tools
- Maintenance requirements, balancing stunning results with realistic time commitments
- Versatility, adaptability to different plant types, spaces, and growing conditions
- Visual impact, creating beautiful focal points that enhance your outdoor area
- Cost-effectiveness, providing options from nearly-free repurposed materials to worthwhile investments
We’ve included projects spanning every difficulty level. Complete beginners will find approachable options like shoe organizer planters that require no construction, while experienced DIYers can tackle living wall frames or hydroponic towers. Budget-conscious gardeners can start with salvaged pallets costing under $20, and those ready to invest will discover professional modular systems that deliver restaurant-quality results.
The collection also represents diverse styles and purposes. You’ll find rustic wooden structures, sleek modern designs, edible gardens, and ornamental displays. Space requirements range from compact balcony solutions to ambitious fence-covering installations. Whether you’re growing herbs in a shaded courtyard or vegetables on a sunny wall, you’ll find ideas suited to your climate and conditions.
1. Pallet Garden Wall: Budget-Friendly and Rustic
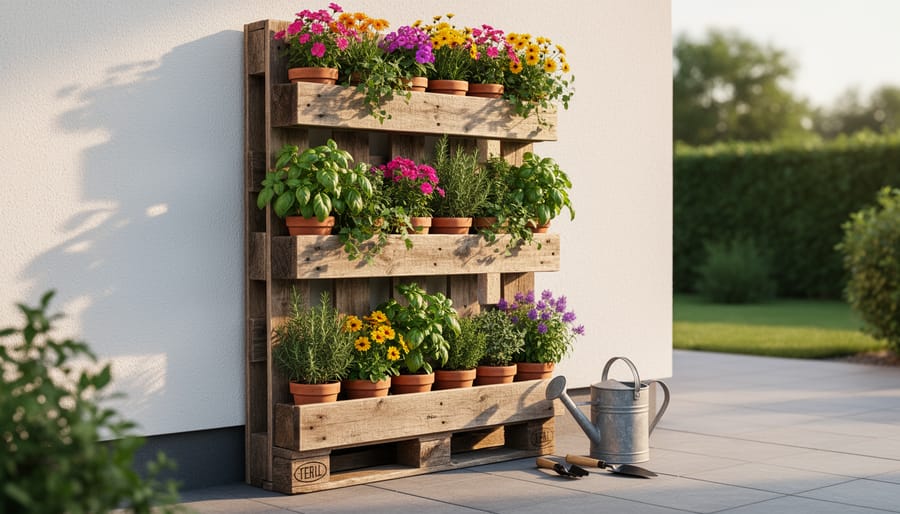
Wooden pallets offer one of the most accessible entry points into vertical gardening. These free or low-cost structures transform into rustic planting displays with minimal effort, making them perfect for first-time vertical gardeners.
Start by sourcing a pallet marked “HT” (heat-treated) rather than “MB” (methyl bromide-treated), ensuring it’s safe for growing edibles. Sand rough edges and apply a coat of non-toxic sealant if you want to extend its life outdoors. The natural gaps between slats create ready-made planting pockets.
Staple landscape fabric or weed barrier to the back and bottom of the pallet, creating a pocket that holds soil while allowing drainage. Fill each opening with quality potting mix, then plant shallow-rooted varieties like lettuce, herbs, strawberries, or succulents. Start with the pallet lying flat, giving plants two weeks to establish roots before standing it upright.
Mount your finished pallet garden securely using heavy-duty brackets or fence hangers, attaching it to a fence, shed wall, or sturdy posts. Make sure it can support the combined weight of wood, soil, and water, typically 50-75 pounds when fully saturated.
This project costs under $30 if you buy the pallet, or nothing if you find one free. The weathered wood aesthetic blends beautifully with cottage and farmhouse garden styles.
2. Hanging Gutter Gardens: Maximize Your Fence Space
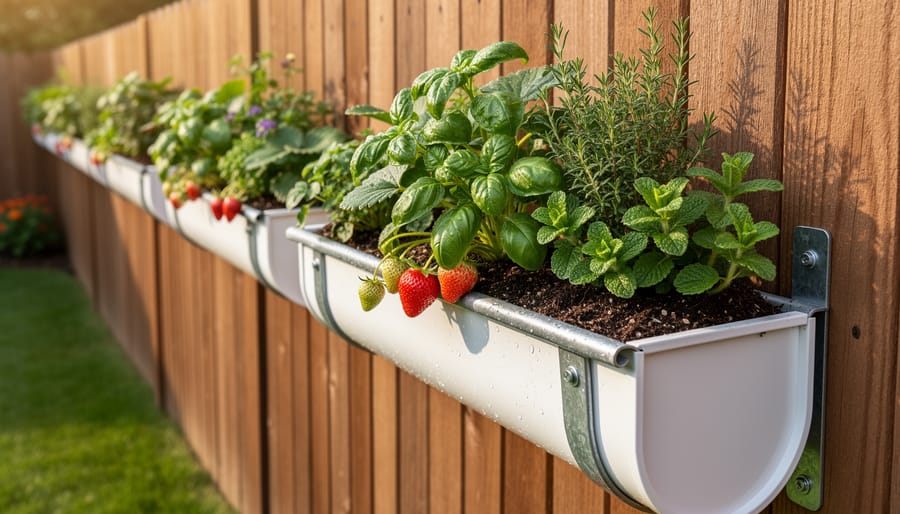
Hanging gutter gardens transform unused fence space into productive growing areas using inexpensive materials you can find at any hardware store. This approach works brilliantly for shallow-rooted crops that don’t need deep soil, making it perfect for fast-growing greens, compact herbs, and even cascading strawberries.
Standard vinyl gutters are lightweight, affordable, and rust-proof, while metal gutters offer a sleeker look with greater durability. Choose 4-inch or wider gutters to give roots adequate room. Mount them securely to sturdy fence posts using heavy-duty brackets spaced every 2-3 feet, gutters filled with wet soil are heavier than you’d expect.
Drainage is critical since gutters weren’t designed as planters. Drill quarter-inch holes every 6-8 inches along the bottom to prevent waterlogging. If you’re stacking multiple rows, angle them slightly downward (about 1 inch per 10 feet) so excess water drains naturally rather than pooling.
Fill gutters with quality potting mix rather than garden soil, it’s lighter and drains better. Space your rows at least 12 inches apart vertically so plants in lower gutters still receive adequate sunlight. This setup creates a cascading effect that’s both productive and visually appealing.
Lettuce, spinach, arugula, cilantro, and parsley thrive in gutter gardens. Strawberries work wonderfully too, with their runners trailing down decoratively between levels.
3. Living Wall Pocket Planters: Instant Green Wall
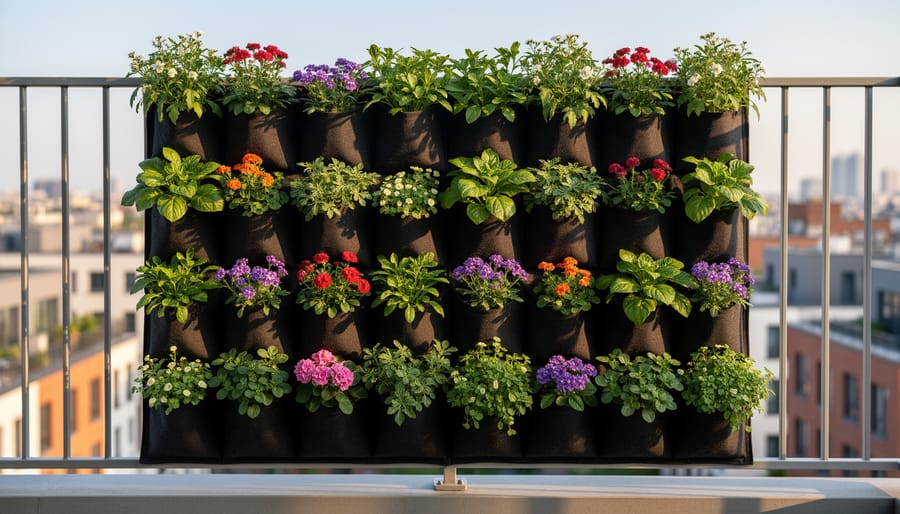
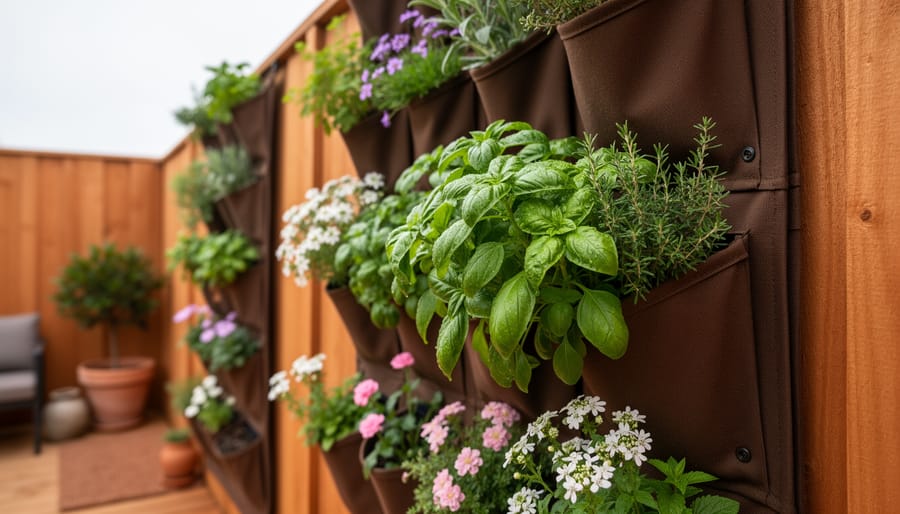
Living wall pocket planters offer one of the quickest routes to a verdant vertical garden. These systems feature multiple fabric or felt pockets sewn onto a backing that hangs directly on walls, fences, or railings. You’ll find options ranging from small 12-pocket panels to expansive designs covering entire walls.
The beauty lies in their simplicity. Most pocket planters install in minutes using hooks, nails, or fence clips. No construction skills required. The breathable fabric promotes healthy root development while naturally preventing overwatering issues common in solid containers. Each pocket typically holds enough soil for herbs, small flowers, strawberries, or leafy greens like lettuce and spinach.
Portability makes these systems perfect for renters or anyone who likes rearranging their garden. Take them down for winter, move them to catch better sun, or pack them up when you relocate. The pockets accommodate individual plants, allowing you to create patterns, alternate colors, or mix edibles with ornamentals.
Fill pockets with quality potting mix rather than garden soil, which compacts in vertical positions. Water from the top and let excess drain through. Start with drought-tolerant plants like herbs or succulents until you establish a watering routine that works for your climate.
4. Trellis Towers with Climbing Vegetables
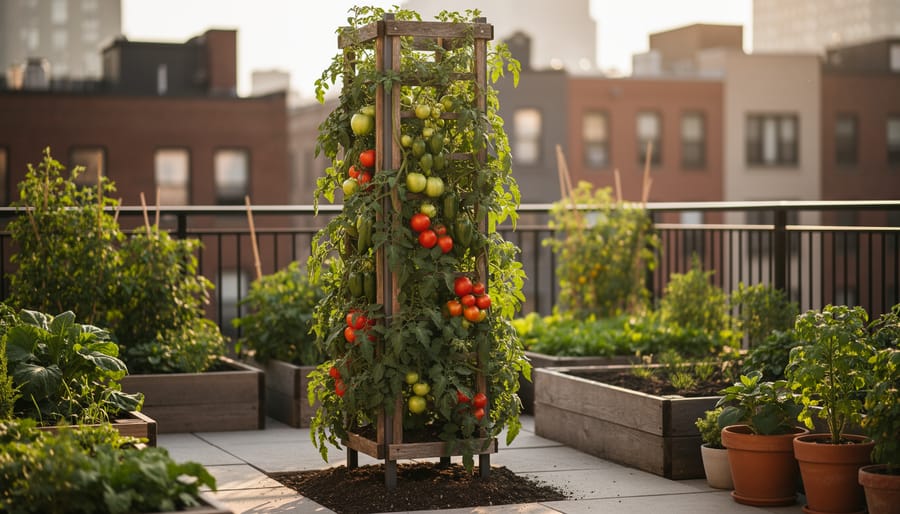
Trellis towers transform your garden into a productive vertical farm, perfect for growing heavy-yielding crops like tomatoes, beans, peas, and cucumbers without sprawling across precious ground space. These freestanding structures typically consist of four to six tall posts connected by horizontal supports or wrapped with sturdy mesh, creating a central column where plants climb upward naturally.
The beauty of trellis towers lies in their efficiency. A four-foot-square tower can produce as much as a 16-foot traditional row, while keeping fruits cleaner and easier to harvest. You’ll spend less time bent over and more time enjoying perfectly ripe vegetables at eye level.
Build your tower using treated lumber posts, bamboo poles, or metal conduit, whatever suits your budget and aesthetic. Space the posts 2-3 feet apart and secure them at least 18 inches deep for stability, especially important when supporting heavy tomato vines laden with fruit. Wrap the structure with trellis netting, chicken wire, or attach horizontal supports for vining plants to grip.
Plant around the tower’s base, training young plants upward as they grow. The vertical design improves air circulation, reducing disease pressure while maximizing sunlight exposure. For beginners, bush beans and sugar snap peas offer foolproof success, while experienced gardeners can tackle indeterminate tomatoes and sprawling cucumber varieties.
5. Stacked Terracotta Pot Tower: Classic and Elegant
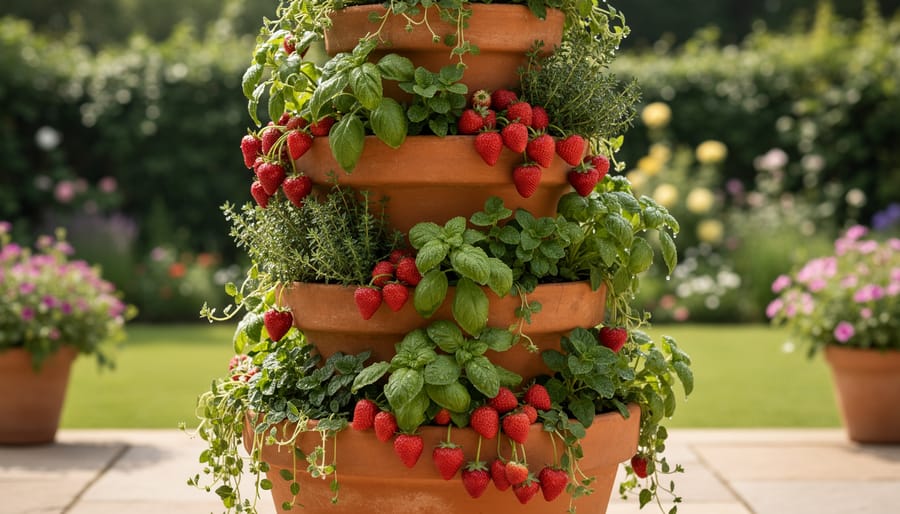
Stacked terracotta pot towers bring timeless elegance to vertical gardening while requiring minimal materials. You’ll thread pots of gradually decreasing sizes onto a sturdy central rod or rebar, creating a striking spiral effect as plants cascade from each level.
Start with a 2-foot length of half-inch rebar driven at least 8 inches into the ground. Choose terracotta pots in descending sizes, typically 12-inch, 10-inch, 8-inch, and 6-inch diameters work well. Thread the largest pot onto the rod first, filling it with potting mix. Tilt each successive pot at a slight angle (about 30 degrees) as you add it, alternating the direction of the tilt to create that classic spiral pattern.
Strawberries thrive in these towers, with their runners trailing beautifully between levels. Herbs like thyme, oregano, and parsley also excel, as do trailing petunias or sweet alyssum for pure visual impact. The offset positioning ensures each plant receives adequate sunlight.
For stability, pack soil firmly around the rod at each level and consider using a washer between pots if the drainage hole is large. Water thoroughly from the top, allowing moisture to seep through each tier. The terracotta naturally regulates moisture, preventing overwatering while maintaining attractive drainage.
6. Ladder Garden Shelves: Versatile and Moveable
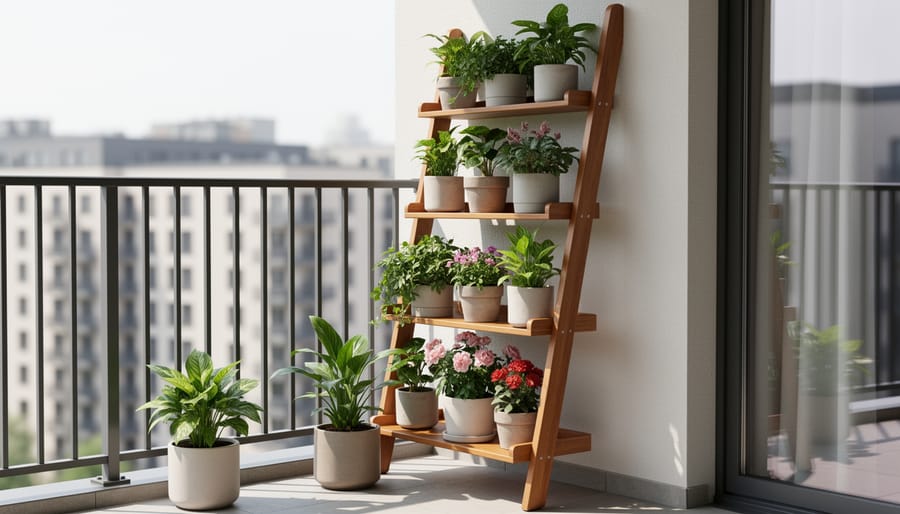
Ladder garden shelves bring cottage charm and practical flexibility to vertical gardening. You can repurpose a vintage wooden ladder from a flea market or purchase a new A-frame ladder shelf designed specifically for plants. The beauty lies in versatility, each rung holds containers at different heights, creating a tiered display that’s perfect for herbs, flowers, or compact vegetables like cherry tomatoes and peppers.
This approach works wonderfully for renters since nothing attaches permanently to walls or fences. Simply lean the ladder against a sturdy surface or use a freestanding design. You can rearrange plants seasonally, move the entire setup to follow the sun, or take it with you when you relocate. Mix pot sizes and styles for visual interest, placing trailing plants on upper rungs so they cascade downward.
Water management is straightforward, just ensure containers have drainage holes and place saucers underneath to protect surfaces. If you’re growing thirsty plants or want to reduce daily watering chores, consider whether an irrigation system worth it for your setup. Start with six to eight pots on a standard six-foot ladder, adjusting as you discover what works best for your space.
7. Modular Living Wall Systems: Professional Results
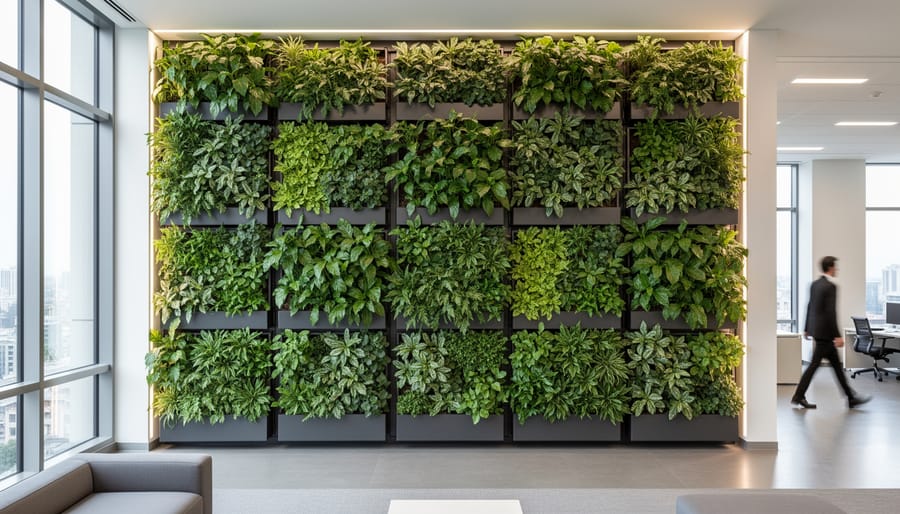
Modular living wall systems represent the premium tier of vertical gardening, delivering professional-quality results that rival what you’d see in high-end hotels or corporate atriums. These commercial systems feature interlocking panels or frames with built-in planting pockets, integrated irrigation lines, and drainage channels that work together as a complete ecosystem. Brands like Florafelt and Woolly Pocket offer systems where you simply mount the framework to your wall, insert plants into the pre-formed pockets, and connect a water source.
The investment is substantial compared to DIY options, typically ranging from several hundred to several thousand dollars depending on coverage area, but the payoff comes in stunning visual impact and dramatically reduced maintenance. The irrigation system distributes water evenly to all plants automatically, while the drainage layer prevents root rot and water damage to your wall. Many systems include fertilizer injectors that deliver nutrients with each watering cycle, eliminating the need for manual feeding.
These systems work beautifully for large-scale projects like covering entire exterior walls, creating privacy screens, or transforming bland garage sides into living tapestries. The professional appearance makes them ideal if you’re designing for curb appeal or want your garden to look polished from day one. While the upfront cost is higher, you’re essentially buying a turnkey solution that removes most of the guesswork from vertical gardening.
8. PVC Pipe Vertical Planters: Modern and Space-Saving
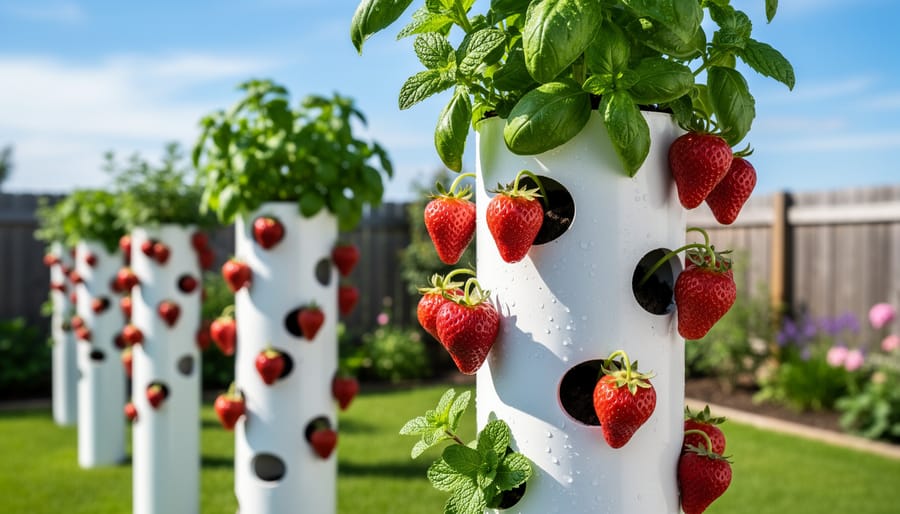
PVC pipe planters bring a clean, modern look to vertical gardening while delivering serious space efficiency. This system works by drilling circular holes into 4-inch or larger diameter PVC pipes, then mounting them upright or at a slight angle to create multiple planting pockets along the pipe’s length. The setup is brilliant for strawberries, which naturally cascade from the openings, as well as herbs like basil and cilantro, or leafy greens such as lettuce and spinach.
To build one, mark your hole positions in a staggered pattern to prevent weakening the pipe, then use a hole saw attachment to cut clean circles. Fill the bottom with gravel for drainage, add quality potting mix, and plant as you fill. Mount the pipe securely to a fence, wall, or freestanding frame using brackets rated for the weight when filled.
Here’s the critical consideration: if you’re growing anything edible, verify your PVC is food-safe. Standard construction-grade PVC can leach chemicals, so look for pipes labeled NSF-approved or specifically rated for potable water. This matters especially for edible landscaping projects where plants will be consumed. The white PVC typically works well, while gray varieties may contain more additives.
This system handles watering efficiently since you fill from the top and gravity does the rest, making it perfect for busy gardeners who want productivity without constant maintenance.
9. Vertical Herb Spiral: Functional and Beautiful
A vertical herb spiral transforms traditional spiral garden design by building upward instead of outward, creating a striking tower that packs numerous herbs into minimal ground space. This three-dimensional structure stacks in a corkscrew pattern, rising 3-4 feet high while maintaining a compact footprint of just 2-3 feet across.
The genius lies in the microclimates created at different heights and exposures. Mediterranean herbs like rosemary and thyme thrive at the sunny, well-drained summit. Midway down, basil and oregano enjoy moderate moisture. The shaded base provides the cool, damp conditions mint and parsley prefer. You’re essentially building multiple growing zones in one compact structure.
Start with a sturdy foundation of stacked stones, bricks, or weather-resistant wood planks arranged in a gradually ascending spiral. Fill each level with quality potting mix as you build upward. The spiral design allows easy access to every plant without reaching over others, and harvesting becomes a simple walk around the tower.
This project suits intermediate gardeners comfortable with basic masonry or carpentry. Beyond functionality, herb spirals create genuine focal points that blend edible gardening with sculptural appeal, conversation pieces that happen to provide fresh seasonings daily.
10. Hanging Basket Columns: Cascading Color
Hanging basket columns transform ordinary vertical space into stunning pillars of color and texture with minimal effort. This approach involves suspending several baskets at staggered heights from a single anchor point, creating a flowing column of plants that draws the eye upward while maximizing your growing area.
Start with a sturdy hook rated for at least 50 pounds, secured into a ceiling beam, pergola crossbeam, or strong tree branch. Attach a heavy-duty chain or marine-grade rope, then hang three to five baskets at intervals of 12 to 18 inches apart using S-hooks or adjustable rope hangers. The spacing allows each basket to receive adequate light while creating a cohesive visual effect.
Choose trailing plants like petunias, lobelia, million bells, or sweet potato vine for the upper baskets, letting them cascade downward. Mix in some upright plants like geraniums or begonias in lower baskets for variety. Consider using different basket sizes, smaller ones at the top, larger at the bottom, to enhance the cascading appearance.
This setup works beautifully on porches, patios, or near entryways. Watering is straightforward since the upper baskets naturally drip down to lower ones, though you’ll still need to water each basket individually.
11. Wire Mesh Living Wall with Sphagnum Moss
Creating a wire mesh living wall with sphagnum moss is where vertical gardening becomes genuine living architecture. This technique produces dense, lush green walls similar to those you’d see in high-end botanical gardens or commercial installations, and while it requires more effort upfront, the results are spectacular.
The construction involves building two frames of sturdy wire mesh or hardware cloth, placing moistened sphagnum moss between them, and securing everything together. The moss acts as your growing medium, holding moisture and nutrients while providing root anchorage. Once assembled, you cut small openings in the front mesh and insert plant roots directly into the moss layer. Small ferns, mosses, creeping fig, and shade-loving groundcovers work beautifully for this system.
This method excels in shaded areas where traditional containers might struggle. The moss stays naturally moist, reducing watering frequency compared to conventional planters. However, installation requires patience. The wall needs to lie flat for several weeks while plants establish their roots before being hung vertically. You’ll also need a robust mounting system since a fully planted living wall becomes quite heavy when saturated.
Consider starting with a small two-by-three-foot frame to learn the technique before tackling larger installations. The moss provides excellent insulation and can last several years before requiring replacement, making this an investment in long-term garden beauty.
12. Repurposed Shoe Organizer Planter: Quick and Easy
Hanging fabric shoe organizers transform into surprisingly effective vertical planters in minutes, no tools, no drilling, no complex assembly required. Simply hang one over a fence, balcony rail, or hook, fill the pockets with potting soil, and you’re ready to plant.
These organizers work brilliantly for shallow-rooted plants like herbs (basil, parsley, thyme), small succulents, lettuce, and compact flowers such as pansies or marigolds. Each pocket holds just enough soil for these plants to thrive, and the fabric allows for decent drainage while being gentle on delicate roots.
The real beauty here is flexibility. Renters love this solution because it leaves no permanent marks and moves easily when needed. You can test different plant combinations, rearrange your garden on a whim, or take it down for the winter without hassle.
Choose organizers with reinforced stitching and breathable fabric rather than clear vinyl, which can overheat in direct sun. Poke a few small drainage holes in the bottom of each pocket to prevent waterlogging. Water from the top down, letting excess moisture drain through, this method means lower pockets may need less frequent watering than upper ones.
13. Vertical Succulent Frame Garden: Living Art
A vertical succulent frame garden transforms living plants into genuine wall art, creating a stunning focal point for patios, covered porches, or protected outdoor walls. This project combines creativity with the natural low-maintenance appeal of succulents, resulting in a display that requires minimal watering and care once established.
Start with a shallow wooden picture frame or shadowbox, typically 4-6 inches deep. Cover the back with plywood, then layer wire mesh or hardware cloth across the front. Fill the frame with a well-draining succulent mix combined with sphagnum moss for moisture retention. Plant your succulents through the mesh openings, spacing them close together for a lush appearance. Choose varieties with different colors, textures, and growth habits, jade plants, echeveria, sedum, and hen-and-chicks work beautifully together.
Here’s the crucial step: lay the frame flat in a shaded area for 4-6 weeks, watering sparingly. This allows the succulents to root securely into the soil before you hang the frame vertically. Once established, hang your living artwork in a location that receives bright, indirect light. Water every few weeks by laying the frame flat and misting the surface. This project suits gardeners who want maximum visual impact with minimum maintenance time.
14. Tiered Planter Boxes: Staircase of Greenery
Tiered planter boxes bring architectural drama to your outdoor space while offering exceptional versatility for any plant you want to grow. Think of them as a wooden staircase where each step holds its own garden bed, creating multiple growing levels that catch the eye and maximize your planting area.
You can build these yourself following DIY vertical ideas or purchase ready-made units in cedar or composite materials. The beauty lies in customization, create a small three-tier unit for your balcony or a grand six-tier structure against a sunny wall. Most designs use simple box construction with 2×6 or 2×8 boards, secured together and arranged in descending steps.
The stepped design isn’t just attractive. It prevents plants from shading each other and makes harvesting incredibly convenient. Plant cascading flowers like petunias on upper tiers, vegetables in the middle, and herbs along the bottom. Each level gets proper sunlight while creating a lush, layered effect.
Understanding how soil shapes gardens matters here, fill each tier with quality potting mix suited to your plants. Add drainage holes in each box and consider lining with landscape fabric to prevent soil loss. This complete vertical garden setup delivers years of productive beauty.
15. Hydroponic Tower Garden: High-Tech Productivity
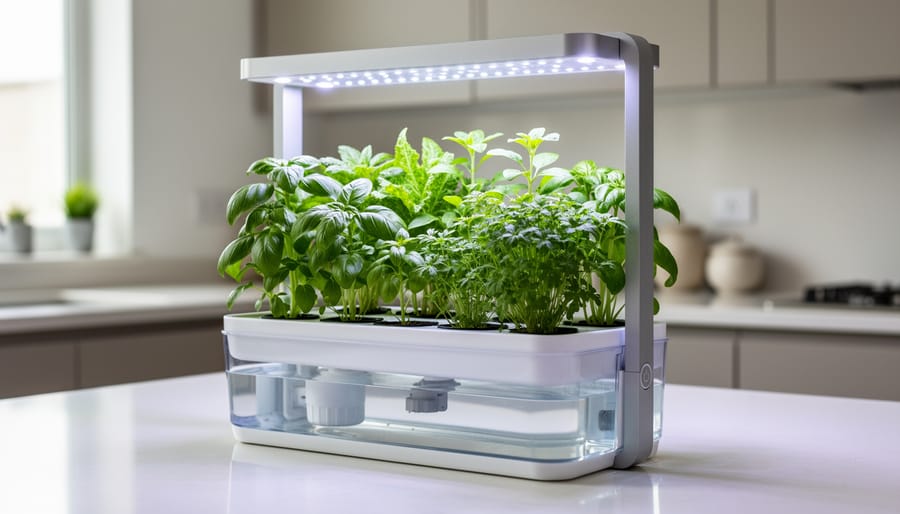
Hydroponic tower gardens represent the most advanced approach to vertical gardening, using stacked growing chambers fed by recirculating nutrient-rich water instead of soil. These freestanding towers can produce impressive yields in minimal space, some models grow 20-40 plants in just four square feet of floor space. Popular brands like Tower Garden and Lettuce Grow have made the technology accessible for home gardeners, though you’ll invest $300-600 for a quality system.
The appeal? Plants grow 30% faster than traditional methods while using 90% less water, since the closed-loop system recycles every drop. You’ll harvest abundant lettuce, herbs, kale, strawberries, and even dwarf tomatoes. Setup involves assembling the tower, adding water mixed with hydroponic nutrients, plugging in a small pump, and planting seedlings into the growing ports. The pump circulates nutrient solution through the tower several times hourly.
These systems excel on sunny patios or balconies with electrical access. While low-water plants typically need soil, hydroponics eliminates watering concerns entirely, you’ll just refill the reservoir weekly and monitor pH levels monthly. Perfect for tech-savvy gardeners wanting maximum productivity, hydroponic towers deliver restaurant-quality greens and prove that vertical gardening has entered an exciting, high-efficiency era.
Getting Started with Your Vertical Garden
Ready to bring your first vertical garden to life? Start by spending a few days observing your space. Note which areas get full sun (six-plus hours), partial shade, or deep shade throughout the day. This single observation will guide every other decision you make, since sun-loving tomatoes and peppers need completely different conditions than shade-tolerant ferns or hostas.
Choose plants that match both your light conditions and your vertical system. Shallow-rooted herbs, lettuce, and strawberries thrive in gutters or pocket planters with just a few inches of soil. Heavier feeders like tomatoes need deeper containers or tower systems with at least eight to twelve inches of root space. Start with hardy, forgiving plants while you learn how quickly your vertical setup dries out.
Securing your structure safely isn’t optional. Wall-mounted systems need proper anchors into studs or masonry, not just drywall or siding. Factor in weight when soil is saturated, a four-foot living wall can easily exceed fifty pounds. For freestanding towers, ensure they’re stable enough to withstand wind without toppling.
Irrigation deserves serious thought upfront. Vertical gardens dry out faster than ground beds since containers have less soil volume and increased air exposure. You’ll water more frequently, possibly daily in summer heat. Drip irrigation or soaker systems save time and water more evenly than hand-watering.
Start with one manageable project rather than tackling your entire yard at once. Master the watering rhythm and plant care on a single pallet garden or gutter system before expanding. Success breeds confidence and teaches you what works in your specific conditions.
Common Questions About Outdoor Vertical Gardens
Vertical gardening raises practical questions, especially if you’re new to growing plants upward instead of outward. Here are answers to the most common concerns we hear from gardeners planning their first vertical projects.
What plants work best in vertical gardens?
Shallow-rooted plants like lettuce, herbs, strawberries, and succulents thrive in vertical setups. For climbing structures, try beans, peas, tomatoes, and cucumbers, which naturally grow upward and produce heavily in small spaces.
How often do vertical gardens need watering?
Vertical gardens dry out faster than traditional beds because of increased air exposure and limited soil volume. Most need daily watering in hot weather, though drip irrigation or self-watering systems can reduce this to every few days.
Can my wall or fence support a vertical garden’s weight?
A saturated vertical garden can weigh 10-20 pounds per square foot. Always mount systems into wall studs or use anchors rated for the total weight, and check that fences are structurally sound before adding planters.
How do I protect vertical gardens in winter?
Bring portable systems indoors or into protected areas. For permanent installations, switch to cold-hardy plants like kale and pansies, add mulch to insulate roots, or dismantle seasonal structures until spring.
What’s the cost range for vertical garden projects?
Simple DIY projects using pallets or shoe organizers cost $20-50, mid-range systems like modular panels run $100-300, and professional living wall installations with irrigation can reach $500-2000 depending on size.
How much time does vertical garden maintenance take?
Plan for 15-30 minutes daily for watering and quick checks. Weekly tasks like pruning, harvesting, and fertilizing add another 30-60 minutes, though automated irrigation cuts daily time significantly.
These questions reflect the real concerns gardeners face, but don’t let them discourage you. Start with a simple project that matches your available time and budget. You’ll quickly develop a routine that fits your schedule, and the rewards of fresh herbs or a wall of blooms make the effort worthwhile.
Vertical gardens prove you don’t need sprawling yards to create stunning, productive outdoor spaces. Whether you’re working with a tiny balcony or a bare fence, these 15 ideas show how growing upward transforms limitations into opportunities. A simple pallet garden can kickstart your journey this weekend, while modular systems or hydroponic towers offer paths to expand as your confidence grows.
The beauty of vertical gardening is its flexibility. Choose a project that matches your current skill level and available time. Beginners might start with hanging gutter gardens or repurposed shoe organizers, while experienced gardeners can tackle living walls or herb spirals. Each approach adds visual interest and fresh harvests to spaces previously considered unusable.
Vertical gardening represents part of a larger movement making gardening accessible to everyone, regardless of space constraints or urban living situations. These innovations turn walls into gardens, fences into food sources, and overlooked corners into green retreats.
Pick one idea from this list, gather your materials, and start building. Your outdoor space holds more potential than you realize. Transform it vertically, and watch how a few square feet of wall becomes your favorite growing area.