Growing a vertical garden involves mounting plants upward on walls, trellises, or freestanding structures to maximize limited space while creating a lush, productive garden. Most vertical systems succeed in just 8 to 12 weeks from installation to harvest, and even complete beginners can build a thriving vertical garden with basic tools and a weekend of setup time.
The beauty of vertical gardening lies in its versatility. You can transform a bare balcony, a dull fence, or even an indoor wall into a productive growing space without needing a traditional backyard. The method works by training plants to grow upward using support structures, stacking planters, or installing modular wall-mounted pockets. This approach delivers multiple benefits beyond space efficiency: better air circulation reduces disease, harvesting becomes easier at eye level, and pests have fewer hiding spots.
What makes vertical gardens particularly appealing in 2026 is how accessible the materials have become. You don’t need specialized equipment or expensive systems to start. Simple options like repurposed pallets, hanging gutters, or stacked containers work beautifully for herbs, lettuces, strawberries, and compact vegetables. Climbing plants like beans, cucumbers, and tomatoes naturally adapt to vertical growth, while trailing varieties such as cherry tomatoes and certain pepper cultivars thrive when supported upward.
The key to success is matching your plant selection to your available light, choosing the right support structure for your space, and understanding how vertical growing affects watering needs. Plants in vertical arrangements dry out faster than ground-level gardens, but once you establish a simple routine, maintenance becomes straightforward and rewarding.
Understanding Your Vertical Garden Options
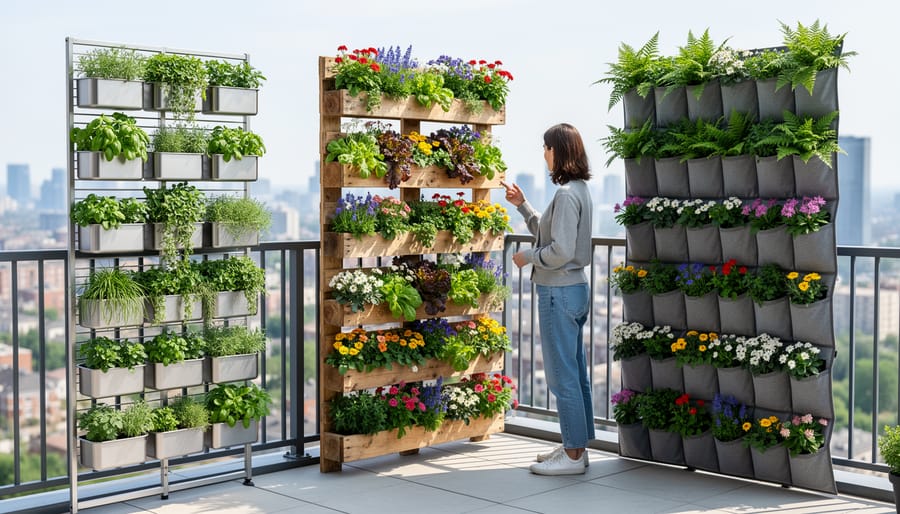
Choosing the right vertical gardening system makes all the difference between a thriving garden and a frustrating struggle. The good news? There’s a vertical solution for virtually every space, budget, and growing goal, and recent modular innovations have made these systems more adaptable than ever.
Your main options include:
- Tower gardens: Freestanding structures with stacked planting pockets, perfect for patios and small yards where you can’t mount to walls
- Wall planters: Mounted panels or frames that transform vertical surfaces into growing space, ideal for balconies and sunny walls
- Trellises and climbing frames: Simple, budget-friendly supports that work beautifully for climbing crops like beans, peas, and cucumbers
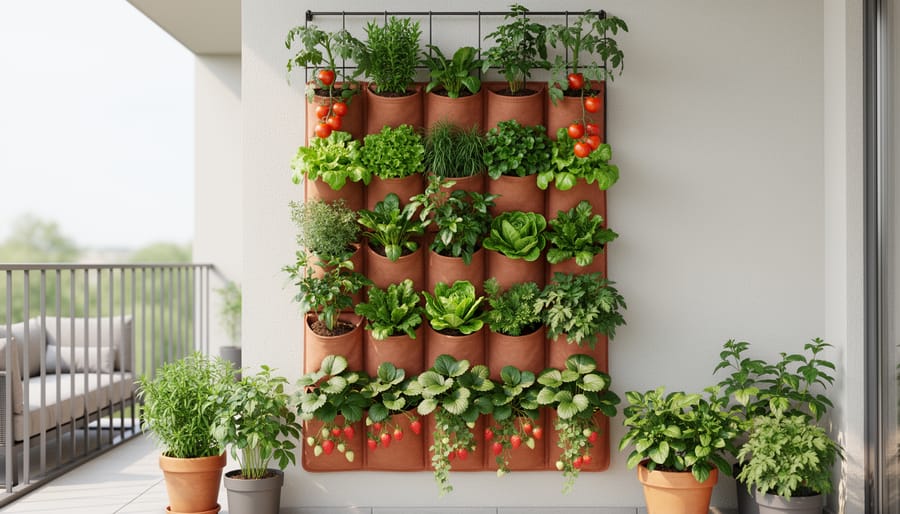
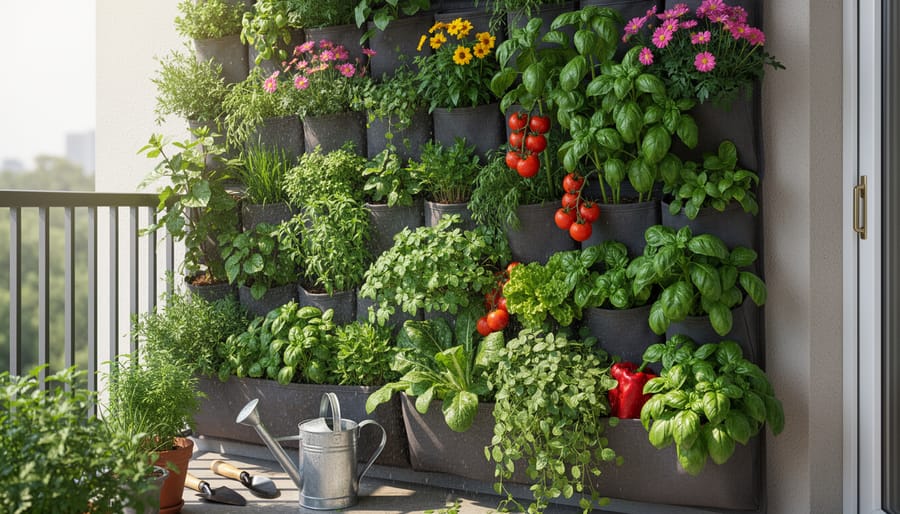
- Pocket planters: Fabric or felt systems with individual pockets that hang from structures, offering flexibility and easy plant rotation
- Stacking containers: Modular pots that stack vertically, letting you expand upward as your ambitions grow
Your choice depends on three key factors. First, assess your space: wall-mounted systems need solid anchoring points, while freestanding towers require floor space and weight capacity. Second, consider your budget, trellises start around $20, while sophisticated tower systems with built-in irrigation can run $200 or more. Third, match the system to your plants: leafy greens and herbs thrive in compact pocket planters, while fruiting vegetables need the deeper root space that stacking containers or tower gardens provide.
Many 2026 systems now include smart irrigation options with drip lines and reservoirs that distribute water evenly from top to bottom, solving the common problem of lower plants drying out while upper ones stay saturated. If you’re starting out, a simple trellis or small stacking system lets you learn the vertical gardening rhythm before investing in more complex setups. The best system is the one you’ll actually use and maintain.
What You’ll Need to Get Started
Before you dive into building, let’s gather everything you’ll need. Having all your materials on hand saves trips to the store and keeps momentum going once you start. I’ve organized this list from essential to optional, so you can prioritize based on your budget.
The Essentials
Your vertical structure is the foundation. This could be a tower planter, wall-mounted pockets, a trellis with containers, or modular stacking units. Choose one that fits your space and weight capacity. You’ll need a lightweight growing medium, not regular garden soil. Look for a mix designed for containers with perlite or coconut coir, which drains well while holding moisture where plants can reach it.
Grab a selection of seedlings or seeds suited to vertical growing. Herbs like basil and thyme, lettuces, strawberries, and compact vegetables work beautifully. Start with four to six varieties you’ll actually use in the kitchen.
For watering, at minimum you need a watering can with a long spout or a hose with a gentle spray nozzle. If your system sits above shoulder height, consider a pump sprayer to reach upper levels without creating a waterfall.
You’ll want basic anchoring hardware if mounting to a wall: heavy-duty brackets, wall anchors rated for your structure’s weight when filled and wet, a drill, and a level. For freestanding systems, skip this and ensure the base is stable.
Nice-to-Have Additions
A drip irrigation kit with a timer transforms maintenance, especially during summer. These run about thirty dollars and pay for themselves in convenience and water savings.
Lightweight mulch like shredded bark keeps moisture in and weeds down. A moisture meter takes the guesswork out of watering, particularly useful while you’re learning your garden’s patterns.
Slow-release organic fertilizer and liquid fish emulsion cover feeding needs throughout the season. Add plant labels if you’re growing multiple varieties, and gardening gloves always make the work more pleasant.
Gather these materials now, and you’ll move smoothly through the installation process without frustrating interruptions.
Safety and Site Considerations Before You Build
Before you start building, a few quick safety checks will save you from headaches down the road. Think of these as your garden’s foundation, just as important as the plants themselves.
First, consider where your vertical garden will live. If you’re mounting it to a wall, you need to know what’s behind that surface. Drywall alone won’t support much weight, a fully planted vertical garden can easily reach 50-100 pounds when watered. You’ll want to anchor into wall studs or use heavy-duty masonry anchors for brick or concrete. For balconies or elevated decks, check the weight rating, especially if you’re stacking multiple tiers. When in doubt, consult your building’s maintenance office or a structural professional.
Water management deserves special attention. Even with careful watering, drips and overflow happen. For indoor gardens or those against house walls, install a waterproof barrier or drip tray to protect surfaces below. Outdoor structures should direct water away from your home’s foundation.
If you’re using powered systems like automated irrigation or grow lights, electrical safety matters. All outdoor outlets should have NEC GFCI protection outdoors to prevent shock hazards around water. Keep power cords away from standing water and use outdoor-rated equipment.
Sun exposure shapes your plant choices dramatically. Track how many hours of direct sunlight your site receives, most vegetables need six hours minimum, while leafy greens tolerate partial shade. Also check local regulations, some areas require permits for structures over certain sizes or attached to buildings. A quick call to your local planning office can prevent dismantling a finished project.
These checks take maybe an hour but protect months of growing effort.
Step-by-Step: Building and Planting Your Vertical Garden
Step 1: Prepare Your Site and Install the Structure
Start by clearing your chosen site completely. Remove any debris, dirt, or old plant material, and wipe down walls if you’re mounting there. A clean surface helps you spot potential issues like cracks or moisture damage before you build.
Next, hold your vertical garden structure against the wall or position it where it’ll stand. Use a level to ensure it’s straight, then mark your drill points with a pencil. For wall-mounted systems, locate studs with a stud finder or use heavy-duty wall anchors rated for at least twice the expected weight of your filled, watered garden.
Drill pilot holes at your marks, then install anchors or screws firmly. If you’re using a freestanding tower, position it on level ground and check stability by gently pushing from different angles. Uneven ground? Add shims under the base or choose a better spot.
For balcony installations, confirm your structure won’t block drainage or interfere with railings. Once mounted or positioned, give everything a firm tug to test security. If anything wobbles or feels loose, reinforce it now. Your plants will get heavier as they grow and after watering.
Step 2: Set Up Your Irrigation System
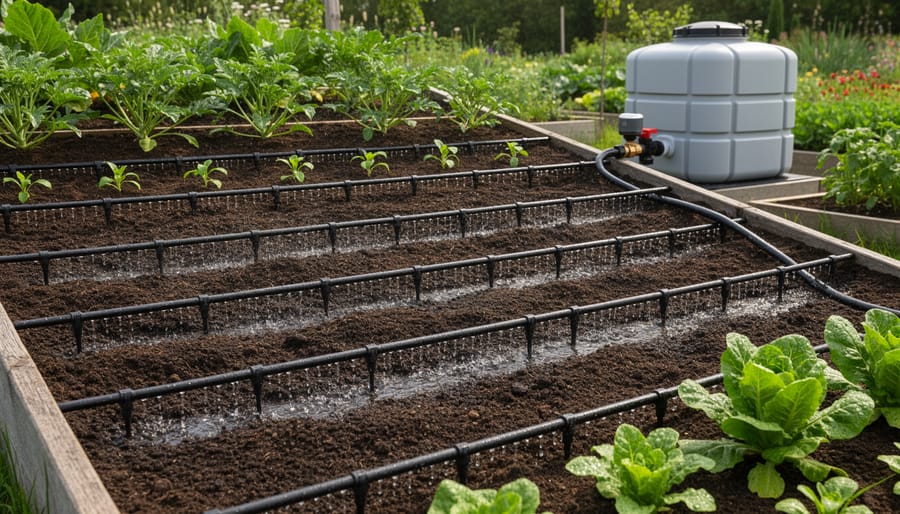
Watering is where most vertical gardens succeed or fail, so getting this step right makes everything easier. If you’ve chosen a system with a built-in reservoir, fill it according to the manufacturer’s instructions and test the wicking or drip mechanism to ensure water reaches all levels. For wall-mounted or tower systems without self-watering features, consider installing a simple drip line that runs from top to bottom with emitters at each planting pocket. This irrigation system approach saves time and ensures consistent moisture.
If you’re watering manually, attach a watering wand or gentle spray nozzle to your hose for even distribution. Start at the top and work down, allowing water to cascade through the levels. Check that bottom pockets aren’t staying dry while top ones overflow. Position a small catch tray beneath the lowest level to prevent water damage and monitor runoff. This tells you when you’ve watered enough. Test your setup by running water through for a full cycle, then checking each pocket’s moisture level an hour later to spot any dry zones that need adjustment.
Step 3: Fill with Growing Medium
The right growing medium makes all the difference in a vertical garden, where proper drainage and moisture retention become critical challenges. Standard garden soil is too heavy and compacts easily when stacked vertically, leading to poor root development and drainage issues that can kill your plants within weeks.
Choose a lightweight soilless mix specifically designed for container gardening, ideally containing peat moss or coconut coir, perlite, and vermiculite. This combination drains excess water quickly while holding enough moisture between waterings, exactly what vertical systems need. Look for mixes labeled “container blend” or “professional potting mix” at garden centers.
Fill your structure from bottom to top, working in manageable sections rather than trying to fill everything at once. Add the growing medium loosely without packing it down, over-compaction prevents root growth and reduces drainage. Fill each pocket or level until the mix sits about an inch below the rim, leaving room for watering without overflow.
Water lightly as you go to help the medium settle naturally, then add more mix where settling occurs. This prevents air pockets that dry out roots while avoiding the dense, oxygen-poor conditions that come from aggressive packing.
Step 4: Plant Your Selections Strategically
Start at the top of your vertical garden with sun-loving plants like tomatoes, peppers, and herbs that thrive in bright light and heat. These naturally reach upward and won’t be shaded by plants above them. In the middle tiers, place moderate light plants such as lettuce, spinach, and chard, they’ll benefit from some shade during the hottest part of the day.
Reserve the bottom sections for shade-tolerant greens like kale and arugula, or consider low-water plants if your lower pockets tend to dry out faster. Position trailing varieties like strawberries, nasturtiums, or cherry tomatoes along the outer edges where they can cascade beautifully without crowding neighbors.
Space plants according to their mature size, not their current nursery pot dimensions. Heavy feeders like tomatoes and peppers need at least 8-10 inches between them, while compact herbs can sit closer at 4-6 inches. Gently loosen root balls before planting to encourage outward growth into the new medium. Press soil firmly around each plant to eliminate air pockets, ensuring good root-to-soil contact for faster establishment.
Step 5: Water Thoroughly and Mulch
With your plants settled in, it’s time to give them the deep drink they need to establish strong roots. Start at the top tier and water slowly, letting the moisture soak in rather than rushing through. This initial watering is critical, you want the growing medium saturated but not waterlogged. Work your way down each level, checking that water reaches every pocket or container. You’ll know you’ve watered enough when you see moisture emerging from drainage holes or the bottom tier feels evenly damp.
Once watering is complete, add a thin layer of lightweight mulch like coconut coir, shredded leaves, or straw to the surface of each planting pocket. This helps lock in moisture and keeps roots cool. In vertical systems, the top sections dry out fastest, so give them extra mulch coverage.
Monitor your garden daily for the first week. Check morning and evening to see how quickly different levels dry out, you’ll likely need to adjust your watering frequency based on what you observe.
Checking Your Work: Signs Your Vertical Garden Is Thriving
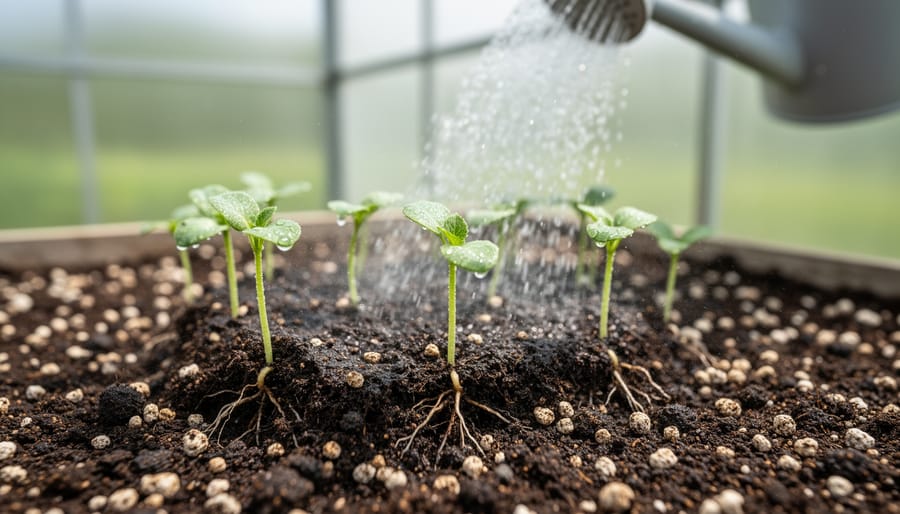
The first few weeks reveal whether your vertical garden is on track for long-term success. Start by observing new growth: healthy plants should show fresh leaves or shoots within 7-10 days of planting. Check all levels of your vertical system, since uneven results often point to fixable issues.
Watch for these success indicators during the first month:
- Consistent new leaf growth across all planting pockets or containers
- Plants standing upright with firm stems, not drooping or leaning
- Uniform green color without yellowing or browning edges
- Moist soil at all levels when you insert your finger an inch deep
- No standing water pooling at the bottom or dripping excessively
Moisture distribution deserves special attention in vertical systems. Water the top level and wait 10 minutes, then check each level below. The soil should feel equally damp throughout. If lower sections stay dry while the top is soaked, you’re watering too quickly. Slow down your flow rate or water in multiple passes to give moisture time to penetrate downward.
Uneven growth between levels usually signals a light or water imbalance. Plants at the top may grow faster because they receive more sun and water first. If bottom plants lag significantly, consider moving shade-tolerant varieties there and relocating sun lovers higher. Conversely, if top plants show stress while lower ones thrive, you might be overwatering or they’re getting too much direct sun.
Wilting during the hottest part of the day is normal, but plants should perk up by evening. Persistent wilting means insufficient water or root problems. Yellowing leaves, especially on fast-growing crops, might indicate nutrient depletion or could be early plant bolting if temperatures spiked unexpectedly. Address drainage issues immediately by adding overflow holes or adjusting your watering schedule before root rot develops.
Ongoing Care to Keep Your Garden Productive
Your vertical garden will reward consistent attention with fresh harvests and lush growth. Once established, maintenance becomes a manageable routine that keeps your garden thriving through every season.
Watering needs shift dramatically with the seasons. During hot summer months, vertical gardens dry out faster than ground beds because of increased air exposure and container evaporation. Check moisture daily and water when the top inch feels dry, which might mean once or even twice per day in peak heat. As temperatures cool in spring and fall, dial back to every two or three days. Winter watering depends on your climate: outdoor gardens may need minimal water, while indoor systems still require regular moisture checks.
Fertilizing fuels continuous production in the limited soil space of vertical systems. Start feeding two weeks after planting, using a balanced liquid fertilizer diluted to half strength. Apply every two weeks throughout the growing season, watering it in thoroughly so nutrients reach all levels. Reduce feeding to monthly when growth naturally slows in cooler months. Watch for yellowing leaves between feedings, which signals your plants need more nutrients.
Pruning keeps your garden productive rather than just bushy. Pinch off the top few inches of herbs and leafy greens regularly to encourage branching and prevent them from shading plants below. Remove dead or yellowing leaves immediately since they can harbor pests in the close quarters of vertical plantings. Harvest frequently, even if you don’t need everything right away, because continuous picking triggers more production.
Monitor for pests weekly by checking leaf undersides and stem joints where problems start. Catch aphids, spider mites, or whiteflies early, and you can often remove them with a strong spray of water or by hand. The vertical arrangement actually helps with pest control since you can inspect every plant easily without bending.
Plan to replant sections as needed. Lettuce and other cool-season crops will bolt in summer heat, and that’s your cue to swap them for heat lovers like basil or peppers. After heavy producers finish their season, refresh that pocket’s soil by mixing in fresh compost before adding new transplants.
Frequently Asked Questions
Which plants work best for vertical garden beginners?
Start with herbs like basil, mint, and parsley, or leafy greens such as lettuce and spinach. These grow quickly, tolerate the slightly different moisture conditions of vertical systems, and don’t require deep root zones, making them forgiving choices while you learn.
Can I grow a vertical garden indoors?
Absolutely! Indoor vertical gardens work well near bright windows or under grow lights. Choose compact systems designed for indoor use, focus on herbs and greens that tolerate lower light, and use saucers or trays to catch excess water and protect your floors.
How much does it cost to start a vertical garden?
Basic DIY setups using recycled materials or simple pocket planters can cost under $50, while ready-made modular systems with irrigation range from $100 to $300. Your investment grows with the size and sophistication of the system you choose, but you’ll start harvesting value quickly through fresh produce.
How much time does vertical garden maintenance take?
Plan on 10-15 minutes every few days for watering and quick checks during the growing season. Weekly tasks like pruning, feeding, and harvest add another 20-30 minutes. Once established and if you install drip irrigation, the time commitment drops significantly.
Do vertical gardens produce less than traditional gardens?
Not necessarily. While individual plants may yield slightly less due to space constraints, you can pack more plants into the same footprint and harvest continuously throughout the season. Many gardeners find their total harvest per square foot actually increases with vertical growing.
These questions come up in nearly every conversation about vertical gardening, and the answers are encouraging. You don’t need perfect conditions or a big budget to succeed. Vertical gardens adapt to your space, schedule, and experience level, which is why they’ve become such a popular solution for urban growers and anyone looking to maximize their growing area. Your specific results will vary based on what you plant and how you care for your garden, but the learning curve is gentle and the rewards start showing up quickly once your plants establish themselves.
You’ve just taken a fantastic step toward growing more food in less space, and you should feel proud of what you’ve built. Your vertical garden is ready to reward you with fresh herbs, vegetables, and flowers throughout the seasons ahead.
The beauty of vertical gardening in 2026 is that it’s never been easier to get started. Modern systems with smart irrigation, modular designs, and lightweight materials have removed so many of the old barriers. Whether you’re working with a tiny balcony or transforming a blank wall, you now have the tools and knowledge to make it thrive.
Remember, every gardener learns by doing. Your first harvest might be small, but each season you’ll understand your plants better, refine your techniques, and grow more confidently. Don’t worry about perfection. Watch your garden closely, adjust as needed, and celebrate every tomato, every handful of basil, every bloom.
Vertical gardening transforms dead space into living abundance. Enjoy the daily ritual of checking your plants, the satisfaction of harvesting ingredients you grew yourself, and the simple pleasure of watching things grow upward, defying gravity and expectations. Your garden is growing. So are you.