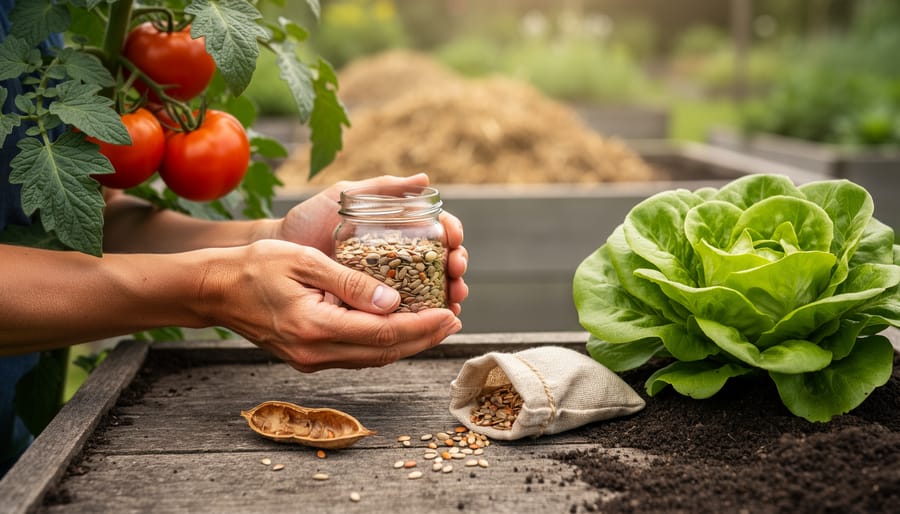
Saving your own seeds is simpler than you might think, and it transforms your garden into a self-sustaining ecosystem that produces better plants year after year. This age-old practice requires nothing more than selecting healthy, mature plants, harvesting their seeds at the right time, and storing them properly until next season. You’ll save money, preserve varieties you love, and grow plants perfectly adapted to your unique garden conditions.
The beauty of seed saving lies in its accessibility. Whether you’re working with a small balcony container garden or a sprawling backyard plot, the basic techniques remain the same. I started my seed-saving journey with just three tomato plants, and within a few seasons, I had enough seeds to share with neighbors and still plant my entire summer garden without buying a single packet.
Not every plant makes seed saving easy, though. Some vegetables cross-pollinate with wild abandon, while others stay true to type with minimal effort on your part. Understanding these differences helps you choose the right candidates for your first attempts. Tomatoes, beans, peas, and lettuce are forgiving teachers, producing reliable seeds that grow into plants nearly identical to their parents. These beginner-friendly options build your confidence before you tackle trickier crops.
Beyond the practical benefits, seed saving connects you to generations of gardeners who carefully selected and preserved the varieties we grow today. Each seed you save carries forward the story of your garden, adapting slightly with each generation to thrive in the exact spot where you plant it.
Why Saving Our Seeds Matters
When you save seeds from your garden, you’re doing far more than just collecting tiny capsules of potential, you’re investing in your garden’s future success. Each seed you save carries genetic information that helps it adapt to your specific soil, climate, and growing conditions. Over several seasons, these saved seeds create plants that are increasingly suited to your unique garden environment, often outperforming store-bought varieties that were bred for different regions.
The environmental impact of seed saving extends beyond your garden fence. By preserving heirloom and open-pollinated varieties, you help maintain genetic diversity that’s disappearing from our food system. Commercial seed companies focus on a narrow range of profitable varieties, leaving countless traditional plants at risk of extinction. Your seed collection becomes a living library of biodiversity.
Seed saving also builds genuine self-reliance. You’re no longer dependent on seed catalogs or garden centers for next year’s planting. This independence matters especially when supply chains face disruptions or when specific varieties become unavailable. You control what grows in your garden, season after season.
There’s something deeply satisfying about mastering the art and benefits of seed saving, it connects you to generations of gardeners who’ve kept these plants alive through centuries. Your grandmother probably saved seeds. Farmers have done it for 10,000 years. When you learn this practice, you join an unbroken chain of people who understood that seeds represent both abundance and resilience. You’re not just growing vegetables anymore. You’re becoming a keeper of living heritage, ensuring that these precious varieties survive for future gardeners to enjoy.
Tools and Materials You’ll Need
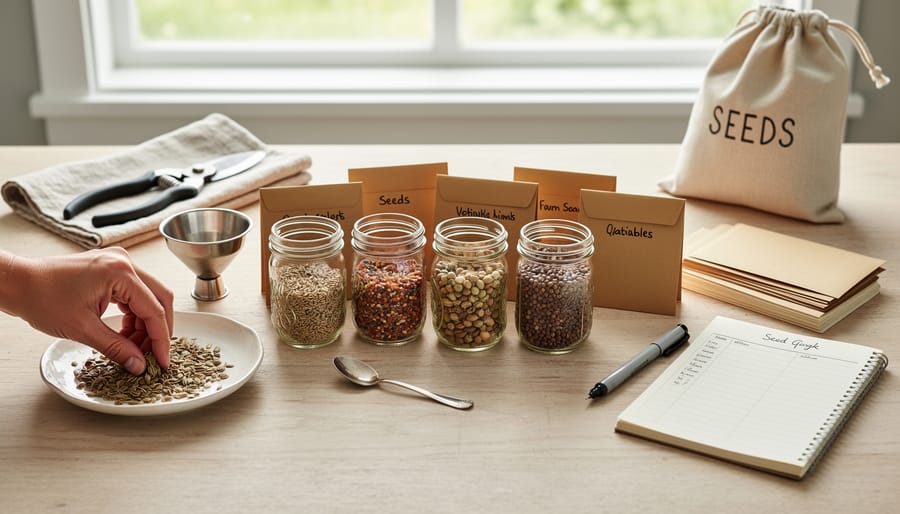
You probably have most of what you need for saving our seeds sitting in your kitchen or home office right now. The beauty of seed saving is that it requires remarkably simple, low-cost tools. No fancy equipment, no big investment. Just a few basic supplies and you’re ready to begin preserving your garden’s best genetics for future seasons.
Here’s what you’ll want to gather:
- Paper envelopes or small paper bags for storing different seed varieties
- Labels and a permanent marker for recording plant variety, harvest date, and any notes about the parent plant
- Screens, mesh trays, or paper plates for drying seeds with good air circulation
- Glass jars with tight-fitting lids for long-term storage of thoroughly dried seeds
- A bowl and strainer for wet processing seeds from fleshy fruits like tomatoes
- Tweezers or small spoons for handling tiny seeds
- Magnifying glass for inspecting seeds and checking for pests (optional but helpful)
The most critical items are the envelopes and jars. Avoid plastic bags for storage since they can trap moisture and ruin your seeds. Paper breathes, which helps during the final drying phase, while glass jars protect fully dried seeds from humidity and pests during long-term storage.
Many gardeners repurpose mason jars, old spice containers, or jam jars they already have. For screens, an old window screen works beautifully, or you can stretch cheesecloth over a frame. The goal is simply to spread seeds in a single layer where air can reach all sides. Start with what you have, and you can always add specialized tools as you expand your seed saving practice.
Understanding Which Seeds to Save (and Which to Avoid)
Not all seeds are worth saving, and knowing the difference can save you time and disappointment. The three main types you’ll encounter are open-pollinated, heirloom, and hybrid seeds. Open-pollinated varieties are naturally pollinated by wind, insects, or other mechanisms and will produce offspring identical to the parent plant when you save their seeds. Heirloom seeds are simply open-pollinated varieties that have been passed down for generations, typically at least fifty years. These are your best friends for seed saving because they breed true year after year, and they often develop resilience to your local conditions, similar to how your soil connection improves with each season.
Hybrid seeds, marked F1 on the packet, are created by cross-breeding two different parent plants to produce specific traits like disease resistance or uniform fruit size. While these plants might perform beautifully in your garden, hybrid seed won’t breed true in the second generation. You’ll get unpredictable results, often reverting to the traits of one grandparent plant or producing weak, unproductive offspring.
For your first seed-saving projects, stick with self-pollinating plants like tomatoes, beans, peas, and lettuce. These varieties pollinate themselves before their flowers even open, making cross-pollination nearly impossible. Cross-pollinating plants like squash, cucumbers, and corn can accidentally breed with nearby related varieties, creating unexpected combinations. Save those for when you’ve gained confidence, or keep different varieties far apart in your garden. Just as urban beekeeping requires understanding pollination patterns, successful seed saving means respecting how your plants reproduce.
Step-by-Step Organic Seed Saving Process
Step 1: Select Your Best Plants
Choosing the right plants for seed saving sets the foundation for future garden success. Walk through your garden and identify the standout performers, plants that produce abundant harvests, resist pests and diseases, and thrive in your specific conditions without excessive care.
Look for plants with the traits you want to replicate: tomatoes with exceptional flavor, beans that produce heavily, or lettuce that doesn’t bolt prematurely in your climate. Save seeds only from completely healthy plants, never from any showing signs of disease, stunted growth, or pest damage, as these problems can pass to the next generation.
Pay attention to timing, too. A plant that produces early or late in your season demonstrates valuable adaptation to your local weather patterns. Similarly, if you understand why lettuce bolts in your garden, you can select plants that resist bolting and save their seeds for better performance next year.
Mark your chosen plants early in the season with stakes or ribbons so you remember which ones earned seed-saving privileges. Let several plants go to seed rather than just one, this maintains genetic diversity and gives you backup options if some seeds fail to develop properly.
Step 2: Allow Seeds to Fully Mature
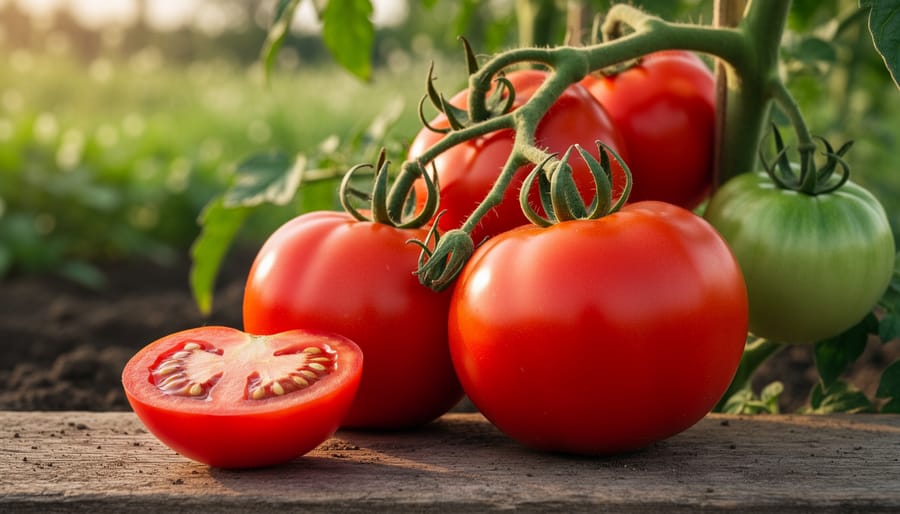
Patience is your best friend when saving seeds. Rushing the harvest is the most common mistake new seed savers make, and it’s one that costs them viable seeds.
Seeds need time to fully develop inside the parent plant. If you harvest too early, they won’t have the stored energy needed to germinate next season. Think of it this way: a green tomato might ripen on your counter, but a green seed won’t mature once it’s off the plant.
For dry seeds like beans, peas, and lettuce, wait until the pods or seed heads turn brown and brittle. You should hear seeds rattling inside when you shake them. The plant itself will often look spent and dried out, that’s exactly what you want. I leave my bean pods on the vine until they’re papery and the plants have completely died back.
Wet seeds from tomatoes, peppers, cucumbers, and squash need a different approach. Let the fruit stay on the plant well beyond eating ripeness. Tomatoes should be fully colored and starting to soften. Cucumbers and squash should be large, past their prime eating stage, with hardened skin. For winter squash, wait until after the first light frost when the rinds are rock-hard.
Mark your seed-producing plants with garden stakes so you don’t accidentally harvest them for eating. Your future garden depends on this waiting game.
Step 3: Harvest Seeds at the Right Time
Timing your harvest correctly makes all the difference between viable seeds and disappointing failures. The goal is to collect seeds when they’re physiologically mature but before weather or wildlife gets to them first.
For dry seed pods like beans, peas, and radishes, wait until the pods turn brown and papery. You should hear seeds rattling inside when you shake them gently. On a dry, sunny morning after the dew has evaporated, simply snap the pods from the plant and collect them in a paper bag or basket. Moisture is the enemy here, wet pods will mold before you can extract the seeds.
Fleshy fruits such as tomatoes, peppers, and squash require a different approach. Harvest these when the fruit is fully ripe or even slightly overripe. The seeds inside have reached maturity when the fruit’s flavor peaks. Cut open the fruit and scoop out the seeds along with their surrounding gel or pulp for processing later.
Seed heads from flowers and herbs like lettuce, dill, and sunflowers should feel dry and crisp to the touch. Bend the stalk into your collection container and gently rub or tap to release the seeds. For delicate seeds that scatter easily, slip a paper bag over the seed head before cutting to catch every precious seed as they fall.
Step 4: Clean and Process Your Seeds
Cleaning your freshly harvested seeds separates the good stuff from everything else clinging to them. The method you’ll use depends on whether you’re dealing with dry seeds or wet ones.
For dry seeds like beans, peas, and flowers, threshing and winnowing work beautifully. Threshing simply means releasing seeds from their pods or seed heads. Roll dried bean pods between your hands over a bowl, or rub flower heads between your palms. The seeds fall out while the chaff stays behind. Winnowing removes the remaining bits: pour your seeds slowly from one bowl to another in front of a fan or on a breezy day. The lightweight chaff blows away while heavier seeds drop into the bowl. You can also gently shake everything in a bowl and blow across the surface, chaff rises to the top where you can pick it off.
Wet seeds from fleshy fruits need a different approach. Tomatoes and cucumbers benefit from fermentation, which removes the gelatinous coating that inhibits germination. Scoop seeds and pulp into a jar with a small amount of water. Let this mixture sit at room temperature for two to four days, stirring daily. You’ll notice a layer of mold forming on top, that’s exactly what you want. Once bubbles appear and the mixture smells sour, pour it through a strainer, rinse thoroughly under running water, and spread the clean seeds on a plate to dry. The fermentation process also kills many seed-borne diseases naturally.
Step 5: Dry Seeds Thoroughly
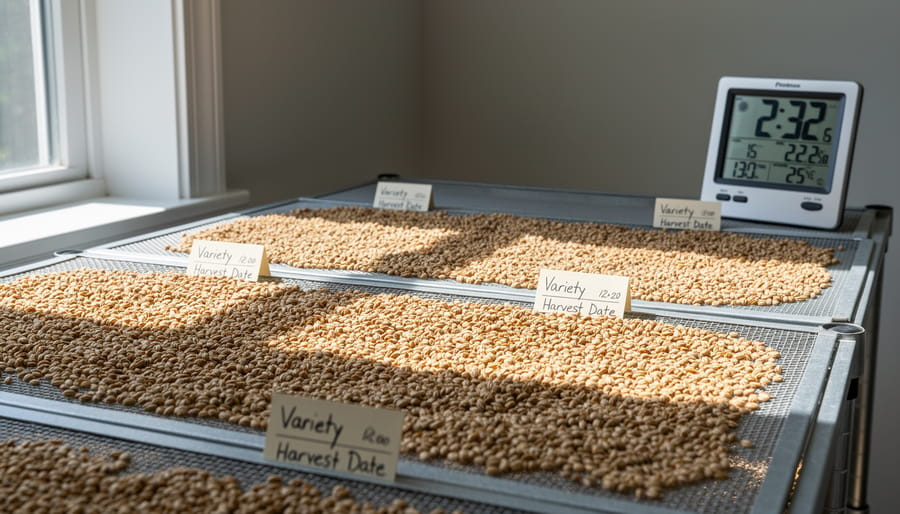
Thorough drying is absolutely critical when saving our seeds, moisture is your enemy here, inviting mold and destroying viability before you even get to planting season.
Spread your cleaned seeds in a single layer on paper towels, newspapers, or fine-mesh screens. Avoid solid trays that trap moisture underneath. Place them in a warm spot with good air circulation, away from direct sunlight which can overheat delicate seeds. A room temperature area (65-75°F) works perfectly for most varieties.
Small seeds like lettuce might dry in three to five days, while larger beans or squash seeds need one to two weeks. Stir or rearrange them daily to expose all surfaces to air and prevent any hidden dampness.
Test for dryness by biting a seed gently (for larger types) or bending it. Properly dried seeds snap cleanly rather than denting or bending. They should feel hard, not pliable. For smaller seeds, press your fingernail into one, if it leaves an indentation, keep drying.
Never rush this step by using ovens or dehydrators unless you’re experienced with very low settings (85°F maximum). High heat kills seeds instantly. When you’re certain they’re bone-dry, you’re ready for storage.
Safety Warnings and Common Mistakes to Avoid
Seed saving is a safe and rewarding practice when done correctly, but a few common mistakes can compromise your results. Understanding these pitfalls will help you preserve viable seeds that grow into healthy plants.
Mold is the biggest threat to saved seeds. Even slightly damp seeds will develop mold in storage, which spreads rapidly and ruins entire batches. Always dry seeds until they’re brittle enough to snap rather than bend. This takes one to two weeks in proper conditions, longer in humid climates. Rushing this step wastes all your earlier effort.
Never save seeds from diseased plants, even if the disease appears minor. Many pathogens survive on seed coats and in seed tissue, spreading infection to next year’s garden. Choose only your healthiest specimens for saving our seeds. Similarly, avoid treating saved seeds with synthetic chemicals or fungicides that conflict with organic growing practices.
Cross-pollination presents a subtle challenge. If you’re growing multiple varieties of the same species (like several types of squash or peppers), they can cross-pollinate and produce seeds that grow into unexpected hybrids. For beginners, stick to one variety per species or choose self-pollinating crops like tomatoes, beans, and lettuce that don’t cross readily.
Don’t assume all seeds are worth saving. Seeds from hybrid plants won’t reliably reproduce the parent’s traits, often reverting to inferior characteristics or producing sterile offspring. Check seed packets or plant labels before saving. Store-bought produce, especially from large-scale farms, often comes from hybrids and may have been treated with growth inhibitors that prevent germination.
Proper Seed Storage for Maximum Viability
Once you’ve dried your seeds thoroughly, proper storage becomes critical for maintaining their ability to sprout next season. Good storage isn’t complicated, but it makes the difference between seeds that germinate vigorously and those that fail before they even hit the soil.
Choose your containers wisely. Paper envelopes work perfectly for most seeds because they allow any residual moisture to escape, preventing mold. You can use coin envelopes, small manila envelopes, or even make your own from folded paper. Glass jars with tight-sealing lids are excellent for storing multiple paper packets together, especially if you add a food-safe desiccant packet to absorb humidity. Avoid plastic bags unless your seeds are bone-dry, as trapped moisture creates the perfect environment for fungal growth.
Label everything immediately. Write the plant variety, the date you collected the seeds, and any special characteristics you noticed about the parent plant. Trust me, that pile of unlabeled envelopes in March will all look identical, and you’ll regret not spending thirty seconds with a marker in the fall.
The ideal storage environment follows three simple rules:
- Keep seeds cool, aim for 35-45°F, making a refrigerator ideal (not the freezer)
- Keep them dark, light degrades seeds over time, so store in opaque containers or a closed drawer
- Keep them dry, humidity below 40% prevents mold and premature germination
- Avoid temperature fluctuations, consistent conditions extend viability more than any other factor
Many gardeners successfully store seeds in a basement closet or spare refrigerator. Just keep them away from heating vents, windows, and damp areas.
Viability varies widely by seed type. Most vegetable seeds remain viable for three to five years under proper storage, though some exceptions exist. Onion and parsnip seeds typically last only one to two years, while tomatoes, cucumbers, and squash can stay viable for six years or longer. Beans and peas generally remain strong for three years. When stored correctly in cool, dry conditions, you’ll often get decent germination well beyond these timelines, though germination rates gradually decline with age.
Testing Your Seeds and Next Steps
Before you plant your saved seeds next season, run a quick germination test to check their viability. This simple process takes about a week and saves you from wasting garden space on duds.
The paper towel method works perfectly for most seeds. Dampen a paper towel until moist but not dripping, then place ten seeds evenly spaced on half the towel. Fold the other half over to cover them, slip the towel into a plastic bag or container to maintain humidity, and set it in a warm spot (around 70°F works for most varieties). Check daily, keeping the towel moist but never soggy.
Within 5-10 days, you’ll see which seeds sprout. Count the germinated seeds and calculate your success rate, if seven out of ten sprouted, that’s 70% viability. Excellent germination is 80% or higher, while 50-70% is acceptable if you plant more densely to compensate. Below 50% means you should probably buy fresh seeds for that variety or save more carefully next time.
Plan to sow your saved seeds during the appropriate planting window for each crop, just as you would with purchased packets. Keep detailed notes about which plants produced the best seeds, unusual traits you noticed, and germination rates. This record-keeping transforms seed saving from a one-time project into genuine skill-building.
Each growing season, challenge yourself with one new seed-saving technique, perhaps try a wet-processed crop if you’ve only done dry seeds, or experiment with isolation distances for preventing cross-pollination. Consider whether irrigation worth it for your garden expansion as your saved seeds multiply your plantings. The more you practice, the more self-sufficient your garden becomes.
Frequently Asked Questions About Saving Our Seeds
How long do saved seeds stay viable?
Most vegetable seeds remain viable for 2-5 years when stored properly in cool, dry, dark conditions. Short-lived seeds like onions and parsnips last 1-2 years, while tomatoes, cucumbers, and beans often stay good for 4-6 years. Always test older seeds before planting to check germination rates.
Can I save seeds from store-bought fruits and vegetables?
You can try, but results vary widely. Organic produce is more likely to yield viable seeds, while conventional produce may be treated with growth inhibitors. The bigger issue is that many store-bought items are hybrids that won’t grow true to type, so your plants might look nothing like the parent.
What seeds are easiest for beginners to start saving?
Tomatoes, beans, peas, and lettuce are perfect for beginners because they’re self-pollinating and require minimal processing. Tomatoes need a simple fermentation step, while beans and peas just need drying. These plants won’t cross-pollinate easily, so you’ll get consistent results even in a small garden.
How do I prevent cross-pollination when saving our seeds?
The easiest method is to grow only one variety of each cross-pollinating species, like squash or cucumbers. If you want multiple varieties, you can separate them by distance (sometimes hundreds of feet), use time isolation by planting early and late varieties, or hand-pollinate and cover flowers to control pollination.
Are seeds I save myself as good as purchased seeds?
Homesaved seeds can actually be better because they adapt to your specific soil, climate, and growing conditions over generations. Purchased seeds offer guaranteed germination rates and disease testing, but your saved seeds develop resilience to your garden’s unique challenges, often becoming stronger performers over time.
Do I need to save seeds from multiple plants or just one?
Always save from at least 5-10 plants to maintain genetic diversity and plant health. Saving from a single plant can lead to inbreeding depression, where vigor and productivity decline over generations. The more plants you save from, the healthier your future crops will be.
Can I save seeds from diseased plants if the seeds look healthy?
Never save seeds from diseased plants, even if the seeds appear fine. Many diseases transmit through seeds, and you’ll introduce pathogens into next year’s garden. Always select seeds from your healthiest, most vigorous plants to ensure you’re passing along strength rather than weakness.
These questions come up constantly in gardening communities, and the answers get easier with experience. Start with the simplest seeds in your garden and don’t worry about mastering every technique at once. Each growing season will teach you something new about saving our seeds, and you’ll quickly develop an intuition for what works in your specific conditions. The beauty of this practice is that you can start small with just one or two favorite varieties and expand as your confidence grows.
Saving our seeds is more than just a practical skill, it’s a beautiful way to close the loop in your garden and become part of a time-honored tradition. You’ve learned the complete process from selecting your best plants to storing viable seeds for future seasons, and now it’s time to put these organic seed saving techniques into practice.
Start small and simple. Choose a few easy-to-save varieties like tomatoes, beans, or lettuce for your first season. These forgiving plants will build your confidence and show you how satisfying it feels to watch next year’s garden spring from seeds you saved yourself. There’s something magical about planting a tomato seed you harvested from last summer’s best fruit and watching it grow into a productive plant that tastes exactly like you remember.
Don’t worry about getting everything perfect right away. Like any gardening skill, seed saving improves with practice. Each season, you’ll refine your techniques, try new varieties, and develop an eye for selecting the best traits in your plants.
You’re now equipped with everything you need to preserve your favorite varieties, save money on seeds, and connect more deeply with your garden’s full lifecycle. Pick up an envelope, head outside, and start saving those seeds, your future garden is waiting.